
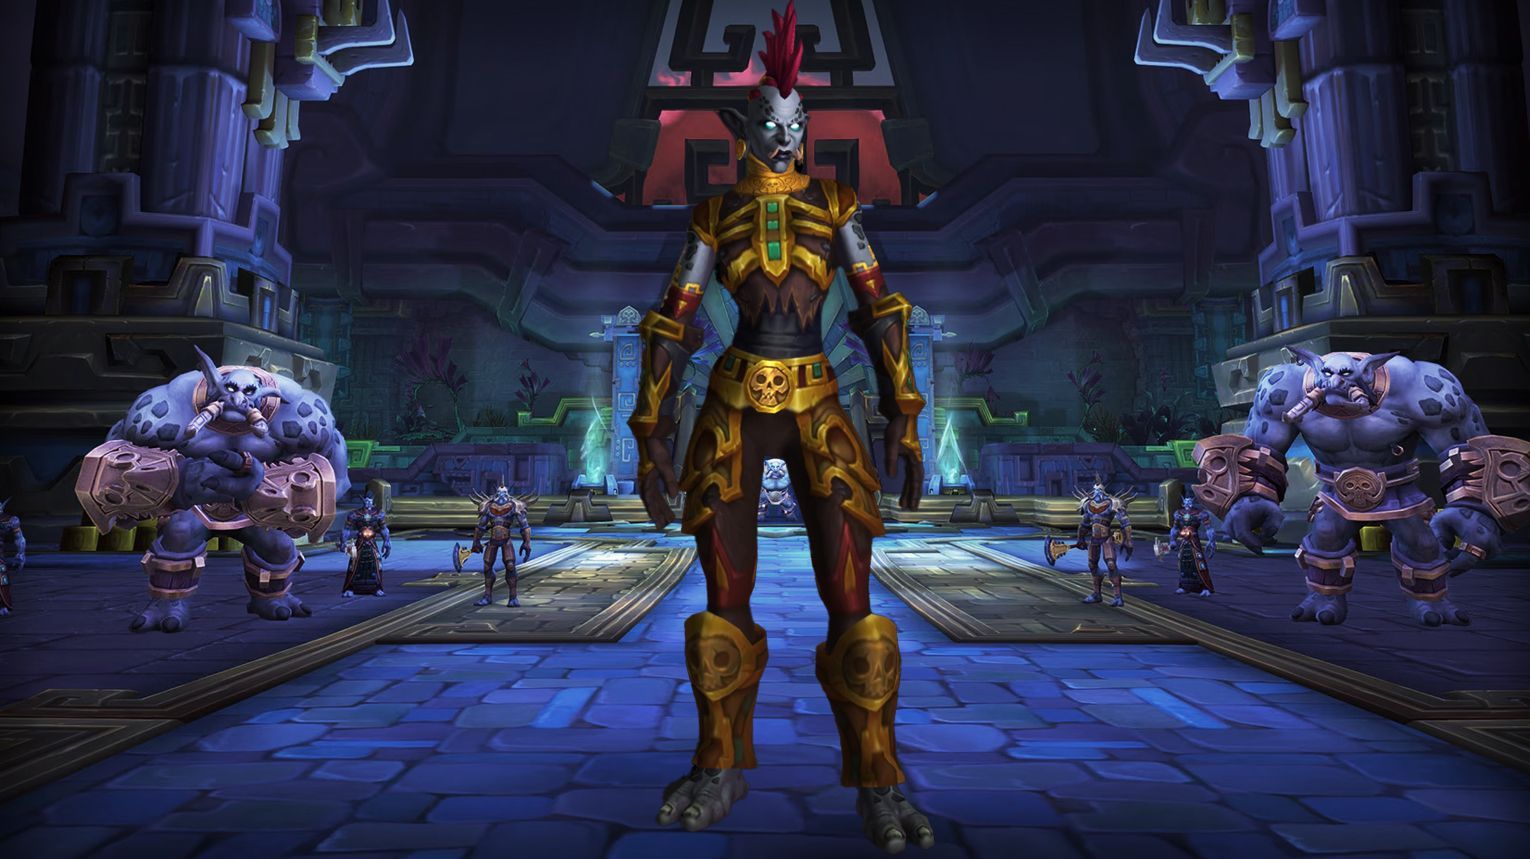
The Battle of Dazar’alor is the second raid in World of Warcraft: Battle for Azeroth, released on January 22nd, 2019 (NA). This raid is unique as it offers a faction-flipped experience, where Alliance and Horde players see the story from opposing perspectives. It consists of 9 bosses with unique mechanics and amazing rewards that are worth farming in WoW Retail (mounts, transmogs, armor sets, achievements, and other collectibles).

- Battle of Dazar’alor location
- Bosses and their rewards
- Available mounts, weapons, and transmogs
- Achievements you can earn
- Can you solo Battle of Dazar’alor?
If you’re hunting for best-in-slot Battle for Azeroth gear, unique faction-themed rewards, and King Rastakhan’s most prized treasures, our Battle of Dazar’alor carry service delivers the ultimate raid experience. You’ll join our elite strike team through this epic faction-war raid, mastering every encounter from Normal and Heroic to the challenging Mythic Jaina Proudmoore battle – with mechanics that change based on your faction!

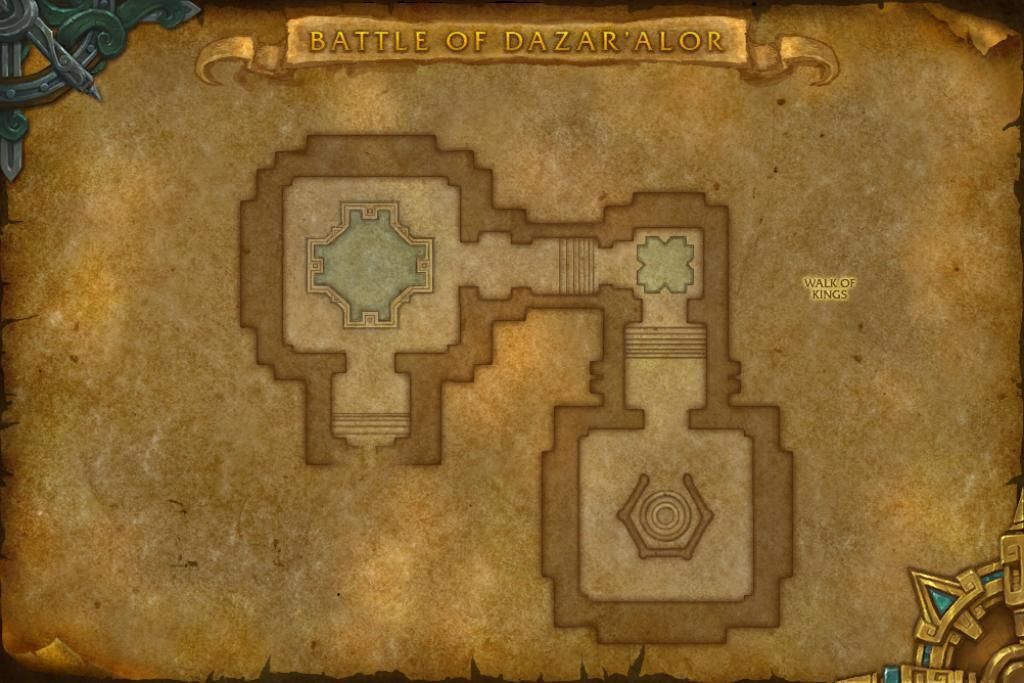
Battle of Dazar’alor Entrance and Subregions
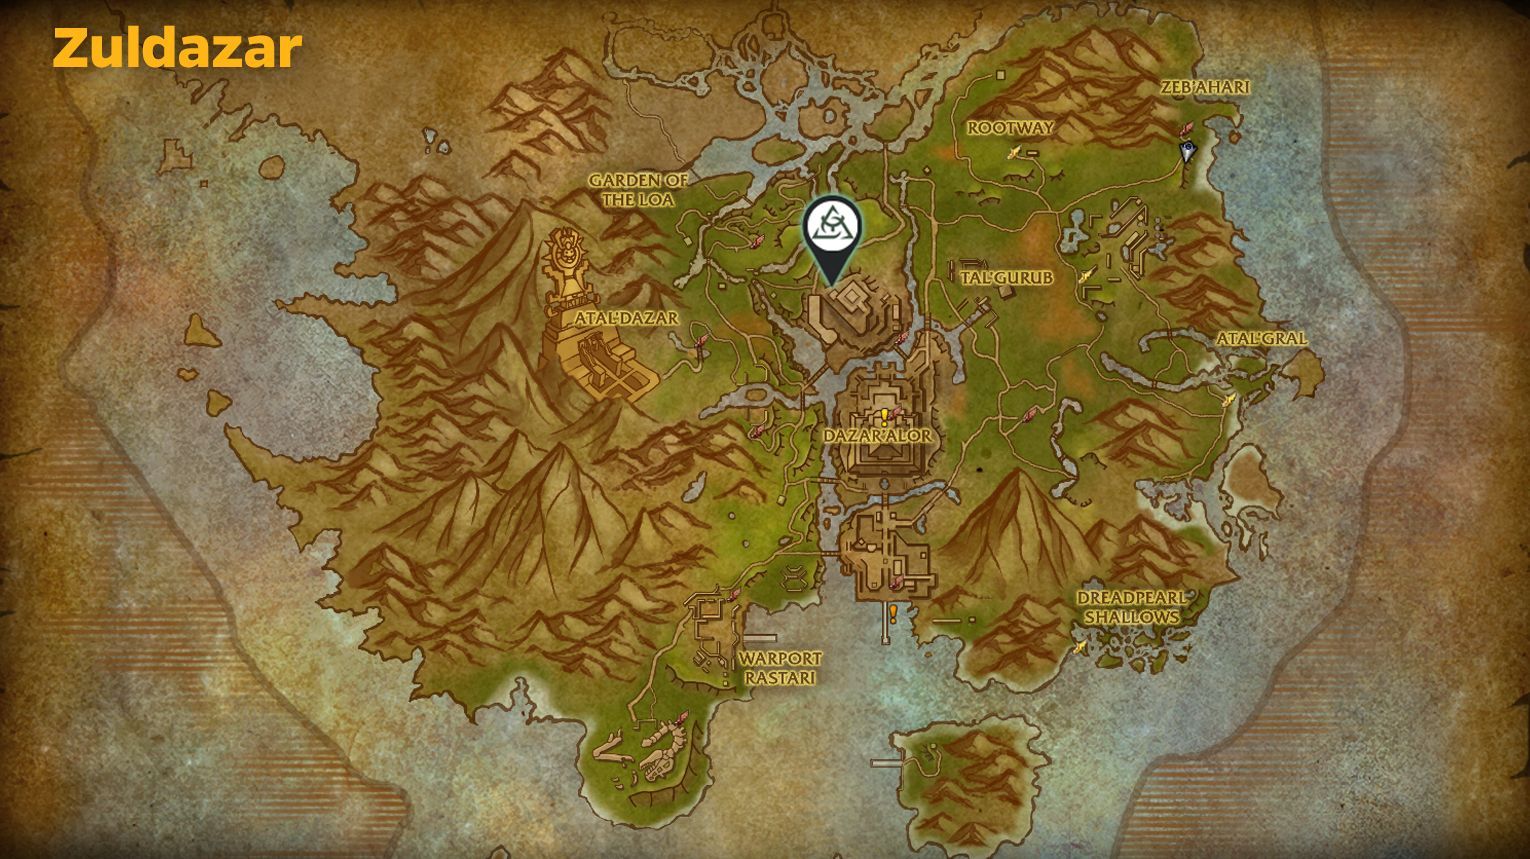
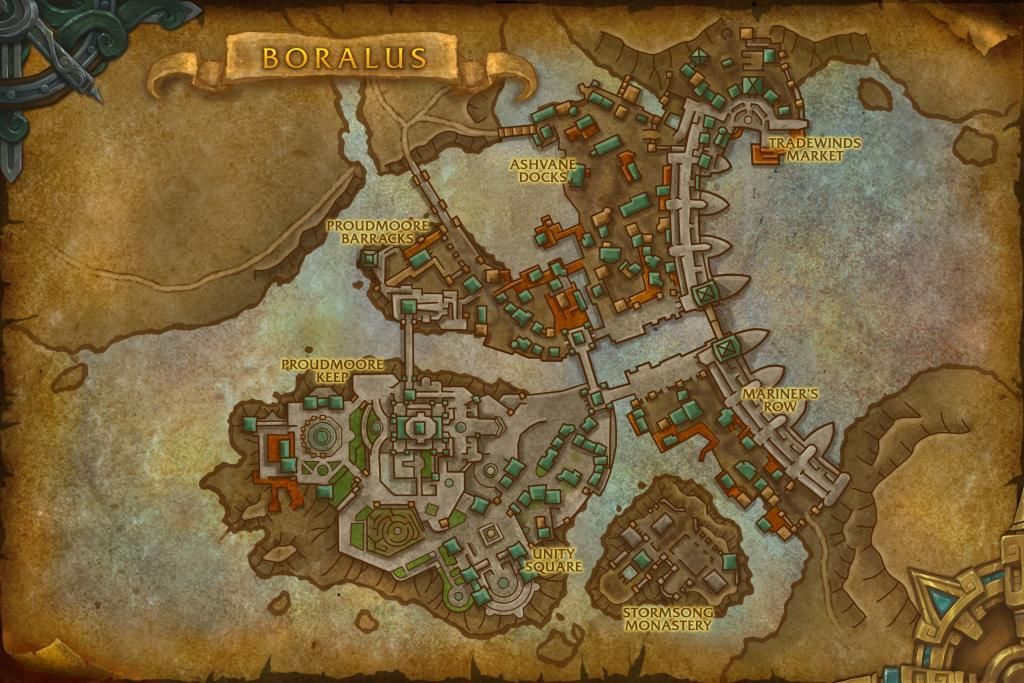
The Battle of Dazar’alor is located in the Zuldazar zone in World of Warcraft: Battle for Azeroth. To reach it, Alliance players should travel to Boralus in Tiragarde Sound, while Horde players can head to the Zocalo in Zuldazar. Both factions will find the raid entrance in an instanced version of the city.
The entrance for Alliance players is near the docks in Boralus, while Horde players can access it near the Great Seal in Zuldazar. Once you arrive, simply walk into the instance portal to begin your journey through the BoD raid.
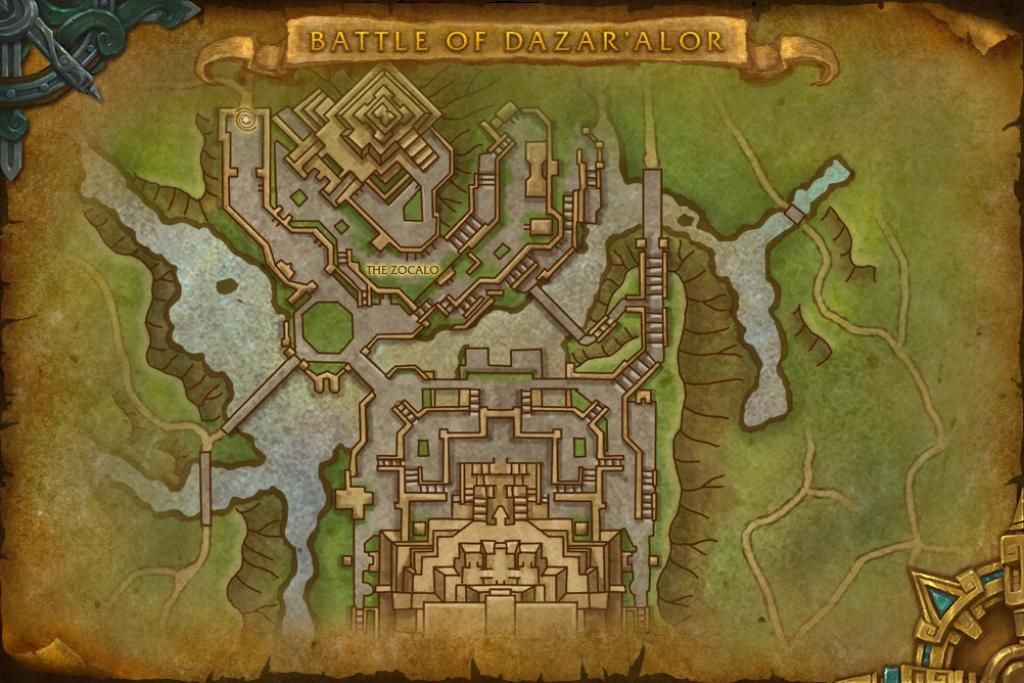
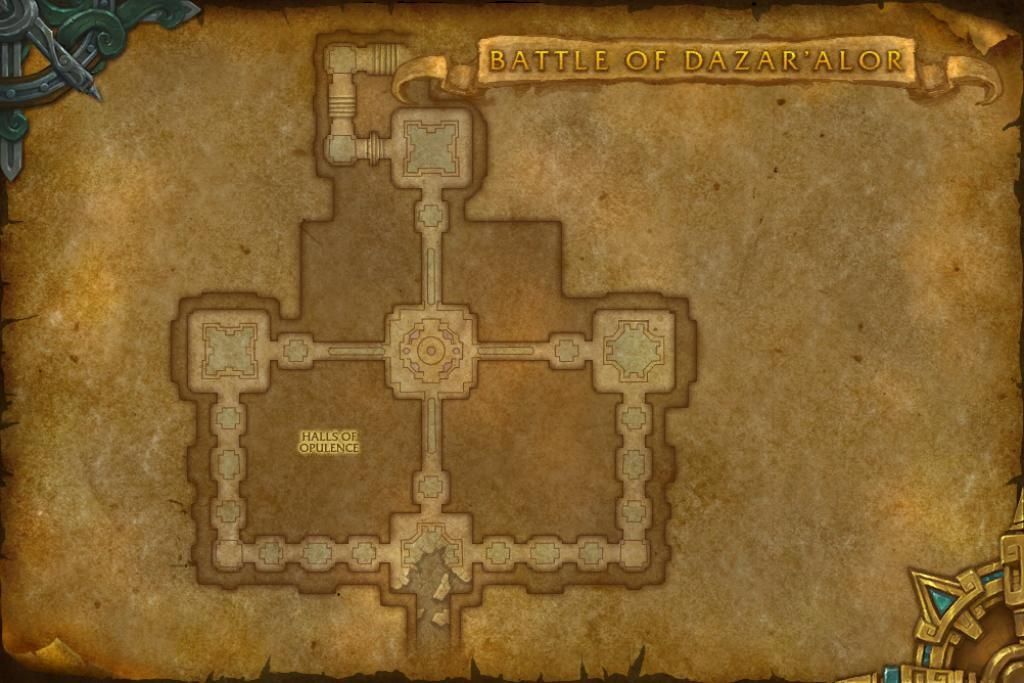
Inside, you’ll progress through different sections of Dazar’alor as you fight your way to Jaina Proudmoore.

- Siege of Dazar’alor (Alliance) / Defense of Dazar’alor (Horde). Features the first three bosses:
- Champions of the Light,
- Grong (Horde) / Jadefire Masters (Alliance),
- and Jadefire Masters (Horde) / Grong, the Revenant (Alliance).
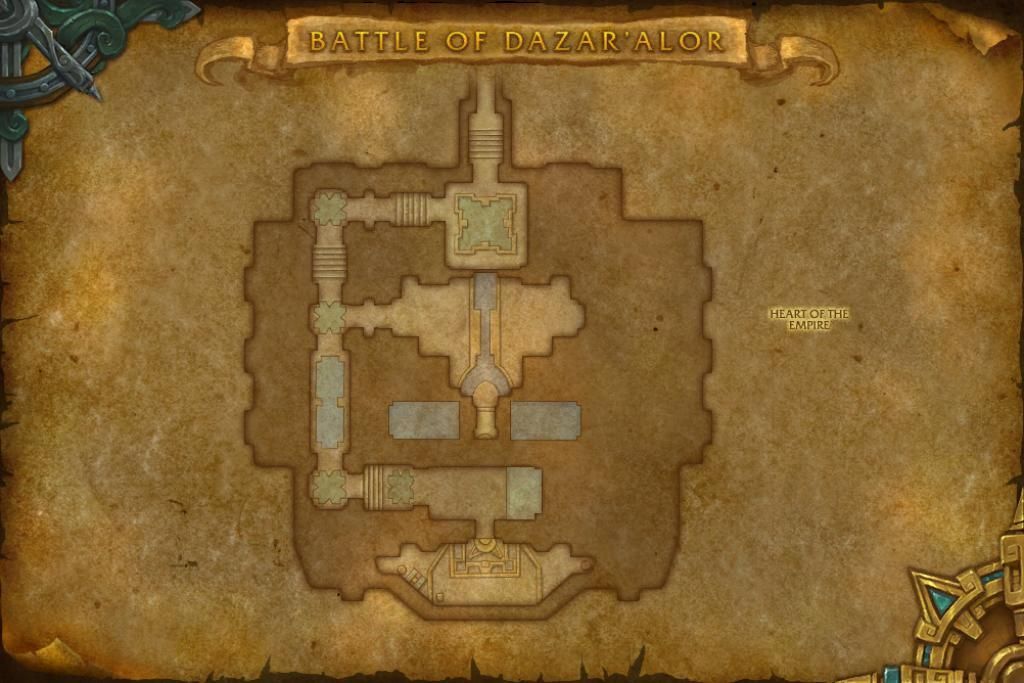
- Empire’s Fall (Alliance) / Death’s Bargain (Horde). Includes the next three bosses:
- Might of the Alliance (Alliance) / Victory or Death (Horde). Culminates in the final three bosses:


Each boss has its challenges and rewards, which we’ll briefly overview below.
Battle of Dazar’alor Collectibles: Mounts, Pets, Transmogs
| Collectible | Source (% drop rate) | Obtainable / Not Obtainable |
| Battle of Dazar’alor Tier Sets | ||
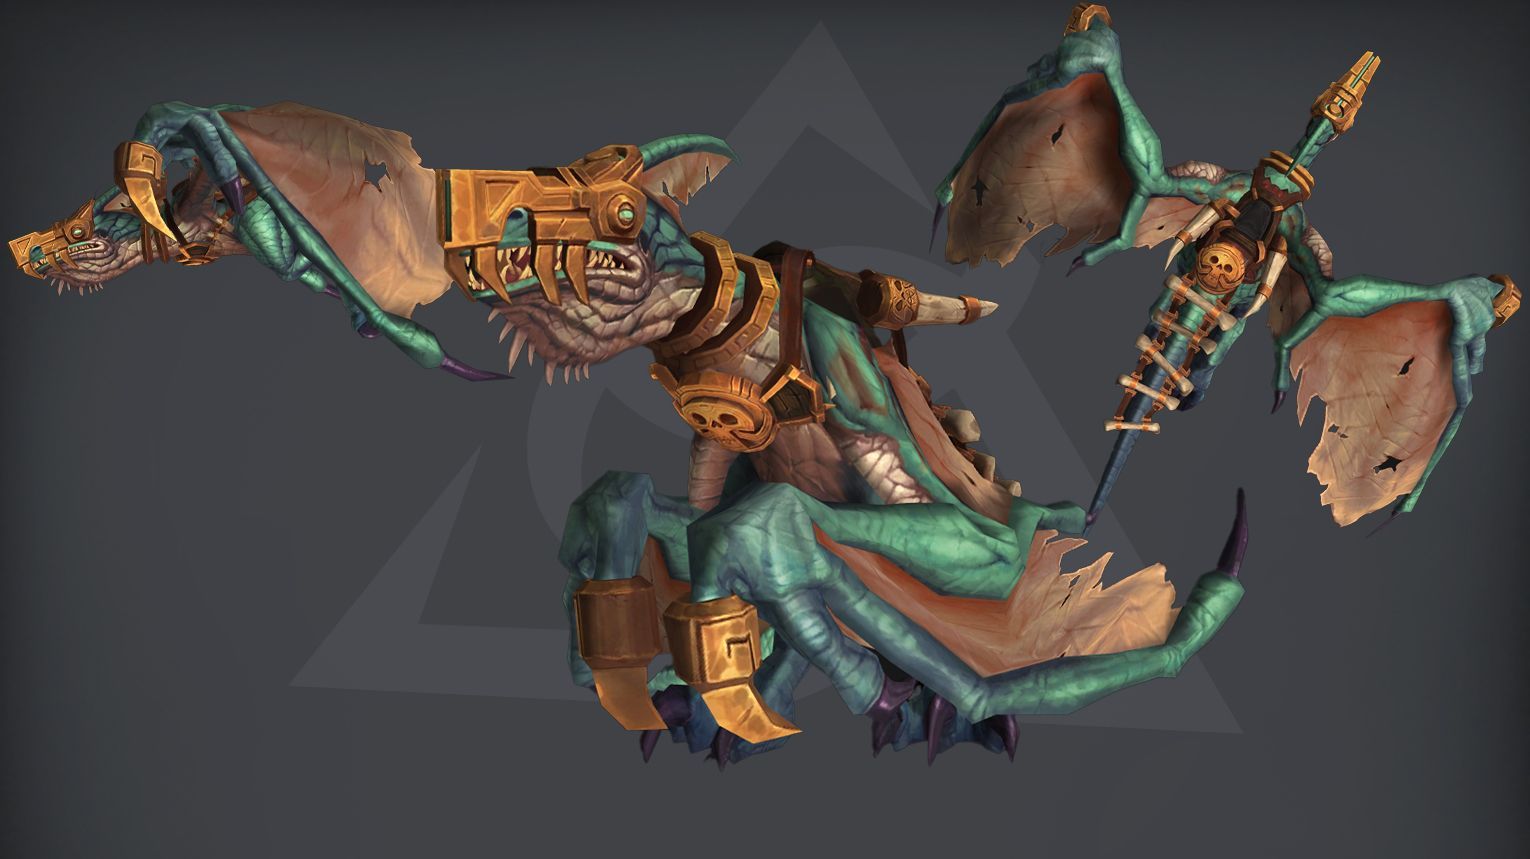
| Dazar’alor Windreaver | Glory of the Dazar’alor Raider | Yes |
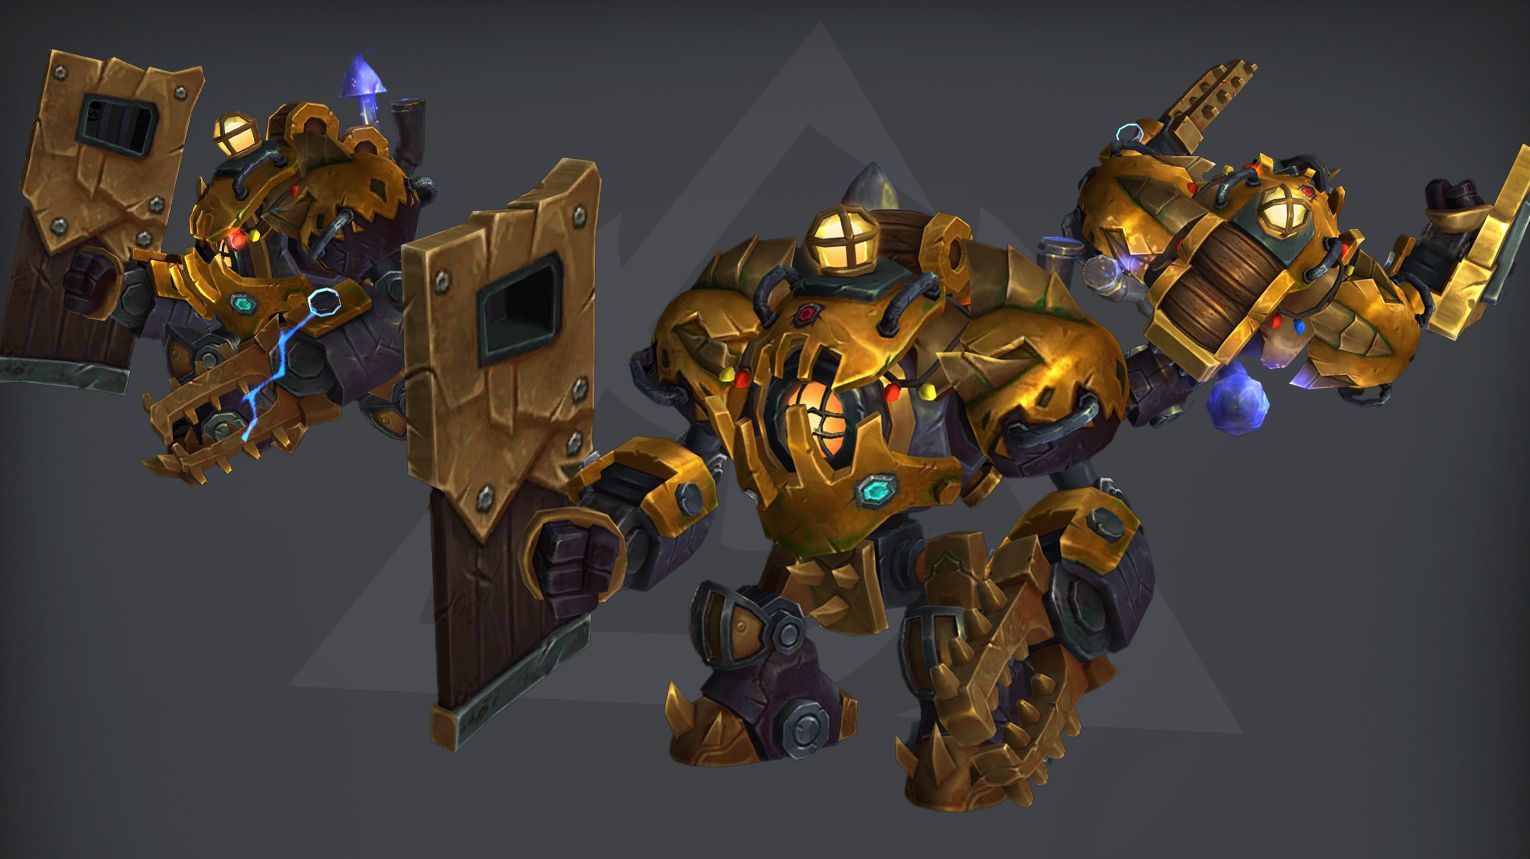
| G.M.O.D. | High Tinker Mekkatorque (1%) | Yes |
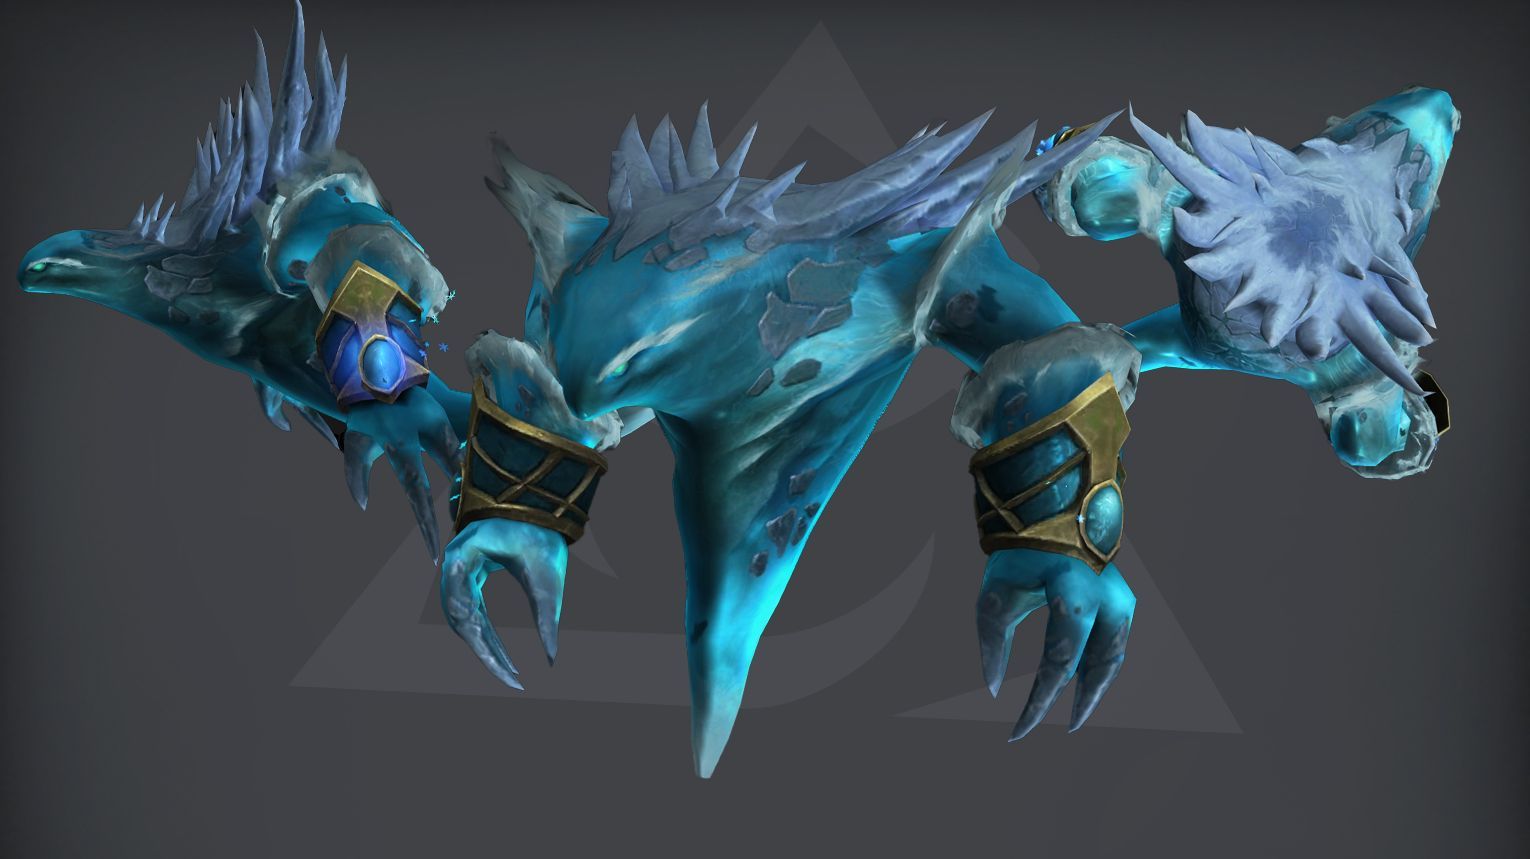
| Glacial Tidestorm | Lady Jaina Proudmoore (1%) | Yes |
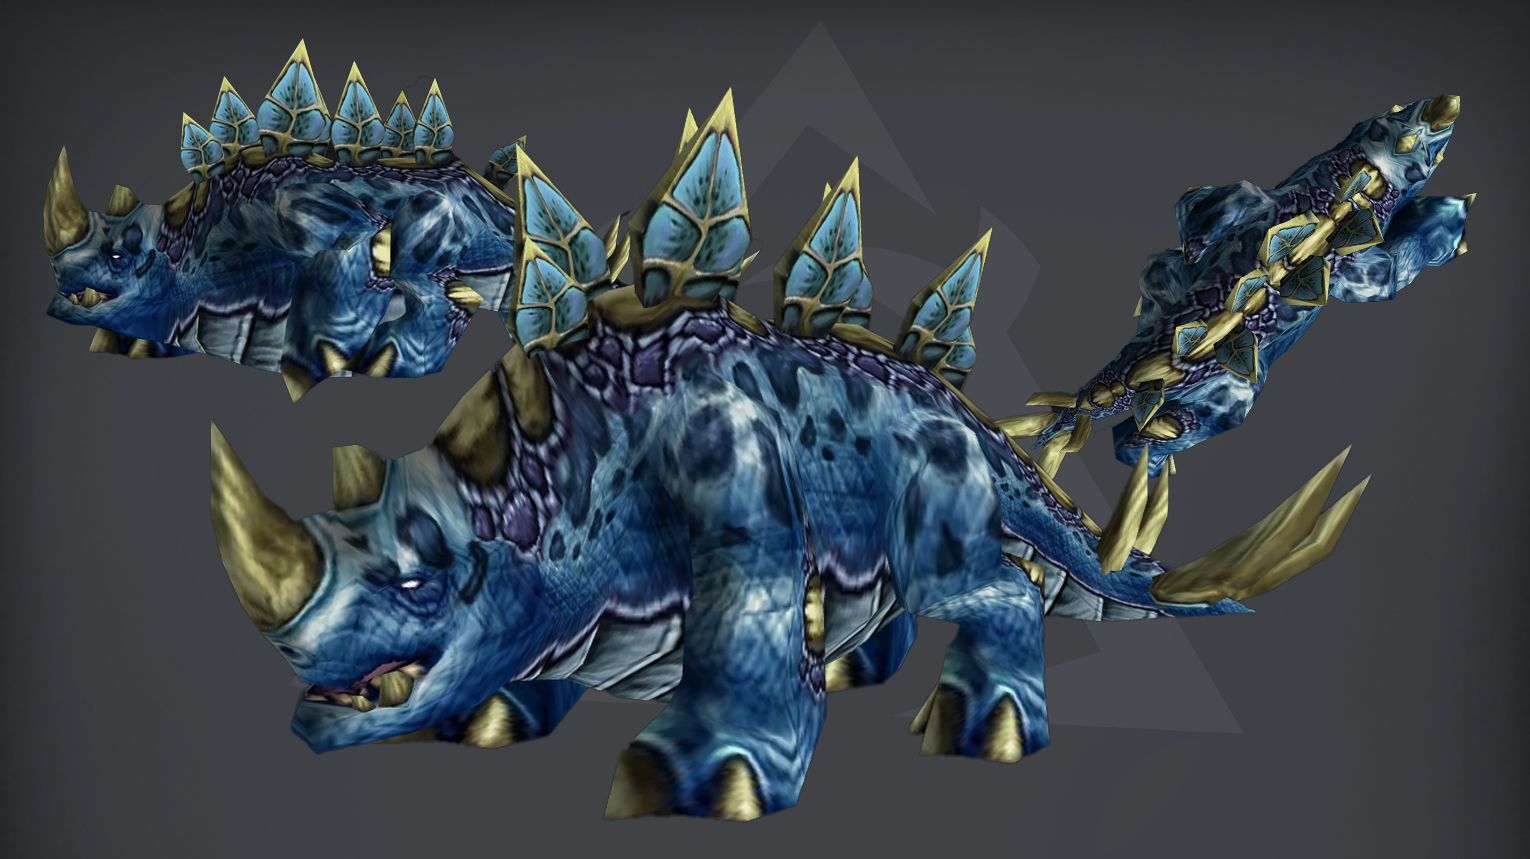
| Child of Pa’ku | Pa’ku’s Aspect (2%) | Yes |
| Thunder Lizard Runt | Pa’ku’s Aspect (2%) | Yes |
| Spawn of Krag’wa | Pa’ku’s Aspect (1%) | Yes |
Battle of Dazar’alor Bosses Overview
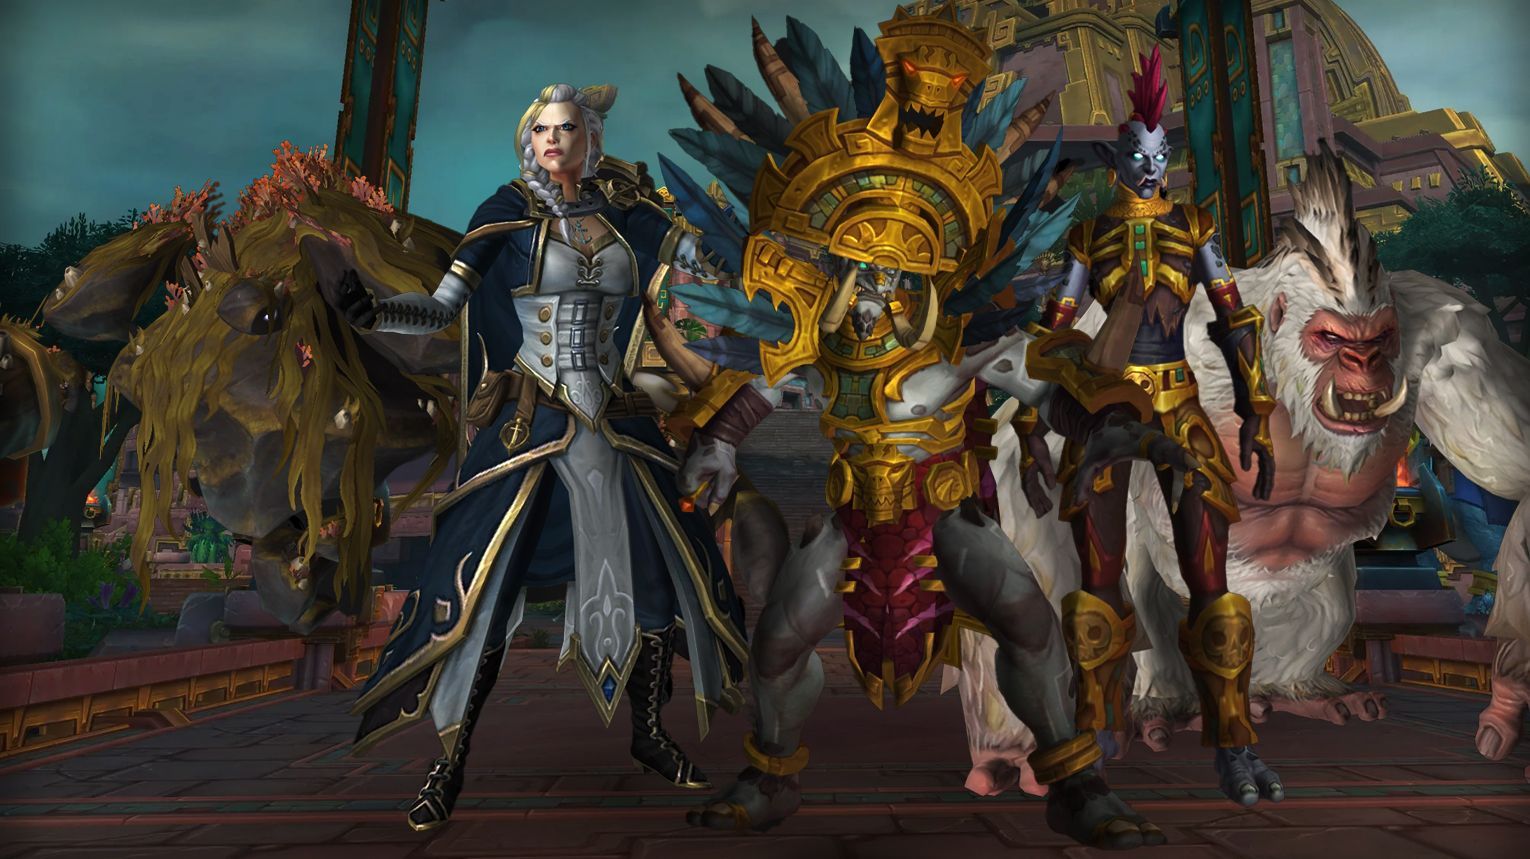
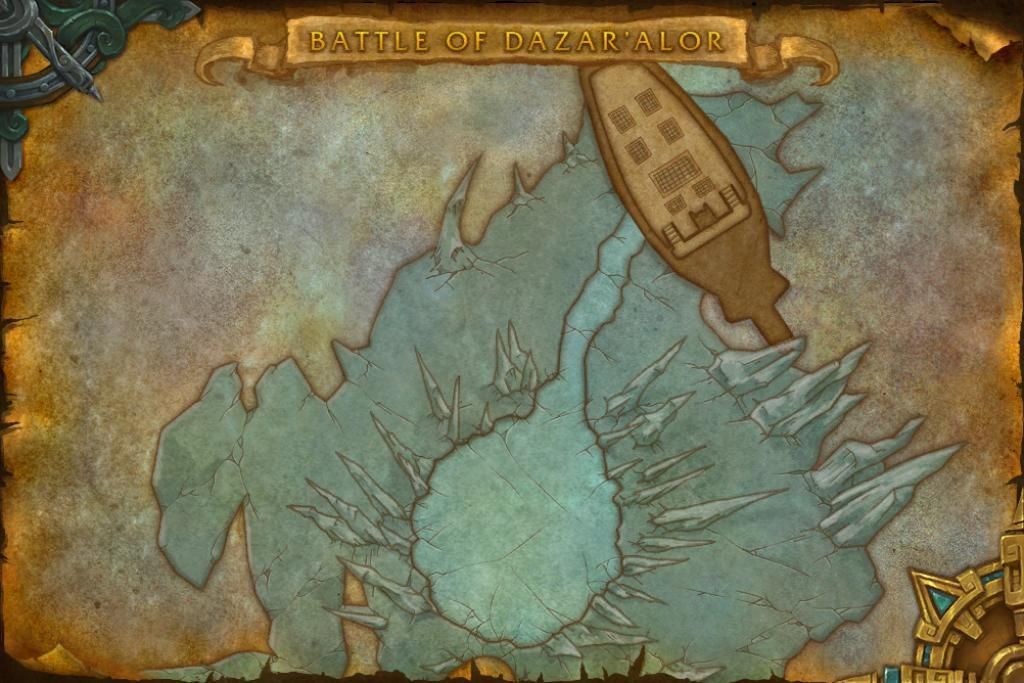
The Battle of Dazar’alor is a faction-themed raid in World of Warcraft: Battle for Azeroth, where players experience the war between the Alliance and Horde from both perspectives. The raid has nine bosses, each tied to the story of the siege on the Zandalari capital. Encounters range from strategic fights like the Conclave of the Chosen, where players face four powerful loa champions, to intense battles against King Rastakhan, who summons the power of Bwonsamdi, the loa of death. The final encounter against Jaina Proudmoore takes place on the docks of Dazar’alor, where players must survive her frost magic and powerful water elementals.
Can You Solo Battle of Dazar’alor in The War Within?
Solo farming the Battle of Dazar’alor in The War Within is a great way to earn exclusive transmog sets, mounts, pets, and achievements from the Battle for Azeroth expansion. While stat scaling and improved gear have made older raids easier to tackle solo, certain bosses in this raid still pose challenges due to their mechanics. This guide provides detailed strategies for each boss, suggests the best classes to use, and advises when to activate Bloodlust or Drums of the Maelstrom for optimal results.
Soloing the Battle of Dazar’alor in World of Warcraft: The War Within is possible, but some fights remain a challenge. Your class, gear, and understanding of the encounters (including when to use when to activate Bloodlust or Drums of the Maelstrom) will determine how far you can go.
- Item Level: Higher gear levels make fights easier, but mechanics may still be an issue.
- Class & Spec: Tanks and self-healing classes (Blood DK, Vengeance DH, Guardian Druid) have an advantage.

- Champion of the Light – Interrupt healing and kill adds quickly.
- Grong – Straightforward fight; avoid area damage and burst him down.
- Jadefire Masters – Manage incoming damage and avoid fire-based mechanics.
- Opulence – A major roadblock due to its enrage timer and Wail of Greed ability, which can one-shot you. Needs extremely high DPS to kill before the second Wail of Greed.
- Conclave of the Chosen – Akunda’s Wrath applies a silence loop, making it impossible to attack or heal. Some classes may be able to counter it (e.g., Blood

- King Rastakhan – Bwonsamdi’s Curse is hard for being defeated solo since it pulls you into the spirit realm and ignores taunts. You need extremely high burst damage to phase him before this happens.
- Lady Jaina Proudmoore – Hard enrage and freezing mechanics make this boss pretty hard unless you manage to break out of crowd control.
If you’re farming BoD transmogs or mounts, bringing at least one other player will make the run much easier. However, soloing this raid is possible even on mythic difficulty: check the video below.
Champion of the Light
The Champion of the Light encounter in Battle of Dazar’alor requires managing two phases: Seal of Retribution (don’t kill adds) and Seal of Reckoning (focus adds). Avoid giving the boss Zealotry stacks by following phase rules and dodging Wave of Light. Tanks must separate the boss and adds, while healers save cooldowns for Judgment: Reckoning and Avenging Wrath (below 30% health). Use Bloodlust/Drums during Seal of Reckoning for quick add kills. Interrupt key abilities like Heal and Penance to control add damage and healing.

 Tanks: Classes with strong mobility and cooldowns to manage Sacred Blade stacks and reposition adds.
 Healers: Classes with strong raid-wide healing cooldowns to handle Judgment: Reckoning and Avenging Wrath phases.
 DPS: Classes with strong single-target and cleave damage to quickly kill adds during Seal of Reckoning.
- Utility: Classes with interrupts (e.g.,


![]() Tips:
Tips:
- General:
- Avoid killing adds during Seal of Retribution to prevent Zealotry stacks.
- Do not attack the boss during Seal of Reckoning unless you are the tank with Sacred Blade.
- Always face away from Darkforged Crusaders to avoid Blinding Faith.
- Use defensive cooldowns during Judgment: Reckoning and Avenging Wrath phases.
- Tank-Specific:
- Keep adds 25+ yards away from the boss to avoid accidental cleave damage.
- Reset Sacred Blade stacks by having the add tank taunt the boss or by moving away during long casts.
- Drag adds out of Consecration zones during Seal of Reckoning to maximize DPS.
- Healer-Specific:
- Save cooldowns for Judgment: Reckoning and high Zealotry stacks.
- Be prepared for increased damage during Avenging Wrath (below 30% boss health).
- DPS-Specific:
- Focus on adds during Seal of Reckoning, prioritizing the add buffed by Judgment: Righteousness.
- Interrupt Heal and Penance casts from Anointed Disciples.
- Phase 1: Seal of Retribution:
- Do not kill adds. Tank them away from the boss to avoid cleave damage.
- Avoid standing between the boss and adds to dodge Wave of Light.
- Interrupt Heal and Penance casts from Anointed Disciples if possible.
- Phase 2: Seal of Reckoning:
- Focus all DPS on killing the adds. Prioritize the add buffed by Judgment: Righteousness.
- Tanks should keep the boss and adds separated to avoid accidental Zealotry stacks.
- Use healing cooldowns for Judgment: Reckoning at the end of the phase.
- Wave of Light Management:
- Position the boss and adds predictably to make dodging Wave of Light easier.
- Purge the Heal over Time buff from adds during Seal of Reckoning.
- Avenging Wrath (Below 30% Health):
- Save major cooldowns for this phase due to the boss’s 30% damage increase.
- Continue managing Wave of Light and Judgment: Reckoning mechanics.


| Type of Armor | Item | Loot type |
| Cloth | Bracers of Zealous Calling | Wrist |
| Divine Fury Raiment | Chest | |
| Leather | Bracers of Regal Devotion | Wrist |
| Cowl of Righteous Resolve | Head | |
| Gloves of Spiritual Grace | Hands | |
| Lightgrace Sabatons | Feet | |
| Pauldrons of Ancestral Vengeance | Shoulder | |
| Plate | Crusade Pummelers | Hands |
| Breastplate of Divine Purification | Chest | |
| Any | Desecrated Blade of the Disciples | Dagger |
| Sunburst Crest | Shield | |
| Ward of Envelopment | Trinket | |
| Dawnbreaker | 2H Sword |
Grong
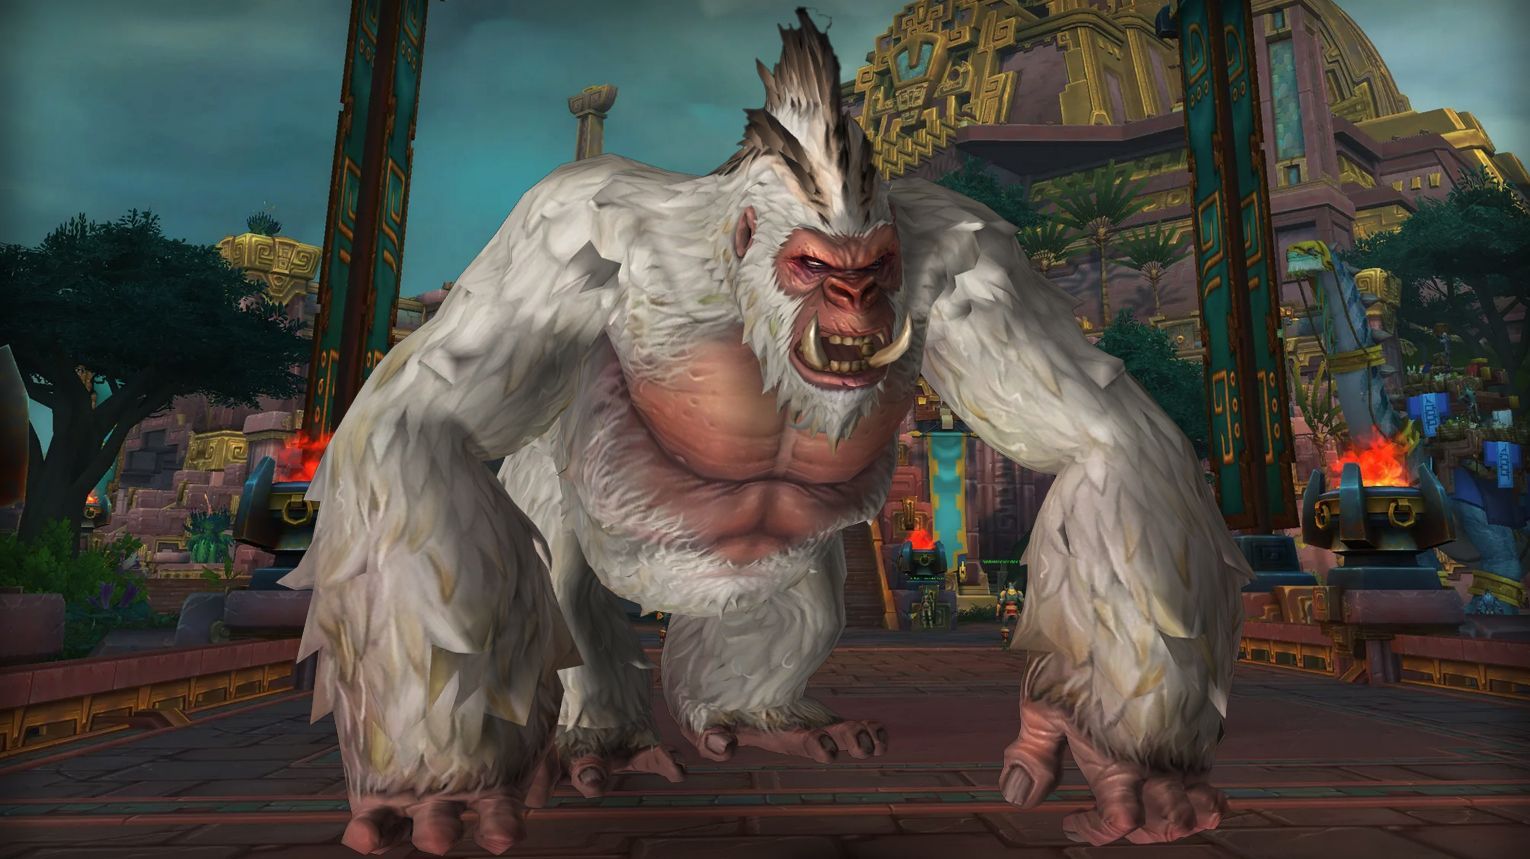
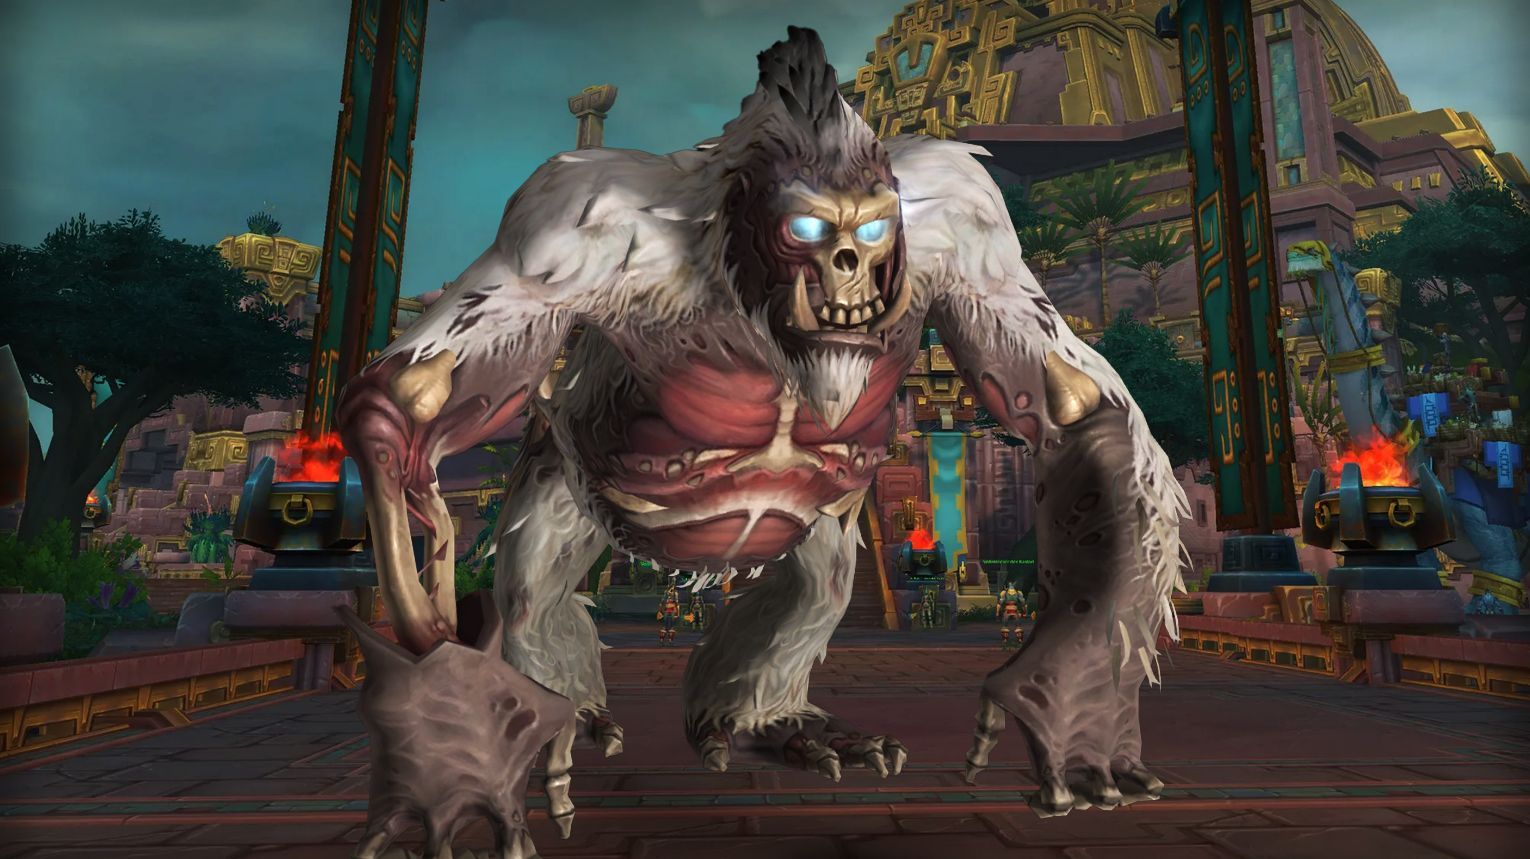
Grong is a single-phase, rage-management fight in Battle of Dazar’alor. The raid must control his rage by interrupting Apetagonize casts from Apetagonizer 3000 adds and using Apetagonizer Core to trigger Tantrum at 50+ rage, preventing a wipe-inducing 100-rage Tantrum. Tanks must taunt swap during Bestial Combo to manage Bestial Smash and Rending Bite debuffs, while DPS spread to avoid Reverberating Slam and Megatomic Seeker Missile. On Heroic, stay grouped to avoid Ferocious Roar fears. Use Bloodlust/Drums at 40% health to burn Grong during his fastest rage-gain phase.
- Tanks: Classes with strong active mitigation and quick taunt reflexes (e.g.,

- Healers: Classes with strong raid-wide healing cooldowns (e.g.,

- DPS: Classes with strong single-target damage and interrupts (e.g.,

![]() Tips:
Tips:
- General Tips:
- Interrupt Apetagonize casts from the Apetagonizer 3000 adds to prevent Grong from gaining rage.
- Use the Apetagonizer Core to trigger Tantrum when Grong has 50+ rage.
- Melee DPS should spread around the boss to minimize Reverberating Slam damage.
- Ranged DPS should spread 10 yards apart to avoid stacking Megatomic Seeker Missile damage.
- On Heroic, stay within 5 yards of another player during Ferocious Roar to avoid being feared.
- Tank Tips:
- Taunt swap during Bestial Combo to avoid taking multiple Bestial Smashes or stacking Rending Bite debuffs.
- Keep Grong 15+ yards away from the Apetagonizer 3000 when it dies to avoid rage gain from Lightning Detonation.
- Healer Tips:
- Save healing cooldowns for Tantrum triggers above 75 rage.
- Be prepared for increased damage during the final phase (40% health and below).
- Rage Management:
- Grong gains rage passively, and it accelerates as his health decreases:
- Angry Ape (100%-70%): 10 rage per 12 seconds.
- Enraged Ape (70%-40%): 10 rage per 11 seconds.
- Furious Ape (40%-0%): 10 rage per 10 seconds.
- Use Apetagonizer Core to trigger Tantrum at 50+ rage to reset his rage bar.
- Add Management:
- Kill the Apetagonizer 3000 as soon as it spawns (every 60 seconds).
- A player must pick up the Apetagonizer Core and use Discharge Apetagonizer Core on Grong to trigger Tantrum.
- Tantrum Mechanics:
- Positioning:
- Melee DPS should spread around Grong to minimize Reverberating Slam hits.
- Ranged DPS should spread 10 yards apart to avoid stacking Megatomic Seeker Missile damage.
| Type of Armor | Item | Loot type |
| Cloth | Bristling Fur-Lined Amice | Shoulder |
| Leggings of Dire Research | Legs | |
| Leather | Grongpelt Vest | Chest |
| Stretched Sinew Waistcord | Waist | |
| Ape Wrangler’s Wristguards | Wrist | |
| Simian Berserker’s Helm | Head | |
| Plate | Spaulders of the Gorilla King | Shoulder |
| Splinter-Bone Vambraces | Wrist | |
| Any | Silverback Cloak | Cloak |
| Bonelash Paw | Fist Weapon | |
| Cursed Monkey Palm | Off-hand | |
| Apetagonizer’s Claw | 1H Mace | |
| Hornridged Crusher | Polear | |
| Grong’s Primal Rage | Trinket |
Jadefire Masters

The Jadefire Masters encounter in Battle of Dazar’alor pits the raid against a Monk and Mage simultaneously. Key mechanics include managing the Monk’s Harmonious Spirits passive by keeping its health lower than the Mage’s, interrupting Whirling Jade Storm, and breaking the Mage’s Fire Shield to stop Pyroblast. Team Attacks at 30, 60, and 100 energy require coordinated responses, such as stacking in Chi-ji’s Song clouds, navigating a maze, and dodging Dragon’s Breath. Use Bloodlust during The Serpent and the Phoenix phase to burn down the bosses quickly. Heroic and Mythic difficulties add mechanics like Spirit of Xuen, Magma Traps, and more complex maze mechanics.
- Tanks: High-mobility tanks (e.g.,

- DPS: Melee DPS with high mobility (e.g.,

- Healers: Classes with strong dispels (e.g.,


![]() Tips:
Tips:
- Monk Health Management: Keep the Monk’s health percentage lower than the Mage’s to avoid the Harmonious Spirits damage buff.
- Interrupts: Melee DPS or tanks must interrupt the Monk’s Whirling Jade Storm by engaging in melee combat.
- Fire Shield: Focus DPS on the Mage to break the Fire Shield and interrupt Pyroblast.
- Tank Swaps: Tanks should taunt the Mage at 4 stacks of Rising Flames to manage Burnout explosions.
- Dispels: Healers must prioritize dispelling Searing Embers, especially those with shorter durations.
- Living Bombs: Stack in one Chi-ji’s Song cloud to maintain line of sight and handle Living Bombs one at a time.
- Monk Focus: DPS should prioritize the Monk to minimize its damage output, while cleaving or multi-dotting the Mage.
- Multi-Sided Strike: Tanks must face the correct Monk images (Blue, Green, Orange) to avoid heavy damage and gain the Successful Defense buff.
- Fire Shield and Pyroblast: All DPS must switch to the Mage to break the Fire Shield and interrupt Pyroblast.
- Team Attacks:
- Fire from Mist (30 Energy): Stack in one Chi-ji’s Song cloud, kill Living Bombs one by one, and avoid their rotating beams.
- A Flash of Hostility (60 Energy): Navigate the maze, avoid Phoenix Strike patches, and destroy the barrier to interrupt the bosses.
- The Serpent and the Phoenix (100 Energy): Dodge the Monk’s Dragon’s Breath cone and manage the Mage’s Blazing Phoenix passive damage.
| Type of Armor | Item | Loot type |
| Cloth | Blazewing Hood | Head |
| Manceroy’s Flamefists | Hands | |
| Leather | Cranedancer Leggings | Legs |
| Mestrah’s Singing Spaulders | Shoulder | |
| Grips of Harmonious Spirits | Hands | |
| Mistfire Raiment | Chest | |
| Plate | Embersear Waistguard | Waist |
| Helm of Tempered Jade | Head | |
| Any | Band of Multi-Sided Strikes | Ring |
| Phoenixfire Staff | Staff | |
| Invocation of Yu’lon | Trinket |
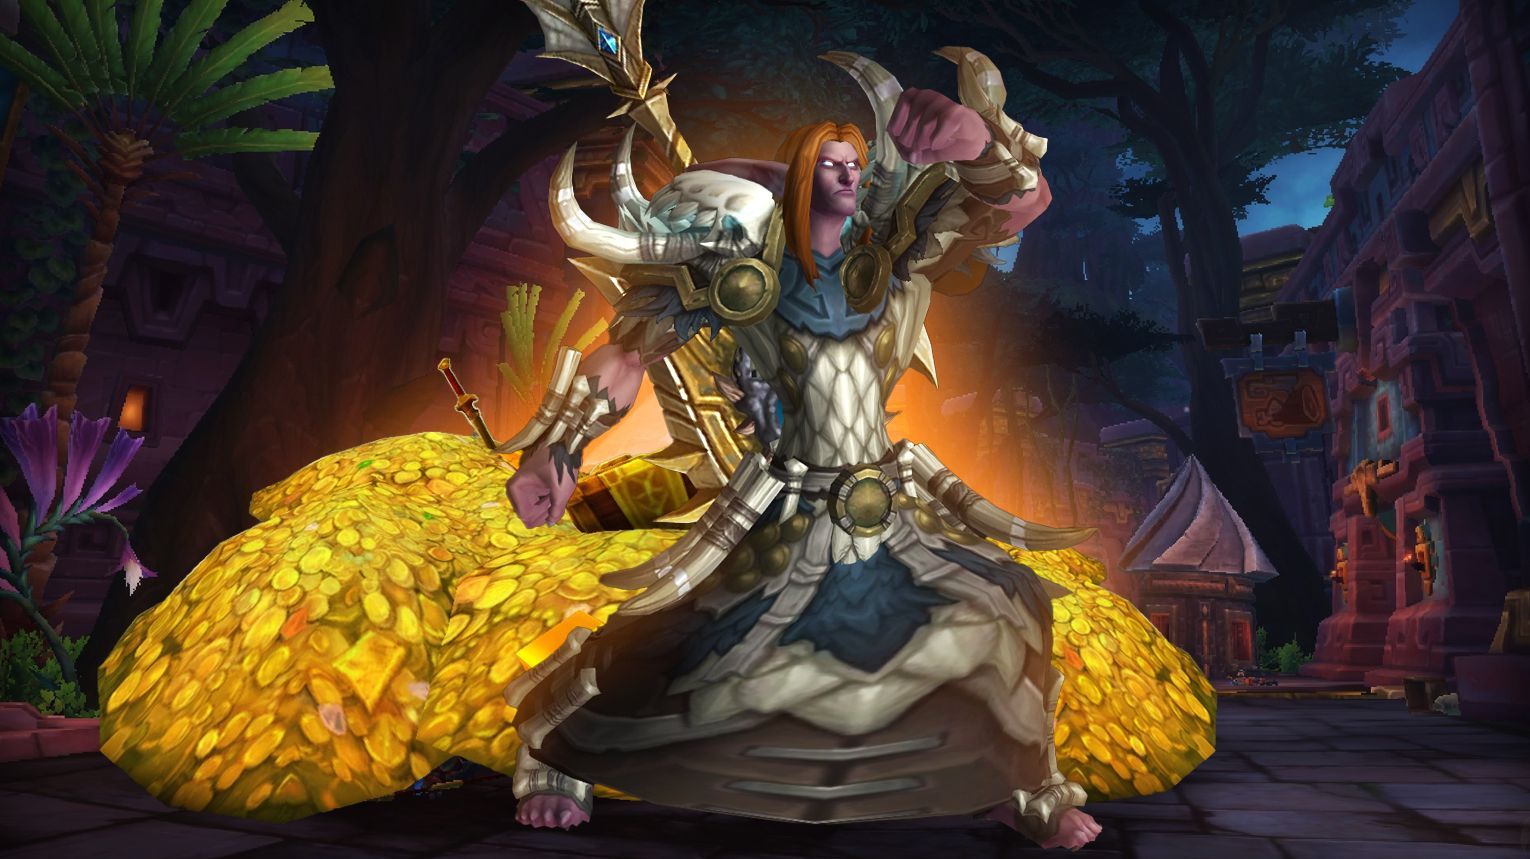
Opulence
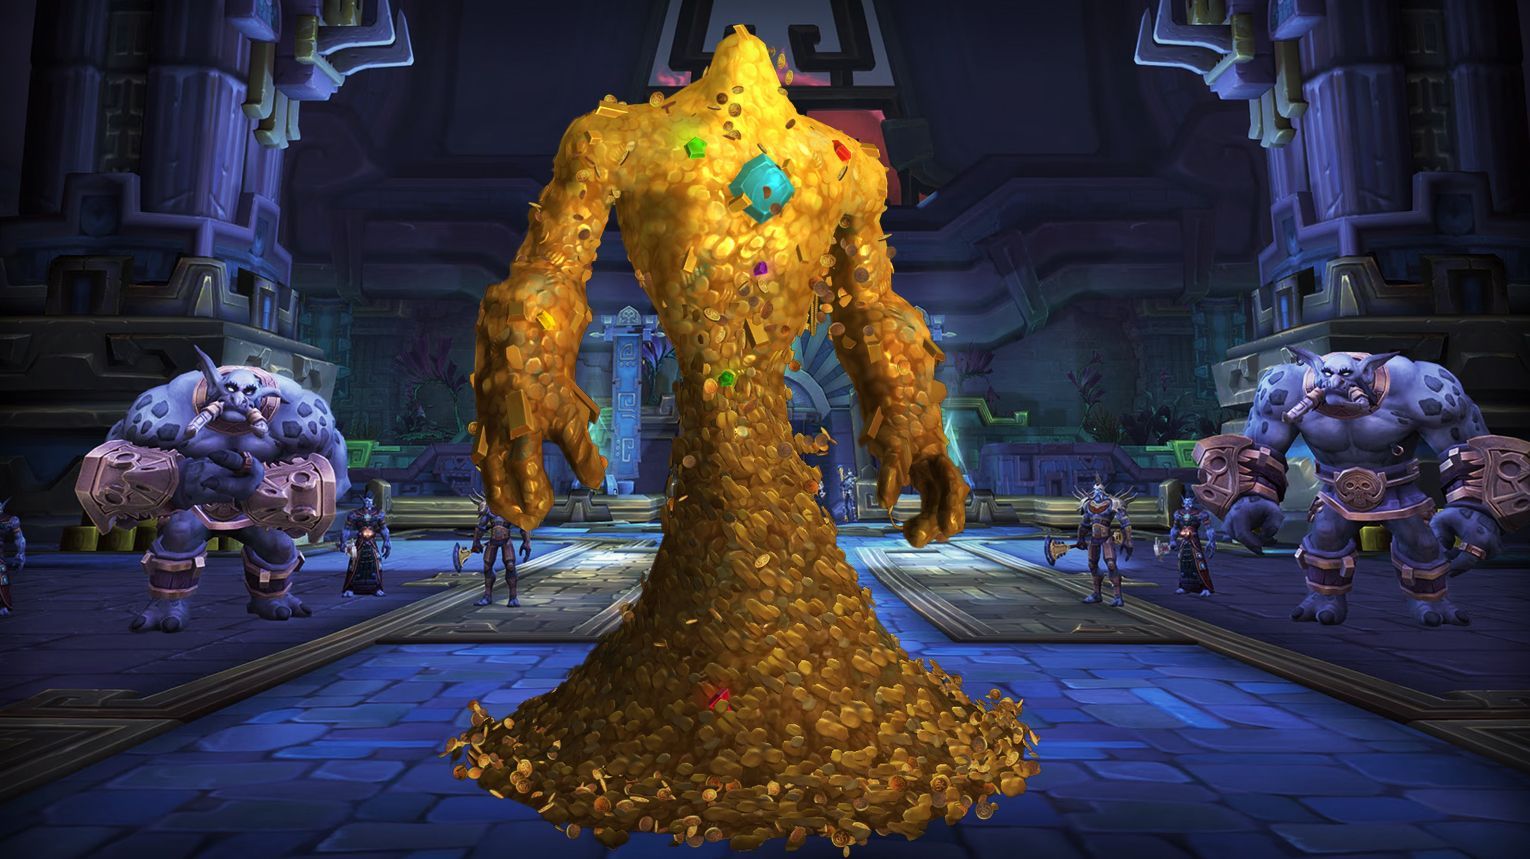
Opulence is a two-phase boss in Battle of Dazar’alor. In Phase 1, the raid splits into two groups to defeat guardians Yalat’s Bulwark and The Hand of In’zashi, navigating traps like Flame Jets and Ruby Beam while collecting Crown Jewels. Both guardians must die simultaneously to avoid buffing Opulence. In Phase 2, the raid reunites to fight Opulence, managing Molten Gold pools, killing Spirits of Gold, and mitigating Wail of Greed. Use Bloodlust/Drums at the start of Phase 2 for maximum DPS. Coordination, positioning, and timely cooldowns are key to success.
- Tanks: Any class can tank, but having two tanks is essential for managing the guardians and Opulence.
- Healers: All healing classes are viable, but coordination is crucial for handling the various debuffs and high damage phases.
- DPS: A mix of melee and ranged DPS is ideal. Melee DPS should focus on the guardians, while ranged DPS can handle adds and provide support from a distance.
![]() Tips:
Tips:
- Phase 1:
- Split the raid evenly into two groups, ensuring balanced DPS and healing.
- Move quickly into the next chamber when the guardian loses 10% health to avoid Creeping Blaze.
- Kite Ruby Beam to the edges of the room.
- Healers should dispel Hex of Lethargy immediately.
- Tanks should position guardians to allow melee DPS to dodge Crush.
- Assign specific players to pick up Crown Jewels in the 7th chamber.
- Defeat both guardians simultaneously to avoid buffing Opulence.
- Phase 2:
- Stack behind Opulence to maximize healing and avoid mechanics.
- Place Molten Gold pools at the edges of the room.
- Use crowd control and burst DPS to kill Spirits of Gold before they reach the edge.
- Healers must ensure all players are Shadow-Touched before Wail of Greed.
- Tanks should taunt swap during Coin Sweep to mitigate damage.
- Phase 1:
- Split the Raid: Divide into two groups with equal roles and DPS output.
- Progress Through Chambers: Move with the guardian into the next chamber when it loses 10% health.
- Handle Traps:
- Flame Jets: Avoid fire jets by standing in safe zones.
- Pulse-quickening Toxin: Use healing cooldowns to counter increasing damage.
- Hex of Lethargy: Dispel immediately and minimize movement.
- Ruby Beam: Kite the beam to the edges of the room.
- Collect Crown Jewels: Assign specific players to pick up jewels in the 7th chamber.
- Defeat Guardians: Ensure both guardians die at the same time.
- Phase 2:
- Positioning: Tank Opulence in the center with the raid stacked behind.
- Liquid Gold: Affected players should drop Molten Gold pools at the edges.
- Spirits of Gold: Use crowd control and burst DPS to kill adds quickly.
- Wail of Greed: Ensure all players are Shadow-Touched and use healing cooldowns.
- Coin Sweep/Coin Shower: Tanks should taunt swap, and the raid should stack to split damage.
| Type of Armor | Item | Loot type |
| Cloth | Crown of the Seducer | Head |
| Waistcord of Flowing Silk | Waist | |
| Leather | Crown of A’akul’s Dark Reign | Wrist |
| Amethyst-Studded Bindings | Head | |
| Electrified Crown of Rahu’ai | Feet | |
| Boots of the Gilded Path | Head | |
| Plate | Coinage Stampers | Feet |
| Crown of Bloody Succession | Head | |
| Any | Greed’s Folly | Dagger |
| Goblet of Glittering Favor | 1H Mace | |
| Incandescent Sliver | Trinket | |
| Diamond-Laced Refracting Prism | Trinket | |
| Bloodtooth, the Soulfeaster | Warglaive |
Conclave of the Chosen
The Conclave of the Chosen is a single-phase fight against four Loa aspects, with two active at a time. Key mechanics include managing Loa’s Wrath (kill the buffed aspect first), avoiding Loa’s Pact by keeping bosses 8+ yards apart, and handling unique Wrath abilities from each Loa. Tanks must taunt swap for Hastening Winds and Lacerating Claws, while the raid stacks for Pa’ku’s Wrath and spreads for Crawling Hex, Kimbul’s Wrath, and Akunda’s Wrath. Use Bloodlust early to burn Pa’ku’s Aspect or late for Akunda’s Aspect. Heroic adds Cry of the Fallen, Pack Hunter, and Krag’wa’s Wrath, requiring precise positioning and healing cooldowns.
- Tanks: Classes with strong defensive cooldowns and mobility to handle frequent taunt swaps and positioning.
- Healers: Classes with strong AoE healing and dispels (e.g.,


- DPS: Classes with strong single-target damage, cleave, and crowd control (e.g.,
![]() Tips:
Tips:
- Purge Buffs: Always purge Gift of Wind (haste and movement speed buff) from enemies.
- Positioning:
- Stay within 10 yards of Pa’ku during Pa’ku’s Wrath.
- Spread out when affected by Crawling Hex or Akunda’s Wrath.
- Move away from others during Kimbul’s Wrath.
- Add Control: Focus on crowd-controlling and killing Ravenous Stalkers spawned by Gonk’s Wrath.
- Tank Coordination: Keep bosses 8+ yards apart to avoid triggering Loa’s Pact (90% damage reduction and increase).
General Mechanics
- Loa’s Wrath: When one aspect dies, the other is healed and gains a 15% damage increase. Always kill the aspect with the Loa’s Wrath stack first.
- Loa’s Pact: If two bosses are within 7 yards, they gain 90% damage reduction and increase. Tanks must keep them 8+ yards apart.
- Wrath Abilities: Each Loa casts a unique Wrath ability that persists even after their aspect is defeated. Manage overlaps carefully.
Aspect-Specific Mechanics
- Pa’ku’s Aspect:
- Hastening Winds: Tanks must taunt swap to reset the attack speed buff.
- Pa’ku’s Wrath: Stand within 10 yards of Pa’ku to minimize damage.
- Gonk’s Aspect:
- Raptor Form: Face the boss away from the raid during Wild Maul.
- Crawling Hex: Move 8+ yards away from others before the hex expires or is dispelled.
- Gonk’s Wrath: Kill Ravenous Stalkers quickly and use crowd control.
- Kimbul’s Aspect:
- Lacerating Claws: Tanks should taunt swap at 3-4 stacks.
- Kimbul’s Wrath: Spread out to avoid stacking Bleeding Wounds.
- Akunda’s Aspect:
- Thundering Storm: Move away from the boss during the cast.
- Mind Wipe: Healers must dispel this debuff quickly.
- Akunda’s Wrath: Spread out to avoid splash damage and Static Orbs.
| Type of Armor | Item | Loot type |
| Cloth | Mantle of the Skyterror | Shoulder |
| Lightfeather Footpads | Feet | |
| Leather | Vestments of Indomitable Will | Chest |
| Gonk’s Scale Robes | Chest | |
| Plate | Arcing Thunderlizard Legplates | Legs |
| Ridgeplate Pauldrons | Shoulder | |
| Any | Pterrorwing Longbow | Bow |
| Loa Exultant’s Shroud | Cloak | |
| Spawn of Krag’wa | Battle Pet | |
| Enchanted Talon of Pa’ku | Battle Pet | |
| Thundering Scale of Akunda | Battle Pet | |
| Akunda’s Shocksplitter | 1H Axe | |
| Blade of Encroaching Death | 1H Sword | |
| Kimbul’s Razor Claw | Trinket | |
| Crest of Pa’ku | Trinket |
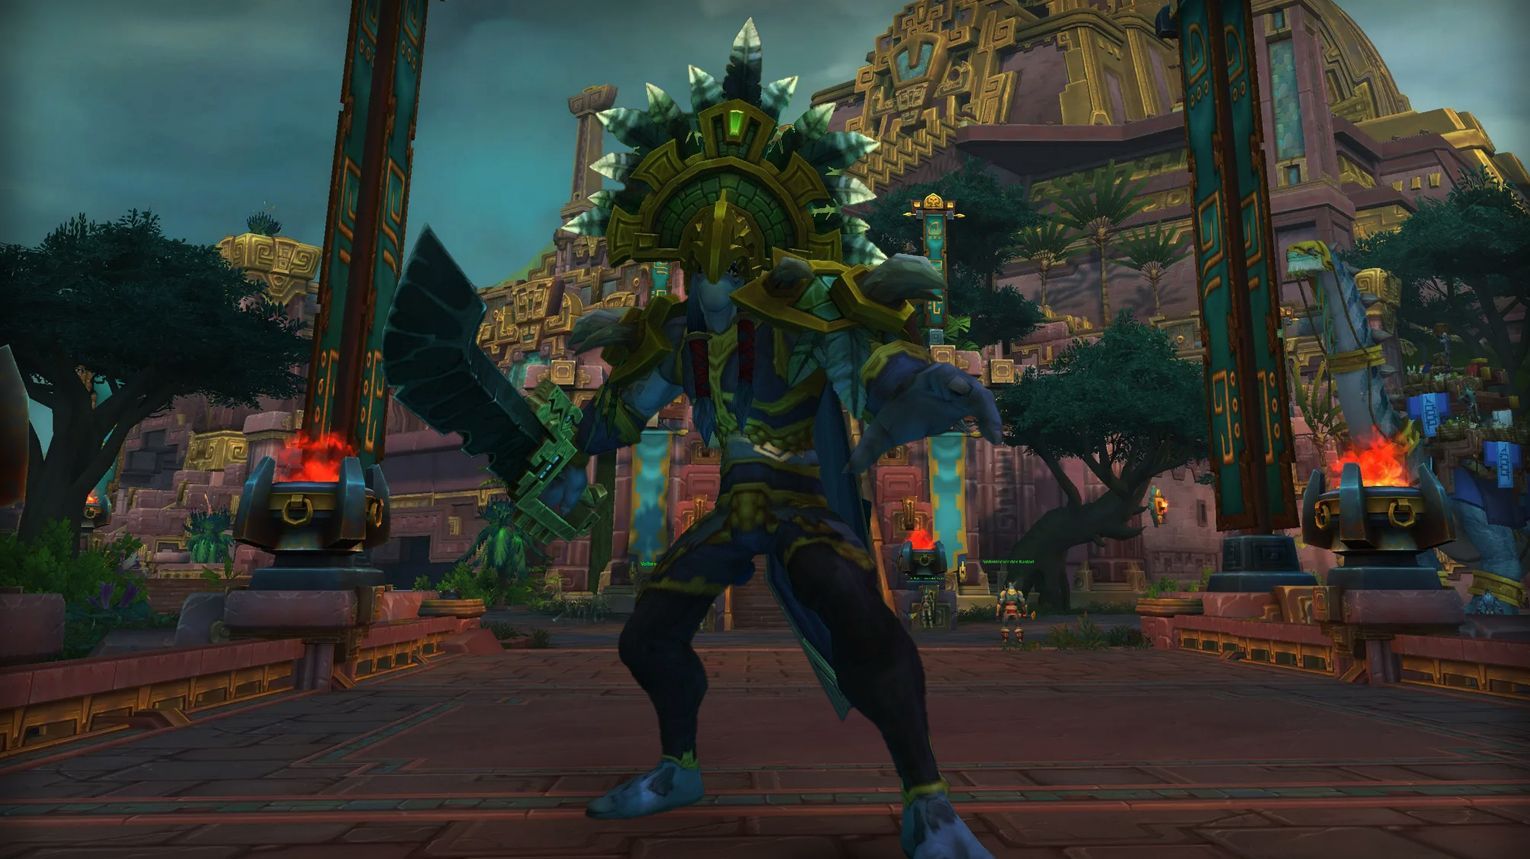
King Rastakhan
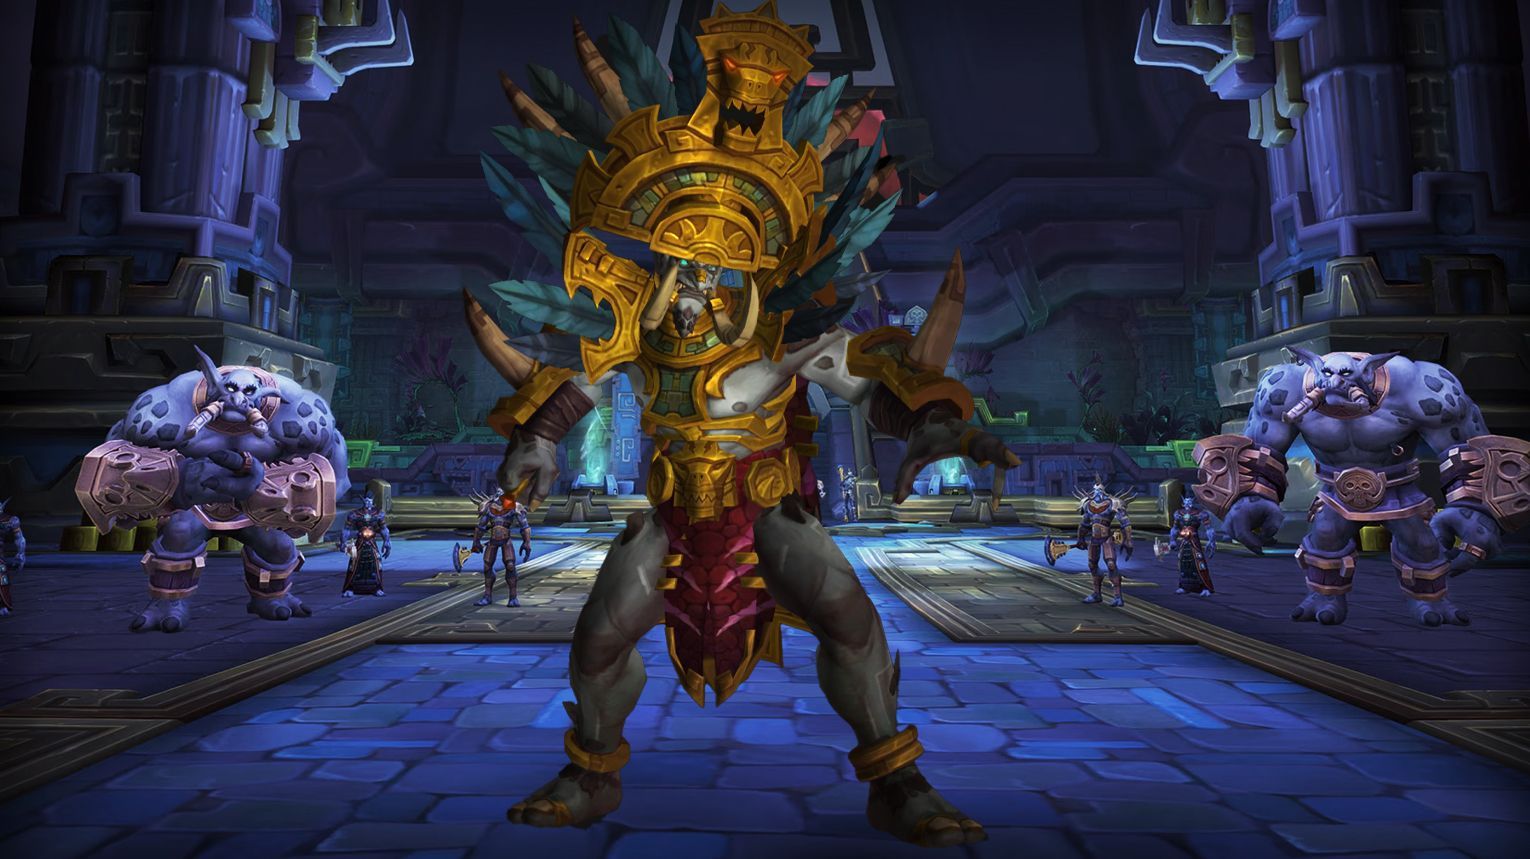
King Rastakhan is a four-phase encounter in Battle of Dazar’alor, starting with fighting him and his bodyguards, then facing Bwonsamdi in Phases Two and Three, and finally battling Rastakhan alone in Phase Four. Key mechanics include Scorching Detonation (tank positioning), Plague of Fire (spread 7+ yards), Death Rifts (reset Deathly Withering stacks), and Dread Reaping (dodgeable zones). Use Bloodlust in Phase Four for maximum DPS. Recommended composition includes 4-5 healers, 8-9 ranged DPS, and Shamans for utility. Focus on mechanics like dodging Plague of Toads, managing Zombie Dust Totem, and staggering Death Rift usage in the Death Realm.
- Tanks: Two tanks are required to manage taunt swaps and positioning.
- Healers: 4-5 healers recommended due to high raid damage.
- DPS:
- Ranged DPS to handle spread mechanics like Plague of Fire and Dread Reaping.
- Melee DPS should be limited to avoid Plague of Fire spreading.
- Shamans are highly recommended for their utility (e.g., Purge for Zombie Dust Totem and Wind Rush Totem for movement).
![]() Tips:
Tips:
- Phase One:
- Focus on killing the bodyguards while cleaving damage onto Rastakhan.
- Stack for Meteor Leap to split damage.
- Dodge Plague of Toads and kite Seal of Purification.
- Phase Two:
- Spread 7+ yards to avoid Plague of Fire spreading.
- Quickly kill Zombie Dust Totem to free mind-controlled players.
- Position Bwonsamdi 30+ yards away to avoid Aura of Death.
- Phase Three:
- Death Realm: Stagger Death Rift usage to reset Deathly Withering stacks.
- Living Realm: Focus on killing Phantom adds while managing Seal of Bwonsamdi zones.
- Phase Four:
- Dodge Plague of Toads, Dread Reaping, and Inevitable End.
- Use Bloodlust during high DPS windows.
- Phase One:
- Stack for Meteor Leap and cleave damage onto Rastakhan while focusing on bodyguards.
- Tanks should taunt swap after Crushing Leap and run away during Scorching Detonation.
- Phase Two:
- Spread for Plague of Fire and kill Zombie Dust Totem immediately.
- Keep Bwonsamdi 30+ yards away to minimize Deathly Withering stacks.
- Phase Three:
- Death Realm: Stagger Death Rift usage to reset stacks and dodge Dread Reaping.
- Living Realm: Kill Phantom adds and soak Seal of Bwonsamdi zones.
- Phase Four:
- Focus on dodging mechanics while burning down Rastakhan before Bwonsamdi’s Boon overwhelms the raid.
| Type of Armor | Item | Loot type |
| Cloth | Vestments of the Afterlife | Chest |
| Leather | Phantom Stalker Shoulders | Shoulder |
| Deathhunter’s Legguards | Legs | |
| Mantle of the Soulbinder’s Caress | Shoulder | |
| Plate | Breastplate of the Deathbound | Chest |
| Roka’s Bonecrushing Manacles | Wrist | |
| Any | Last Fang of Rezan | Dagger |
| Seal of the Zandalari Empire | Ring | |
| Deathspeaker Spire | Staff | |
| Bwonsamdi’s Bargain | Trinket | |
| Mirror of Entwined Fate | Trinket |
High Tinker Mekkatorque
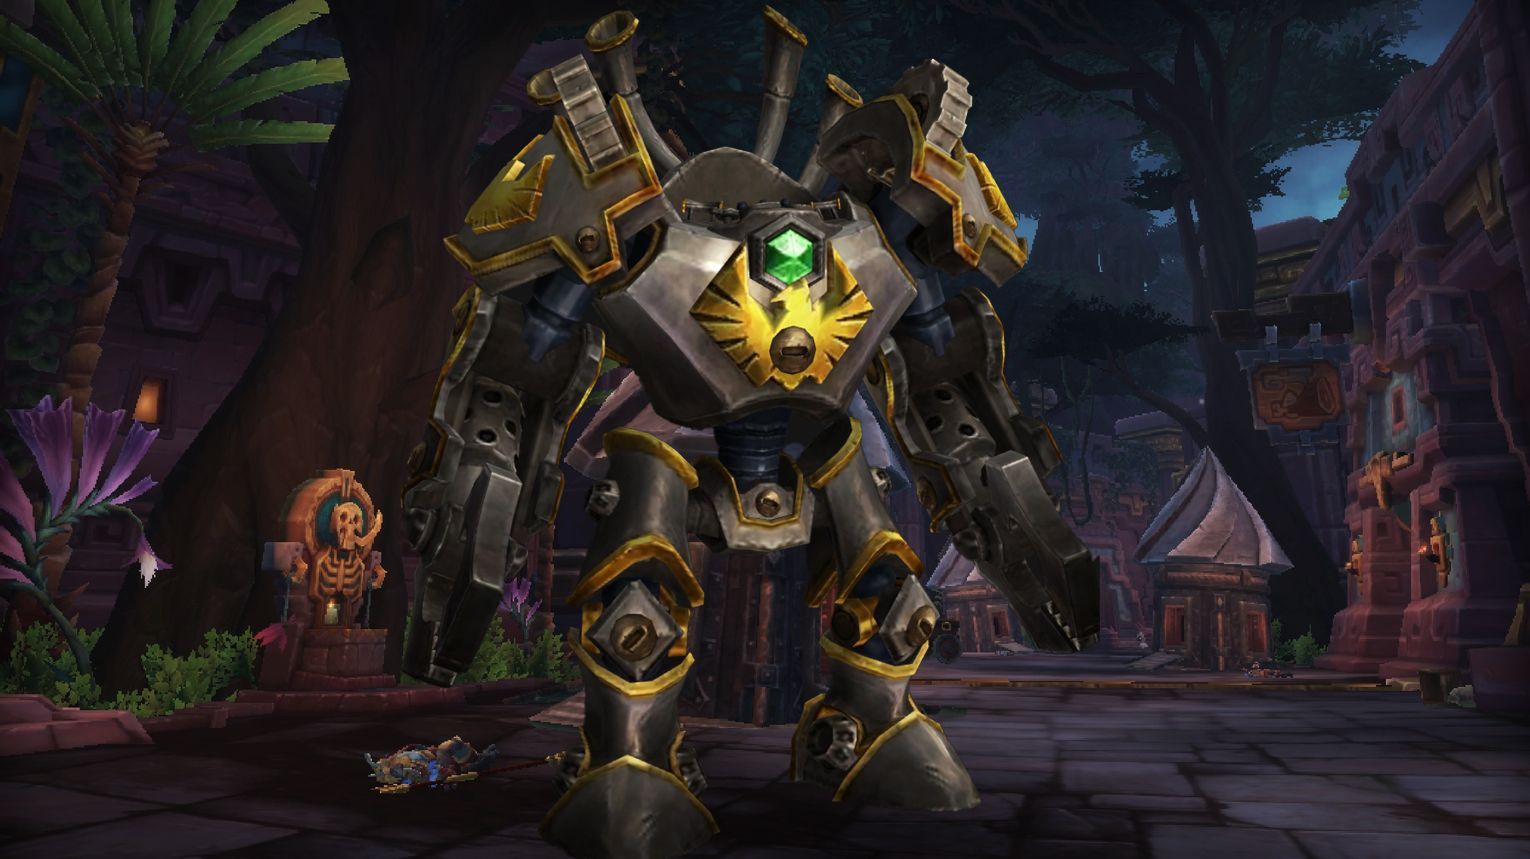
High Tinker Mekkatorque is a three-phase encounter in Battle of Dazar’alor, requiring strong coordination to manage Spark Bots, Gigavolt Charge, and Shrink mechanics. Tanks must taunt swap to reset Electroshock Amplification stacks, while DPS and healers handle Buster Cannon, Heavy Thrusters, and Signal Exploding Sheep. Shrunken players must enter Spark Bots and input shutdown codes communicated by the raid. Use Bloodlust/Drums in Phase 3 when Mekkatorque lands, as this phase has the highest damage pressure. The fight emphasizes communication, positioning, and crowd control to succeed.
- Tanks: Any tank class works, but tanks must coordinate taunts to manage Electroshock Amplification stacks.
- Healers: Strong AoE healers (e.g.,
- DPS: Classes with strong crowd control (e.g.,


- Utility: Priests with Life Grip can help reposition players affected by Gigavolt Charge or Shrink.
![]() Tips:
Tips:
- Buster Cannon: Always sidestep the energy ball to avoid heavy damage and a haste reduction debuff.
- Heavy Thrusters: Move away from both the Blast Off and Crash Down zones to avoid lethal damage.
- Gigavolt Charge: Hide behind rubble to avoid line-of-sight explosions. Assign specific locations for debuffed players.
- Shrink: Avoid stepping on shrunken players to prevent Trample damage and stuns.
- Spark Bots: Use crowd control (slows, roots, displacements) to keep Spark Bots away from the raid. Assign players to call out shutdown codes for Spark Bots.
- Signal Exploding Sheep: Dodge sheep explosions and shrapnel during Phase 2.
- Tanks: Taunt swap at 8-10 stacks of Electroshock Amplification to manage damage intake.
- Healers: Be prepared for increased raid damage in Phase 3 due to Hyperdrive.
- Phase 1:
- Engage Mekkatorque and handle Spark Bots.
- Tanks must taunt swap to reset Electroshock Amplification stacks.
- Players must sidestep Buster Cannon and avoid Heavy Thrusters zones.
- Assign three safe spots (e.g., rubble piles) for Gigavolt Charge players to hide.
- When Shrink is cast, shrunken players must enter Spark Bots and input shutdown codes. Raid members must communicate the codes to the players inside the bots.
- Phase 2:
- Mekkatorque becomes immune to damage. Focus on dodging mechanics.
- Continue handling Gigavolt Charge and Shrink mechanics.
- Dodge Signal Exploding Sheep and their shrapnel.
- Shrunken players should continue disabling Spark Bots if any remain.
- Phase 3:
- Mekkatorque lands and becomes active again.
- Healers must manage increased raid damage from Hyperdrive.
- Tanks must taunt swap more frequently due to faster Electroshock Amplification stacking.
- Continue disabling Spark Bots and avoid Signal Exploding Sheep.
| Type of Armor | Item | Loot type |
| Cloth | Giga-Charged Shoulderpads | Shoulder |
| Lever Stabilizing Wristwraps | Wrist | |
| Leather | Mech-Jockey Grips | Hands |
| Mekkatorque’s Bomber Jacket | Chest | |
| Target-Tracking Headgear | Head | |
| Plate | Dyno-Sprocket Spaulders | Shoulder |
| Any | G.M.O.D. | Mount |
| High Tinker’s Cape | Cloak | |
| Twin-Pipe Buster Cannon | Gun | |
| Servo-Claw Smasher | 1H Mace | |
| Variable Intensity Gigavolt Oscillating Reactor | Trinket | |
| Ramping Amplitude Gigavolt Engine | Trinket |
Stormwall Blockade
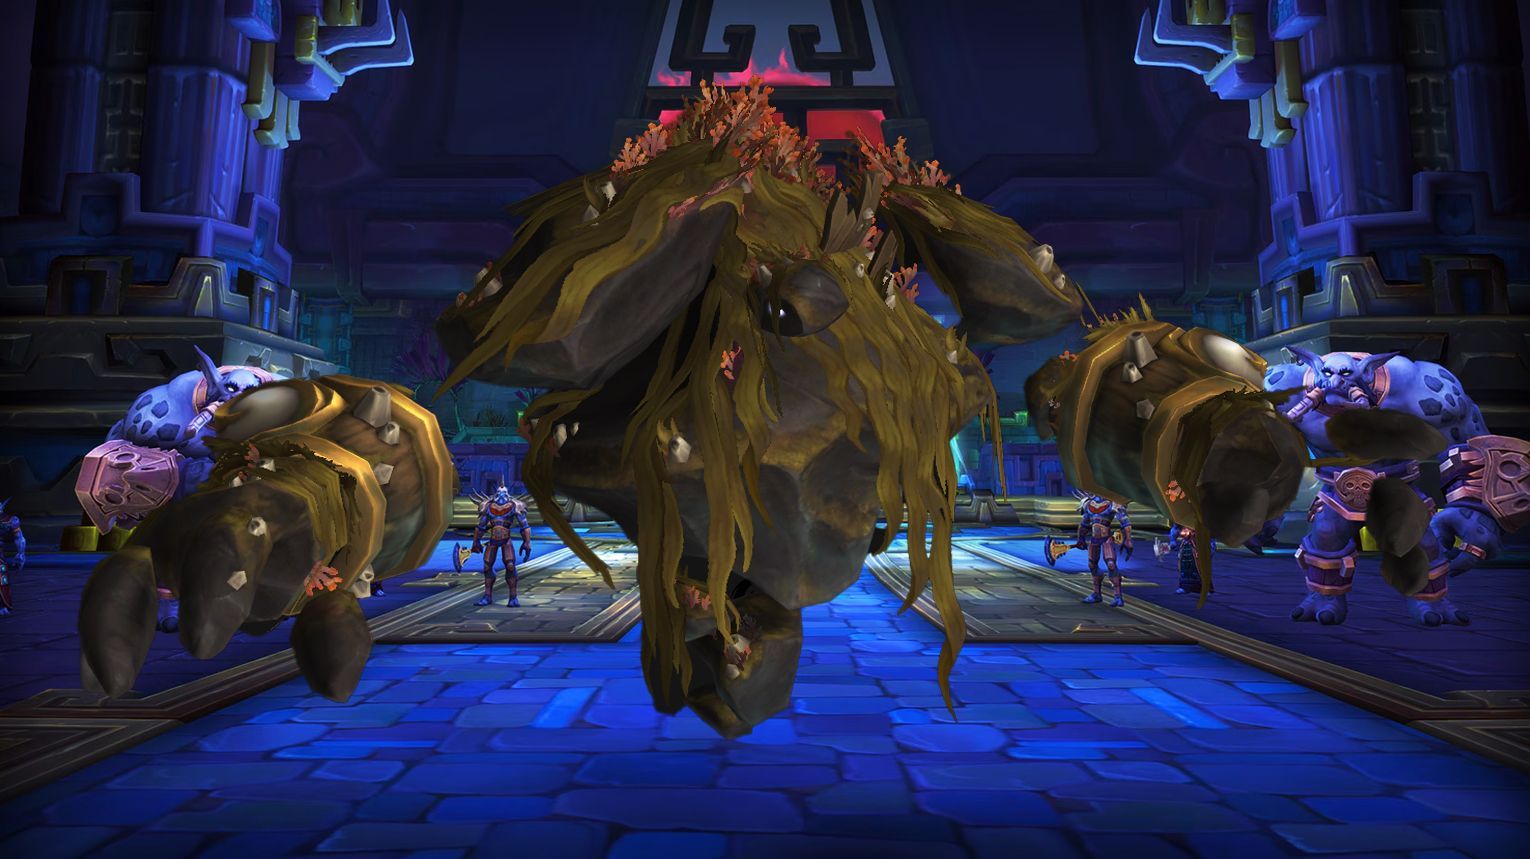
The Stormwall Blockade in Battle of Dazar’alor is a two-phase encounter. In Phase One, the raid splits to defeat bosses on separate ships, ensuring both die simultaneously to prevent Laminaria from gaining energy. Phase Two focuses on Laminaria, where players must manage Energized Storm adds, clear Frozen Tidepools, and soak Ire of the Deep zones. Use Bloodlust/Drums at the start of Phase Two for maximum damage. Coordination, interrupts, and precise movement are key to success.
- Tanks: Two tanks are required, one for each ship in Phase One. Tanks must manage debuffs and taunt swaps effectively.
- Healers: Strong AoE healers are preferred due to frequent raid-wide damage. Classes like
- DPS: Classes with strong single-target and AoE damage are ideal.
- Utility: Classes with grips (e.g.,

![]() Tips:
Tips:
Phase One:
- Split the raid evenly between the two ships.
- Sister Katherine:
- Dodge Voltaic Flash lightning orbs by staying in the middle of the ship.
- Move away from allies when marked with Crackling Lightning.
- Break Electric Shroud and interrupt Storm’s Empowerment.
- Brother Joseph:
- Place Sea Storm patches in the middle of the ship.
- Kill the Tempting Siren quickly to save players affected by Tempting Song.
- Break Tidal Shroud and interrupt Storm’s Empowerment.
- Ensure both bosses die within a short time frame to minimize Laminaria’s energy gain.
Phase Two:
- Stack and move as a group to minimize Frozen Tidepool patches.
- Players with Storm’s Wail should clear Frozen Tidepools before spawning Energized Storm adds far from the boss.
- Tanks should taunt swap to manage Kelp-Wrapped Fists and apply debuffs to Energized Storm adds.
- Soak Ire of the Deep zones with multiple players to avoid raid-wide damage.
- Phase One:
- Assign roles clearly: one tank, half the healers, and half the DPS per ship.
- Use the Translocation Pedestal to correct mistakes in ship assignments before the fight begins.
- Focus on interrupting Storm’s Empowerment to prevent Laminaria from gaining energy.
- Communicate to ensure both bosses die simultaneously.
- Phase Two:
- Keep Laminaria in melee range to avoid Reaching Attack.
- Manage Energized Storm adds by slowing and killing them before they reach the boss.
- Use cooldowns and Bloodlust early in Phase Two to burn down Laminaria quickly.
- Assign players to soak Ire of the Deep zones, using immunities or damage reduction cooldowns if necessary.
| Type of Armor | Item | Loot type |
| Cloth | Cowl of Tideborne Omens | Head |
| Wavecaller Leggings | Legs | |
| Leather | Kelp-Laced Greaves | Legs |
| Tidemother’s Cover | Head | |
| Slimy Kelpweavers | Hands | |
| Tidal Shroud Spaulders | Shoulder | |
| Plate | Sea Swell Chestplate | Chest |
| Stormwrought Gauntlets | Hands | |
| Any | Storm-Toothed Kasuyu | 1H Axe |
| Docksplitter Siege Hook | Polearm | |
| Blockade Bulwark | Shield | |
| Crash of Tides | 2H Axe | |
| Siren’s Song | Wand |
Lady Jaina Proudmoore
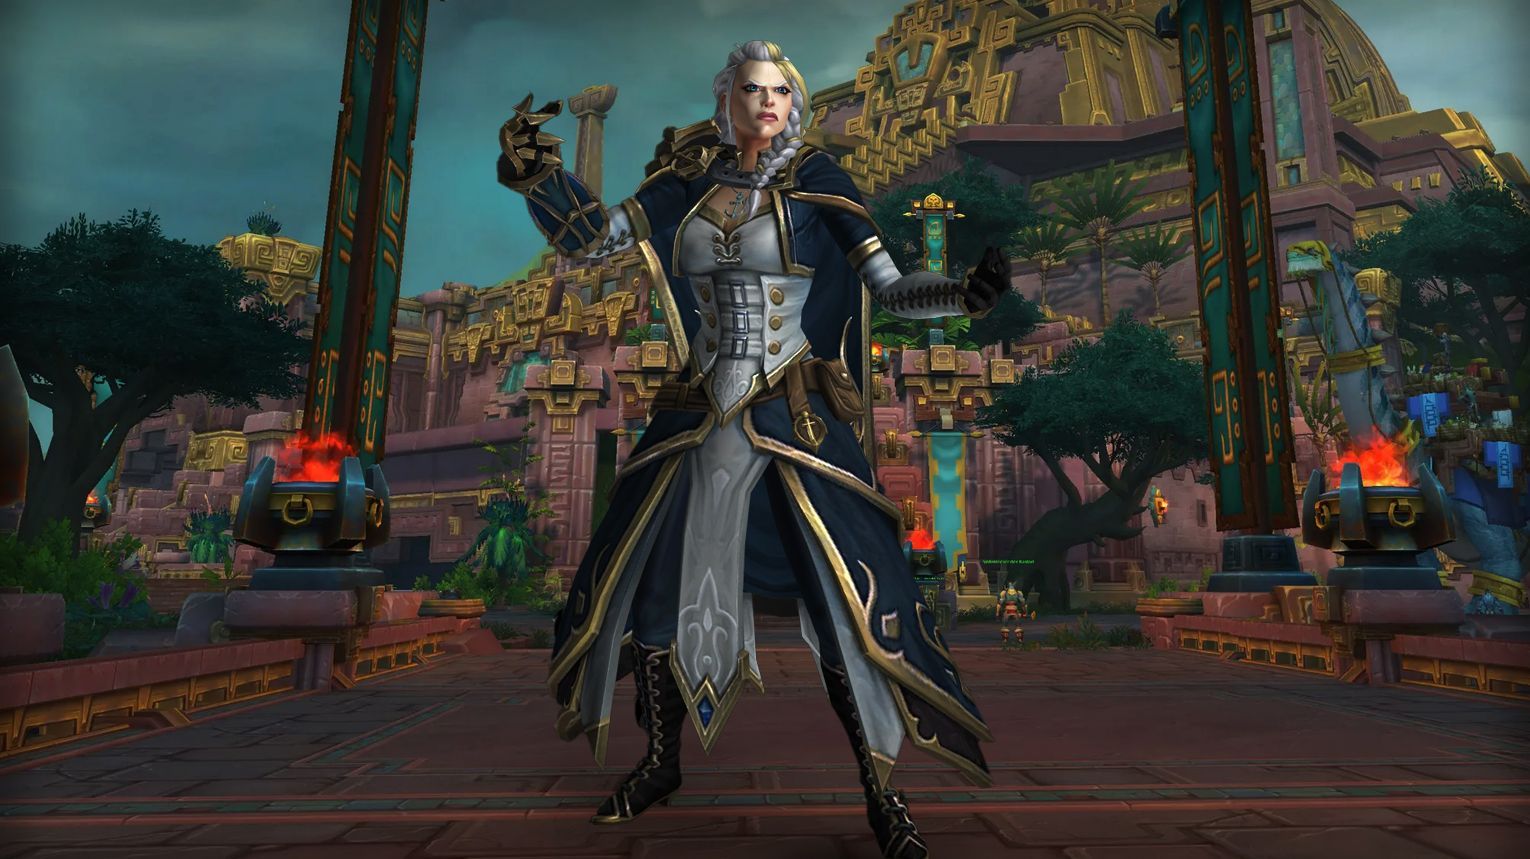
Lady Jaina Proudmoore is a three-phase boss fight in Battle of Dazar’alor with two intermissions. In Phase 1, fight her on a ship while repelling Corsairs and managing mechanics like Avalanche and Ring of Ice. Phase 2 takes place on a frozen arena, where players must use Burning Explosion to reset Chilling Touch stacks and avoid Glacial Ray and Icefall. Phase 3 is a race to defeat Jaina before Prismatic Images overwhelm the raid, while managing Frozen Solid players and Shattering Lance. Use Bloodlust during Intermission 2 to destroy the Wall of Ice and save it for critical moments in Phase 3.
- Tanks: Classes with strong mobility and cooldowns to manage Chilling Touch stacks and Ice Shard damage.
- Healers: Classes with strong dispels (e.g.,
- DPS: Classes with strong AoE and burst damage to handle adds (Prismatic Images, Tide Elemental) and free Frozen Solid players quickly.
- Utility:
![]() Tips:
Tips:
- All Phases:
- Avoid gaining Chilling Touch stacks whenever possible.
- Free Frozen Solid players immediately by destroying their ice blocks.
- Tanks should taunt swap to manage Chilling Touch stacks from Ice Shard.
- Phase 1:
- Move away from allies when marked with Avalanche.
- Use Searing Pitch patches to counter Ring of Ice.
- Throw Set Charge barrels overboard before they explode.
- Use Zandalari Ballistas to repel Kul Tiran Corsairs.
- Phase 2:
- Use Burning Explosion from Unexploded Ordnance barrels to reset Chilling Touch stacks.
- Avoid Hand of Frost projectiles from Avalanche.
- Dodge Glacial Ray and Icefall comets.
- Phase 3:
- Stagger Chilling Touch stacks to avoid the entire raid being Frozen Solid at once.
- Focus down Prismatic Images quickly to reduce replicated abilities.
- Tanks must face Jaina away from the raid during Crystalline Dust.
- Phase 1:
- Tanks taunt swap at 10-12 Chilling Touch stacks.
- Marked players with Avalanche should clear Searing Pitch patches while leaving one for Ring of Ice.
- Use Zandalari Ballistas to repel Corsairs and clear burning ballistas with Avalanche.
- Throw Set Charge barrels overboard immediately.
- Intermission 1:
- Dodge Glacial Shards and Blistering Tornadoes while moving to interrupt Howling Winds.
- Use immunities (e.g., Rogue’s Cloak of Shadows) to bypass mechanics.
- Phase 2:
- Use Broadside to remove Refractive Ice from Unexploded Ordnance barrels.
- Trigger Burning Explosion when Chilling Touch stacks are high (13-18).
- Move away from the raid when targeted by Siegebreaker Blast.
- Intermission 2:
- Use Bloodlust/Heroism to destroy the Wall of Ice quickly.
- Kill Tide Elemental and avoid Frost Nova.
- Free Nathanos from ice to interrupt Flash Freeze.
- Phase 3:
- Stagger Chilling Touch stacks by having some players stand in Arctic Ground.
- Free Frozen Solid players before Shattering Lance hits them.
- Focus down Prismatic Images immediately.
| Type of Armor | Item | Loot type |
| Cloth | Robes of Biting Cold | Chest |
| Leather | Admiralty’s Ceremonial Epaulets | Shoulder |
| Embossed Deckwalkers | Feet | |
| Flag Officer’s Overcoat | Chest | |
| Icebinder’s Bracers | Wrist | |
| Plate | Glaciercrest Helm | Head |
| Hullplate Girdle | Waist | |
| Any | Glacial Tidestorm | Mount |
| Fogbreaker, Light of the Sea | Off-hand | |
| Daelin Proudmoore’s Saber | 1H Sword | |
| Lord Admiral’s Signet | Ring | |
| Everchill Anchor | Trinket | |
| Tidestorm Codex | Trinket |
Battle of Dazar’alor Achievements List
| Achievement | Requirement |
| Death’s Bargain | Witness the retelling of your allies’ heroic efforts in the Battle of Dazar’alor. |
| Might of the Alliance | Witness the retelling of your allies’ valiant efforts in the Battle of Dazar’alor. |
| Defense of Dazar’alor | Defeat bosses in the BoD. |
| Empire’s Fall | Kill bosses in the BoD. |
| Siege of Dazar’alor | Slay bosses in the BoD. |
| Victory or Death | Defeat bosses in the BoD. |
| Battle of Dazar’alor | Kill the Bosses of Battle of Dazar’alot on Normal difficulty or higher. |
| Battle of Dazar’alor Guild Run | Slay the bosses of Battle of Dazar’alor on Normal difficulty or higher, while in a guild group. |
| Ahead of the Curve: Lady Jaina Proudmoore | Defeat Lady Jaina Proudmoore on Heroic difficulty or higher, before the release of the next raid tier. |
| Cutting Edge: Lady Jaina Proudmoore | Kill Lady Jaina Proudmoore on Mythic difficulty, before the release of the next raid tier. |
| Mythic: Lady Jaina Proudmoore | Slay Lady Jaina Proudmoore on Mythic difficulty. |
| Mythic: Lady Jaina Proudmoore Guild Run | Defeat Lady Jaina Proudmoore on Mythic difficulty while in a guild group. |
| Hall of Fame: Lady Jaina Proudmoore (Alliance) | Among the first one hundred Alliance guilds worldwide to defeat Lady Jaina Proudmoore on Mythic difficulty. |
| Hall of Fame: Lady Jaina Proudmoore (Horde) | Among the first one hundred Horde guilds worldwide to defeat Lady Jaina Proudmoore on Mythic difficulty. |
| Mythic: Champion of the Light | Kill the Champion of the Light on Mythic difficulty. |
| Mythic: Conclave of the Chosen | Slay Conclave of the Chosen on Mythic difficulty. |
| Mythic: Grong | Defeat Grong on Mythic difficulty. |
| Mythic: Jadefire Masters | Kill Ma’ra Grimfang and Anathos Firecaller on Mythic difficulty. |
| Mythic: King Rastakhan | Slay King Rastakhan on Mythic difficulty. |
| Mythic: Mekkatorque | Defeat Gelbin Mekkatorque on Mythic difficulty. |
| Mythic: Opulence | Kill Opulence on Mythic difficulty. |
| Mythic: Stormwall Blockade | Slay Stormwall Blockade on Mythic difficulty. |
| Daz’aling Attire | Collect an armor set from the Battle of Dazar’alor. |
| Glory of the Dazar’alor Raider | Complete the Battle of Dazar’alor raid achievements. |
| Barrel of Monkeys | Defeat Grong after destroying 6 Barrels on Normal Difficulty or higher. |
| Can I Get a Hek Hek Hek Yeah? | Defeat the Champion of the Light after stealing 3 shinies from each of the Crusaders, Disciples and Champion of the Light on Normal Difficulty or higher. |
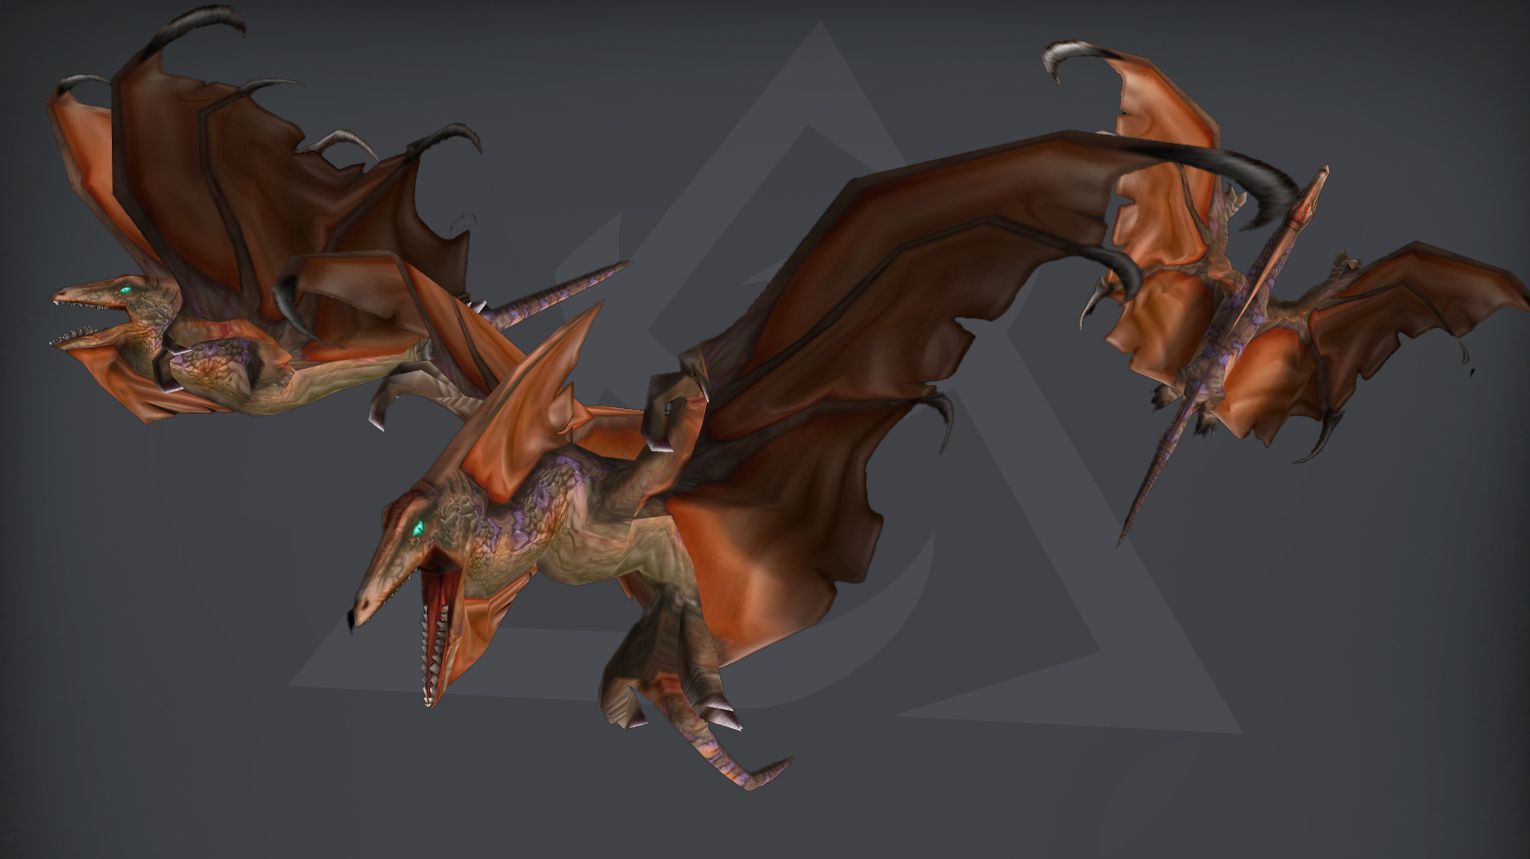
| Hidden Dragon | Hatch the cloud serpent egg during the Jadefire Masters encounter on Normal difficulty or higher. |
| I Got Next! | Kill High Tinker Mekkatorque after defeating the Blingtron MK2 on Normal Difficulty or higher. |
| Praise the Sunflower | Slay the Opulence after /praising a Singing Sunflower while under the effects of Brilliant Aura on Normal Difficulty or higher. |
| Snow Fun Allowed | Build a Frosty Snowmon then destroy it before defeating Lady Jaina Proudmoore on Normal Difficulty or higher. |
| Walk the Dinosaur | Defeat the Conclave of the Chosen without killing all the initial raptors summoned by Gonk’s Wrath on Normal difficulty or higher. |
| De Lurker Be’loa | Fish up the De Lurker Be’loa, then defeat the Stormwall Blockade on Normal Difficulty or higher. |
| We Got Spirit, How About You? | Kill King Rastakhan with all Phantoms still alive on Normal difficulty or higher. |


Comments: