
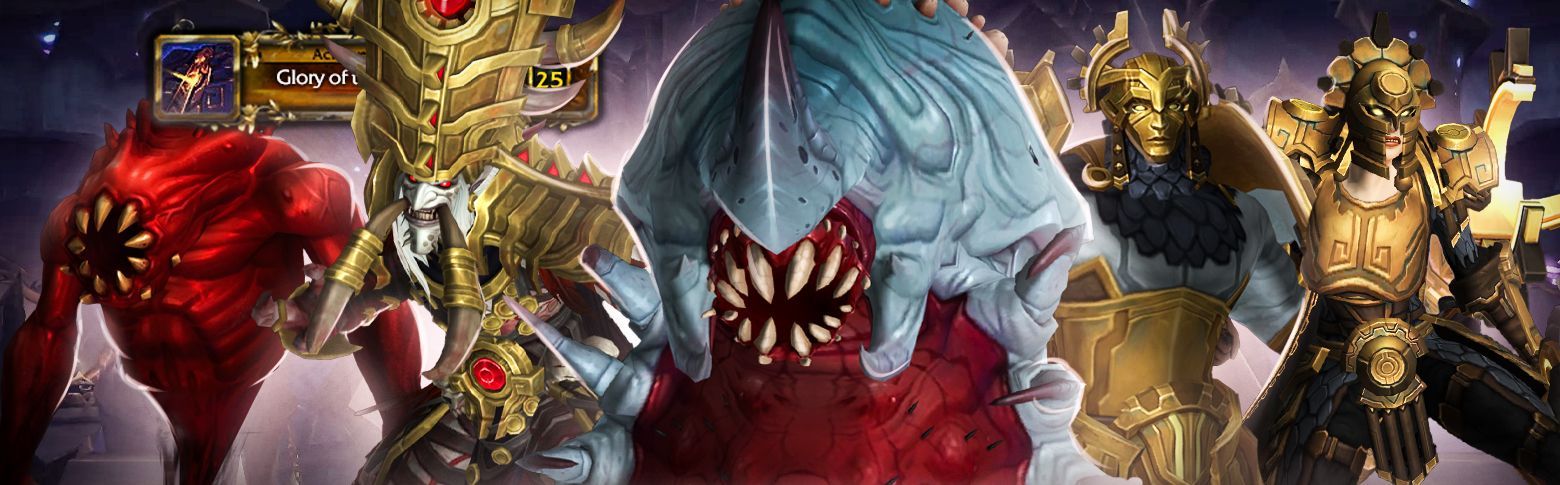
Uldir, the first raid of World of Warcraft: Battle for Azeroth, opened on September 4th. In WoW Retail this PvE instance remains a valuable source of transmogs, mounts, and collectibles that many players are farming weekly. This underground facility in Nazmir features 8 bosses, including G’huun, with unique armor sets, weapons, and achievements to earn.

- Uldir location
- Bosses and their rewards
- Available mounts, weapons, and transmogs
- Achievements you can earn
- Can you solo Uldir?
If you’re searching for powerful Battle for Azeroth tier sets, unique Titanforged rewards, and G’huun’s most terrifying treasures, our Uldir carry service is your perfect solution. You’ll explore this Titan research facility with our elite raiding team, who have mastered every encounter from Normal and Heroic to the grueling Mythic G’huun encounter – the first major raid of BfA!

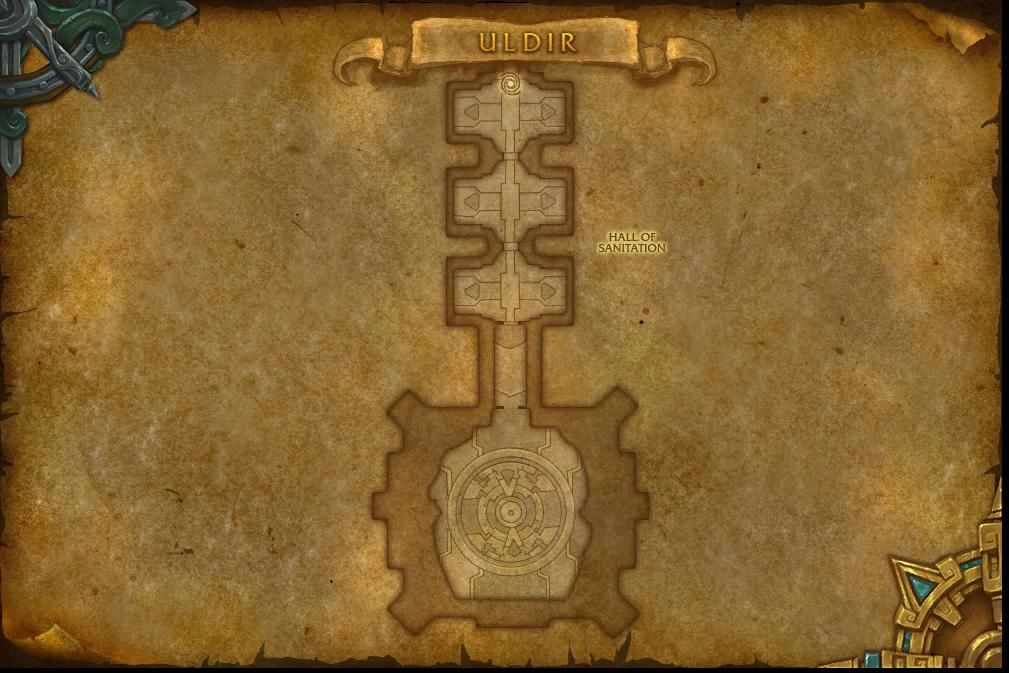
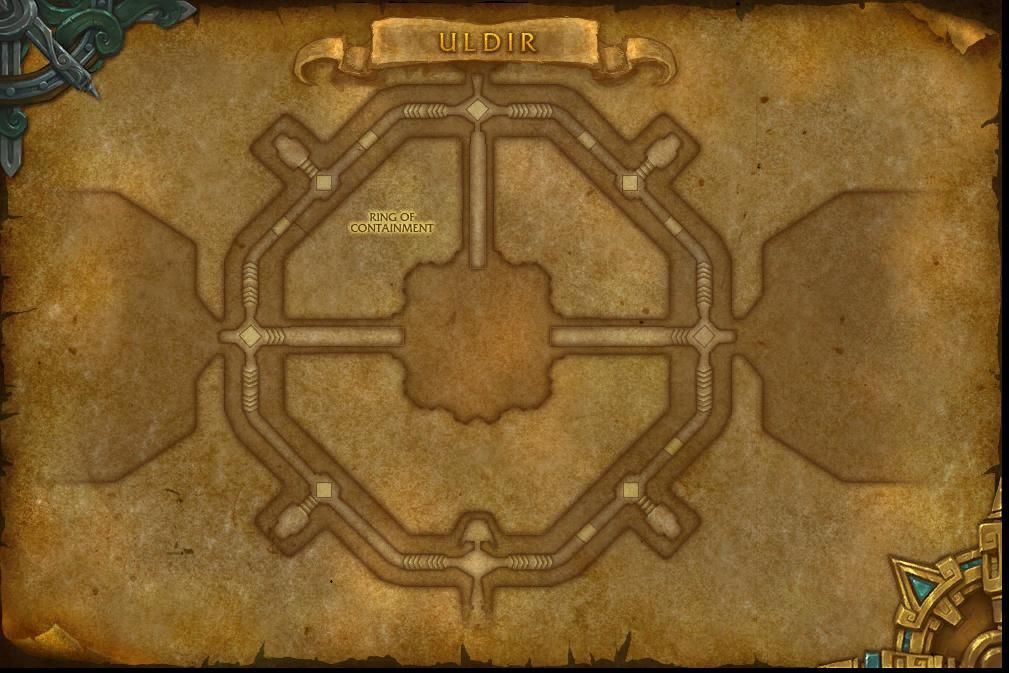
Uldir Entrance and Subregions
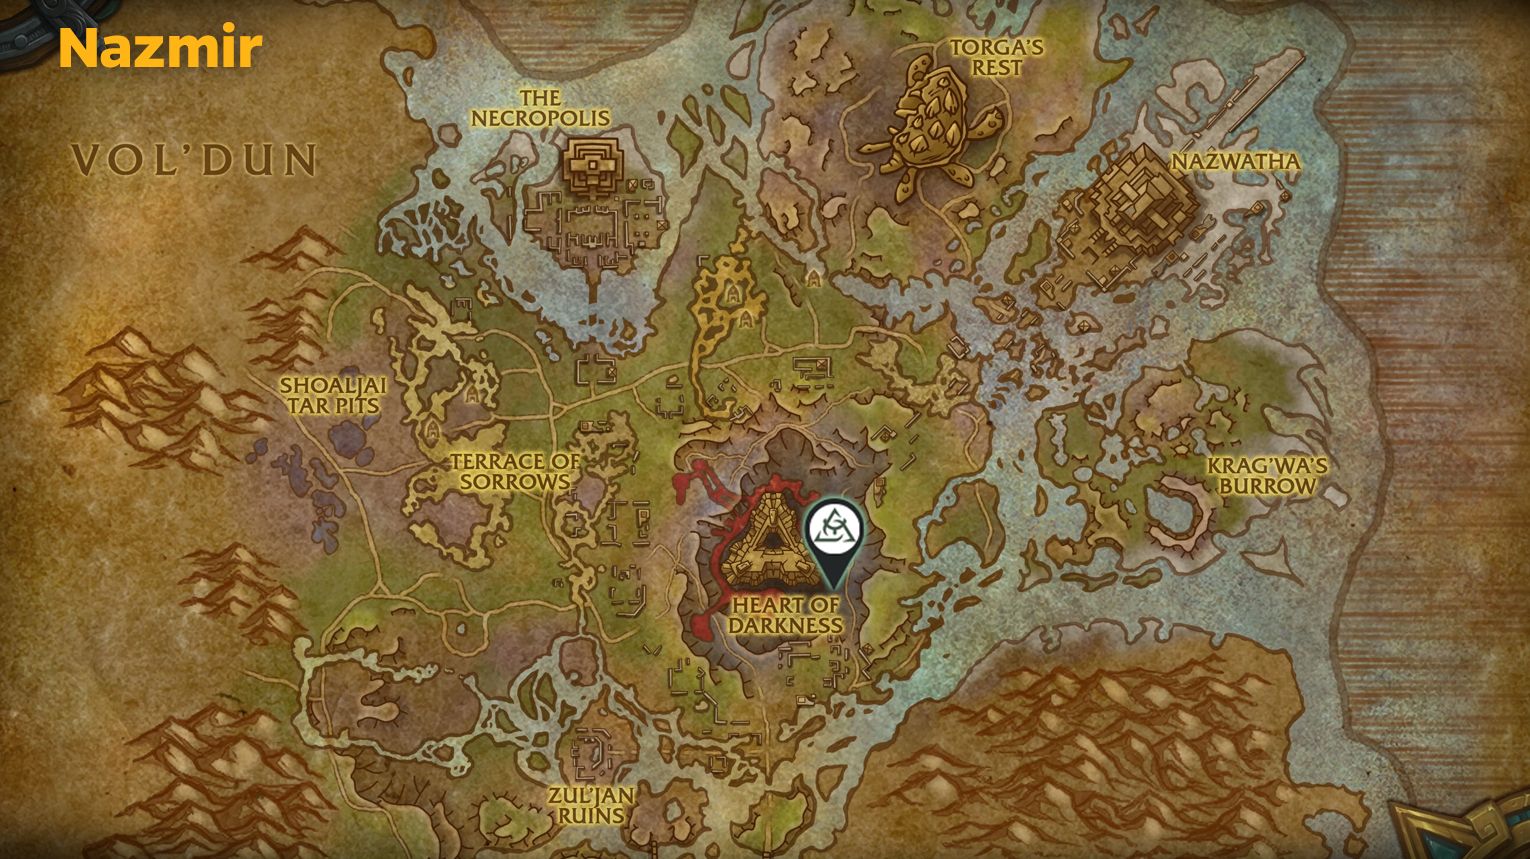
Uldir is located in the Nazmir zone in World of Warcraft: Battle for Azeroth. To reach it, travel to Nazmir in Zandalar. If you’re Alliance, use the Grimwatt’s Crash flight point and upgrade the outpost to unlock a fast Crawg named Spud, which will take you to Uldir’s entrance. If you’re Horde, fly to Nesingwary’s Gameland and use a glider to reach Uldir directly. Alternatively, fly to Zul’jan Ruins and walk to the entrance.
The entrance to Uldir is at the center of Nazmir, near the coordinates 62, 38. Once you arrive, simply walk through the massive titan doors to enter the raid and begin your exploration.
Inside, you’ll move through different sections as you fight your way to G’huun, the final boss.

- The Siege of Uldir (Taloc)
- The Descent (MOTHER)
- The Hall of Sanitation (Fetid Devourer)
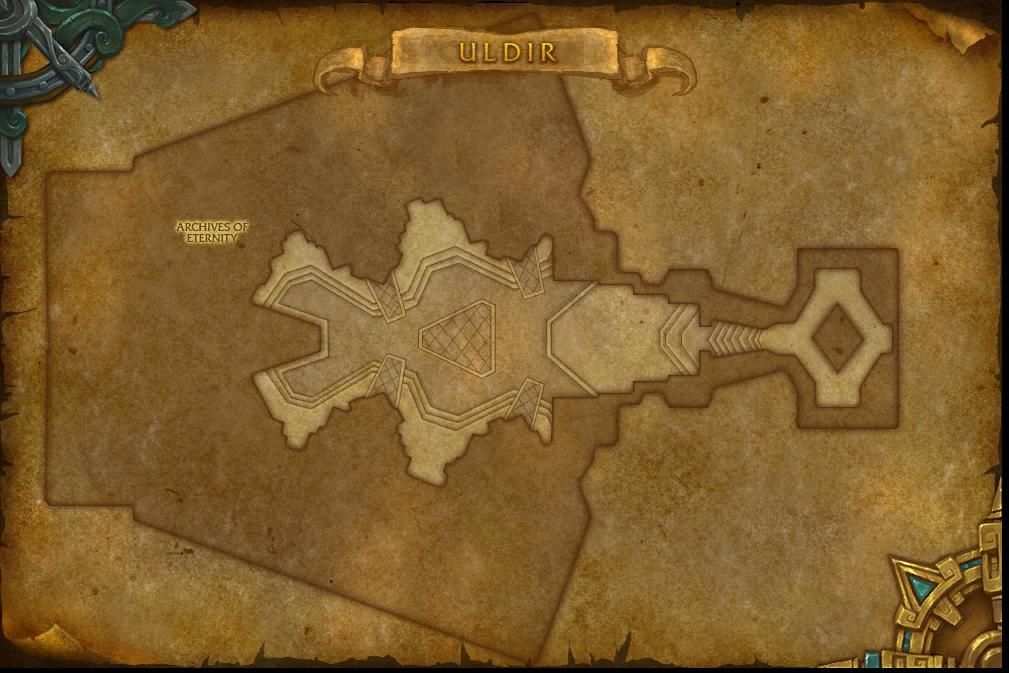
- The Archives of Eternity (Zek’voz)
- The Crimson Chasm (Vectis)
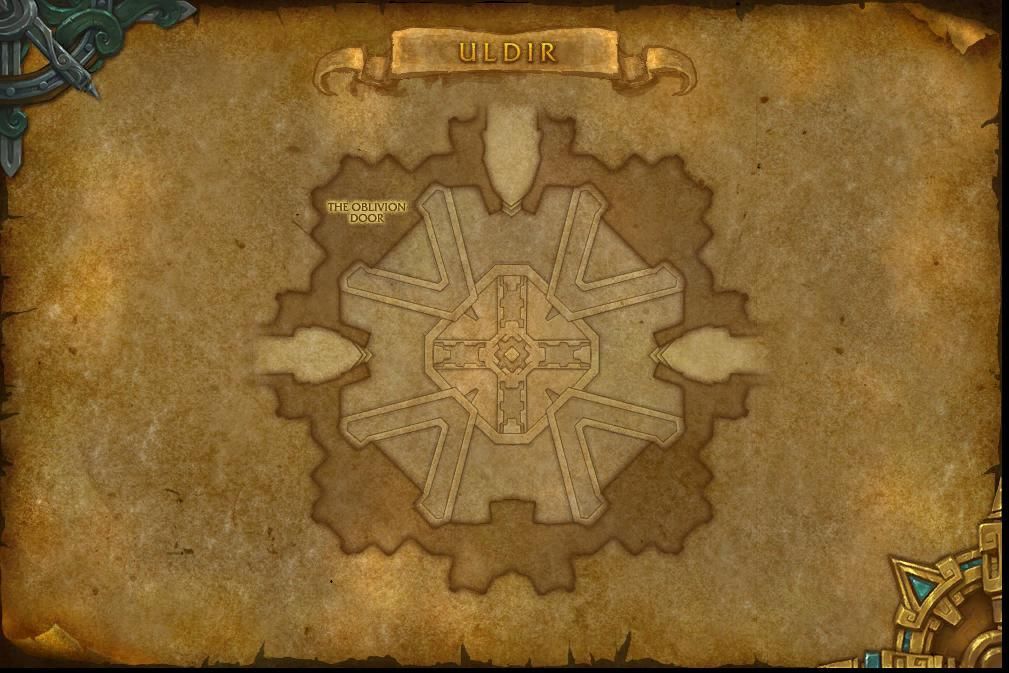
- The Oblivion Door (Zul)
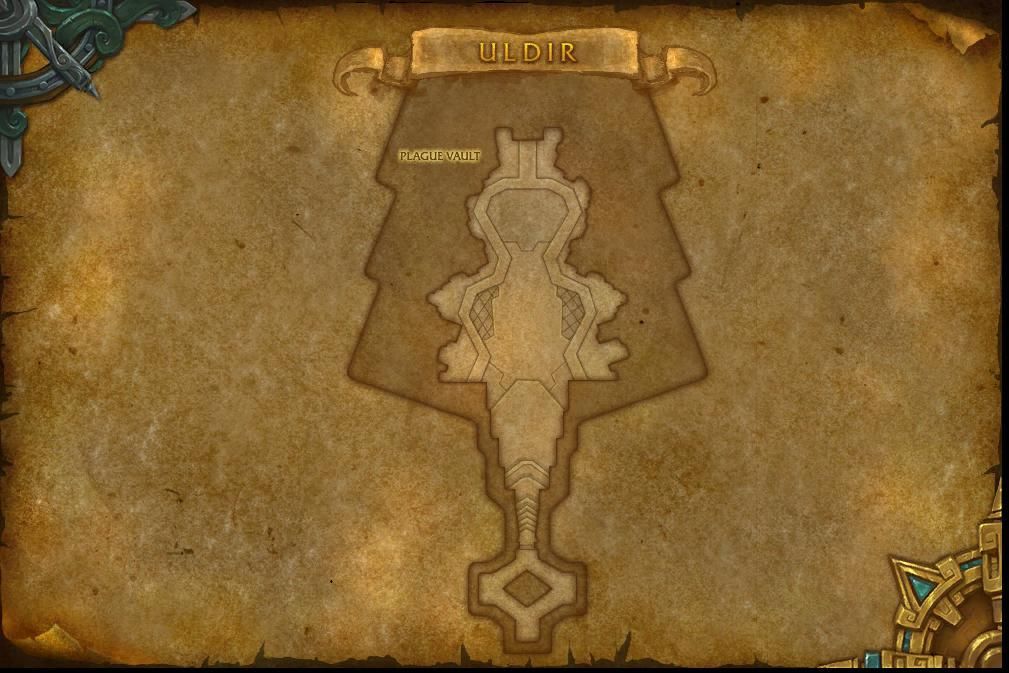
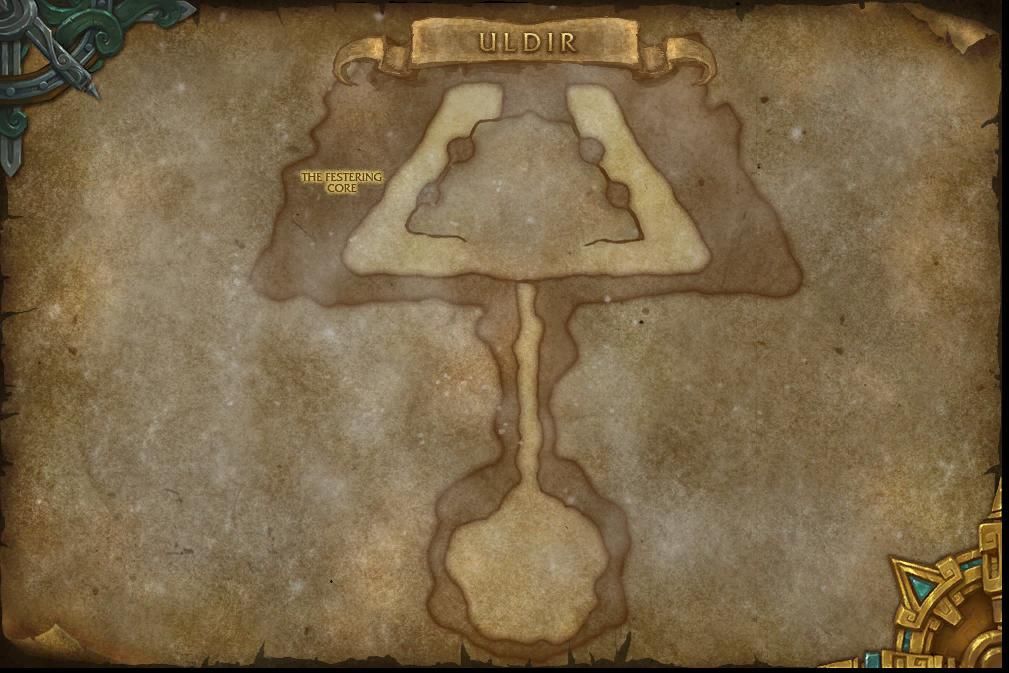
- The Festering Core (Mythrax)
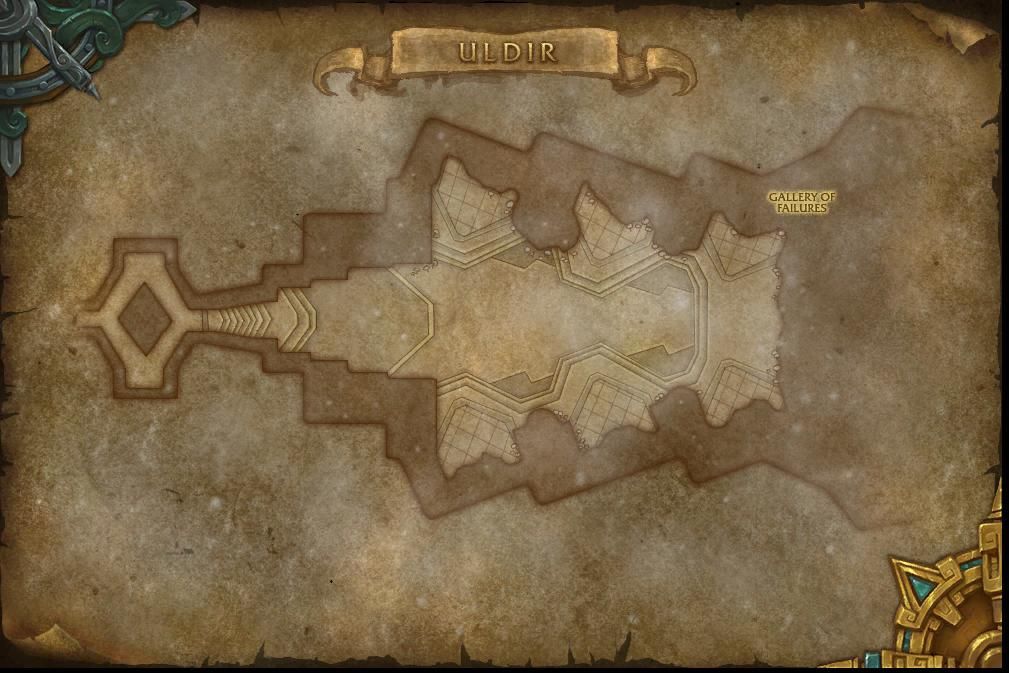
- The Gilded Gate (G’huun)
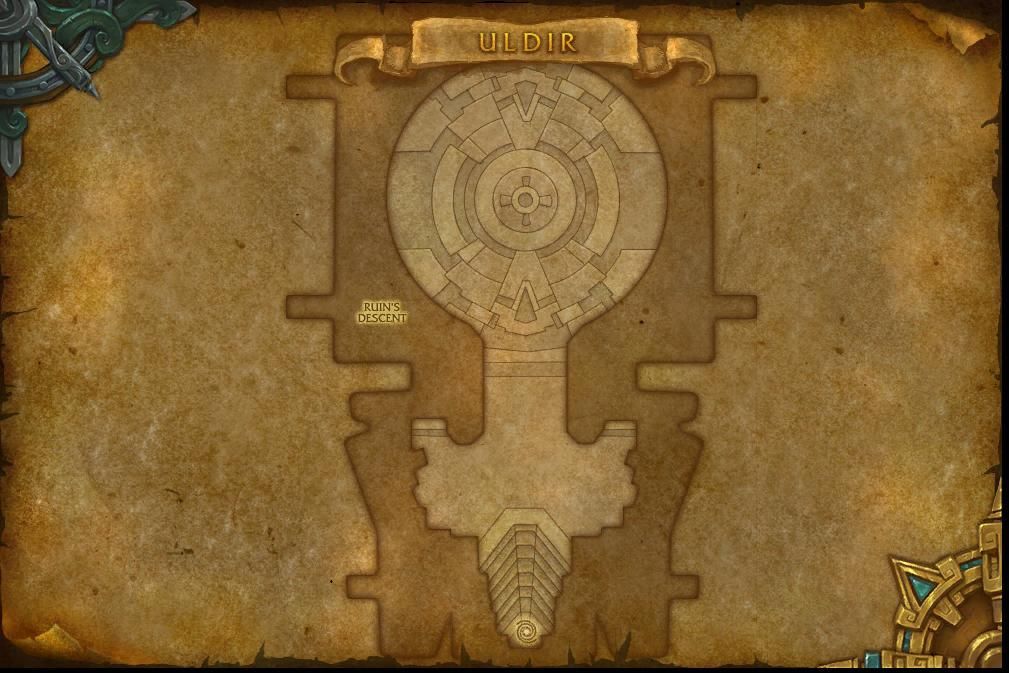
Each section has its own challenges and bosses, which we’ll briefly overview below.
Uldir Collectibles: Mounts, Pets, Transmogs
| Collectible | Source | Obtainable / Not Obtainable |
| Uldir Tier Sets | ||
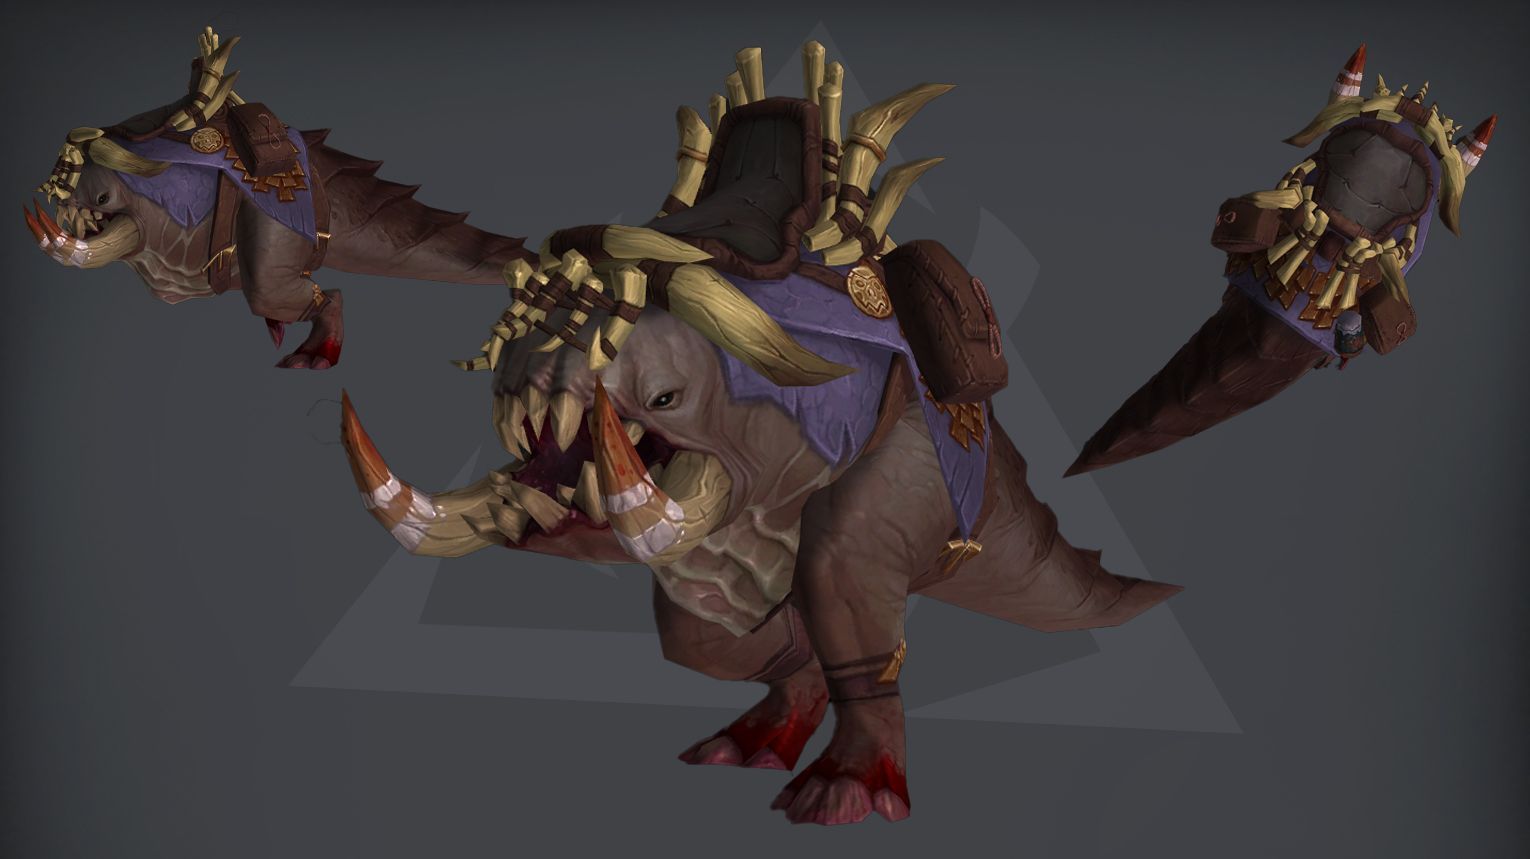
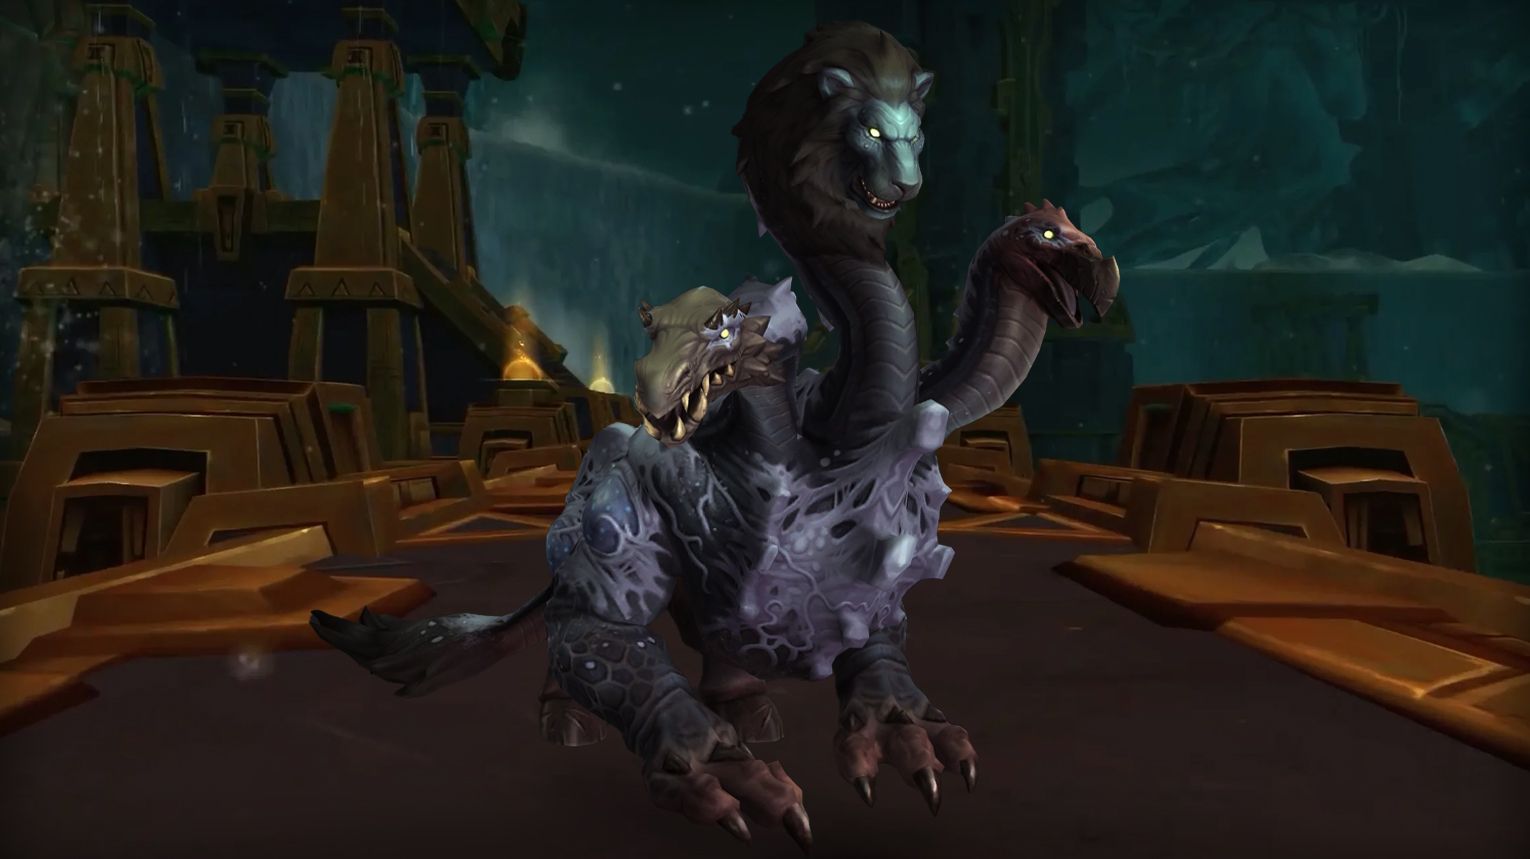
| Bloodgorged Crawg | Glory of the Uldir Raider | Yes |
Uldir Bosses Overview
Uldir is a titan-built underground facility in World of Warcraft: Battle for Azeroth, where players face the horrors unleashed by failed experiments on the Old Gods in Nazmir. The raid has eight bosses, each showcasing the dark and twisted results of the titans’ research.
From Taloc, the corrupted titan construct guarding the entrance, to G’huun, the monstrous embodiment of decay and corruption, each boss presents unique challenges. Encounters range from strategic fights like MOTHER, who summons various titan defenses, to intense survival tests against Fetid Devourer‘s relentless hunger. The final battle against G’huun is a climactic struggle to purge the source of corruption and save Azeroth.
Can You Solo Uldir in The War Within?

Yes, Uldir is soloable in World of Warcraft: The War Within, especially on LFR, Normal, and Heroic difficulties. Most bosses can be brute-forced with high item level gear, but a few fights still have mechanics that make soloing more difficult.

- Item Level: The higher your gear, the faster you’ll clear the raid. Around ilvl 450+ makes it much easier.
- Class & Spec: Tanky classes and self-healing specs (Blood DK, Guardian Druid, Vengeance DH) perform best.
- Mechanics: Some fights require specific strategies to avoid instant deaths or soft enrage mechanics.
Here’s a brief look at how each encounter plays out when soloing.

- Taloc – Simple fight. Dodge pools on the floor, keep attacking.
- MOTHER – Move through the rooms one at a time while killing adds.
- Fetid Devourer – High health pool, but nothing too complex.
- Zek’voz – Avoid lasers and kill adds quickly.
- Vectis – The infection debuff stacks over time, so use self-healing or strong defensives to survive.
- Zul – Kill adds quickly or they will heal the boss. Some classes with poor AoE may struggle.
- Mythrax the Unraveler – Can be annoying due to energy drain mechanics. You need strong burst damage to avoid being overwhelmed by adds.
- G’huun – The final boss is soloable, but handling the orb mechanic can be tricky. Some classes with pets or movement abilities can handle it better.
- LFR/Normal/Heroic: Completely soloable with good gear.
- Mythic: Requires high DPS to avoid certain mechanics, but possible for some classes.
- Future Potential: As gear improves, soloing will become even easier.
If you’re farming Uldir for transmog or the Crawg mount from the Glory of the Uldir Raider achievement, it is very doable solo in WoW TWW. The video below perfectly shows how you can clear this BFA raid solo on Mythic difficulty. In addition, this guide briefly explains how to kill each boss, with recommended classes, strategy tips, and the best time to use Bloodlust or Drums of the Maelstrom.
Taloc
Taloc is the first boss in Uldir, the initial raid in Battle for Azeroth. The encounter is divided into three phases, each with its own set of mechanics that the raid must handle. Taloc starts the fight at 60% health and transitions to the next phase at 35% health. The fight challenges the raid with a combination of positioning, movement, and add management.

 Tanks: Classes with high mobility (e.g.,
 Healers: Classes with strong spot-healing capabilities (e.g.,

 DPS: Classes with strong AoE and cleave abilities (e.g.,


![]() Tips:
Tips:
General Tips:
- Phase 1:
- Stack Blood Storm pools on one side of the room to minimize space issues.
- Stay close to the boss to dodge Sanguine Static bolts.
- Move 30 yards away from the tank during Cudgel of Gore to avoid damage.
- Phase 2:
- Stack as a group to funnel Volatile Droplets for easier cleaving.
- Move as a group to avoid Blood Storm pools from Coalesced Blood adds.
- Avoid falling off the elevator!
- Phase 3:
- Use Bloodlust to quickly kill remaining Coalesced Blood adds.
- Tank Volatile Droplets near the edges to minimize raid damage.
- Spread out to handle increased Plasma Discharge targets.
Healer Tips:
- Spot-heal players affected by Plasma Discharge.
- Focus on healing the tank soaking Volatile Droplets in Phase 3.
Tank Tips:
- Keep Taloc centered in Phase 1 for easier raid movement.
- Use mobility spells to mitigate Cudgel of Gore damage.
- In Phase 2, intercept Volatile Droplets to prevent them from reaching the group.
- In Phase 3, tank Coalesced Blood adds near the edges to keep the middle clear.
- Phase 1 (60% – 35%):
- Plasma Discharge: Affected players should move to one side of the room to drop Blood Storm pools together.
- Cudgel of Gore: The tank should stand near Blood Storm pools to clear them, while the raid moves 30 yards away.
- Sanguine Static: Sidestep the bolts or heal through the damage.
- Phase 2 (70 Seconds):
- Stack as a group to funnel Volatile Droplets into a line for easy cleaving.
- Move as a group to avoid Blood Storm pools from Coalesced Blood adds.
- Avoid falling off the elevator and watch for Uldir Defensive Beams on Heroic difficulty.
- Phase 3 (35% – 0%):
- Use Bloodlust to burn down remaining Coalesced Blood adds.
- Tank Volatile Droplets near the edges and focus on killing Taloc.
- Spread out to handle increased Plasma Discharge targets.


| Type of Armor | Item | Loot type |
| Cloth | Volatile Walkers | Feet |
| Leather | Bloodstorm Buckle | Waist |
| Gloves of Descending Madness | Hands | |
| Legguards of Coalescing Plasma | Legs | |
| Rubywrought Sparkguards | Wrist | |
| Plate | Crimson Colossus Armguards | Wrist |
| Greaves of Unending Vigil | Legs | |
| Any | Morass Prowler’s Cloak | Cloak |
| Golden Fleet Dagger | Dagger | |
| Rivermarsh Claws | Fist Weapon | |
| Zem’lan Chopper | 1H Axe | |
| Bleached Bone Club | 1H Mace | |
| Etched Bone Ring | Ring | |
| Construct Overcharger | Trinket | |
| Vigilant’s Bloodshaper | Trinket | |
| Zem’lan Cleaver | 2H Axe | |
| Khor, Hammer of the Corrupted | 2H Mace | |
| Bleached Bone Skullcracker | 2H mace | |
| Titanspark Animator | Wand | |
| Rivermarsh Wand | Wand |
MOTHER
MOTHER is a single-phase encounter in Uldir, the first raid in Battle for Azeroth. The fight takes place across three chambers, and the group must move between these chambers before they fill with lethal Cleansing Purge fire. The difficulty lies in coordinating the group to pass through the Defense Grid at the right pace to avoid being overwhelmed. MOTHER is the second boss in Uldir, and after defeating her, players can progress to other encounters.
- Tanks: One tank can solo-tank MOTHER by dodging Sanitizing Strike, but a second tank is recommended for handling adds.
- Healers: Strong AoE healers (e.g.,


- DPS:
- High-burst DPS with strong interrupts (e.g.,


- Ranged DPS are preferred for better mobility during Wind Tunnel and Uldir Defensive Beam.
- High-burst DPS with strong interrupts (e.g.,
![]() Tips:
Tips:
- Positioning:
- Tank MOTHER near the Defense Grid for quick transitions.
- Stack the raid in the middle of the chamber to avoid Purifying Flame patches and Wind Tunnel pushback.
- Defense Grid Transitions:
- Pass through in small groups (3-5 players) to manage raid-wide damage.
- Assign a tank and high-burst DPS to go first and handle adds.
- Healers should chain cooldowns during transitions.
- Add Management:
- Interrupt Clinging Corruption casts from Remnants of Corruption.
- Use stuns, silences, and displacements to control adds.
- Third Chamber:
- Uldir Defensive Beam:
- Watch for gaps in the beams and move quickly to avoid lethal damage.
- First Chamber:
- Tank MOTHER near the Defense Grid.
- Dodge Sanitizing Strike by sidestepping during the cast.
- Move out of Purifying Flame patches and stack in the middle to minimize fire spread.
- Start transitioning to the second chamber at ~50 energy.
- Second Chamber:
- Continue dodging mechanics and manage adds.
- Watch for Uldir Defensive Beam and move to safe spots.
- Transition to the third chamber before the second chamber fills with fire.
- Third Chamber:
- MOTHER takes 100% increased damage here. Use Bloodlust/Drums and all DPS cooldowns.
- Focus on surviving Uldir Defensive Beam and finishing the boss before the chamber fills with fire.
| Type of Armor | Item | Loot type |
| Cloth | Leggings of Lingering Infestation | Legs |
| Leather | Pathogenic Legwraps | Legs |
| Flame-Sterilized Spaulders | Shoulder | |
| Gloves of Involuntary Amputation | Hands | |
| Plate | Decontaminator’s Greatbelt | Waist |
| Gridrunner Galea | Head | |
| Any | Latticework Scalpel | Dagger |
| Uldir Subject Manifest | Off-hand | |
| Mother’s Twin Gaze | 1H Mace | |
| Rot-Scour Ring | Ring | |
| Glaive of the Keepers | Warglaive |
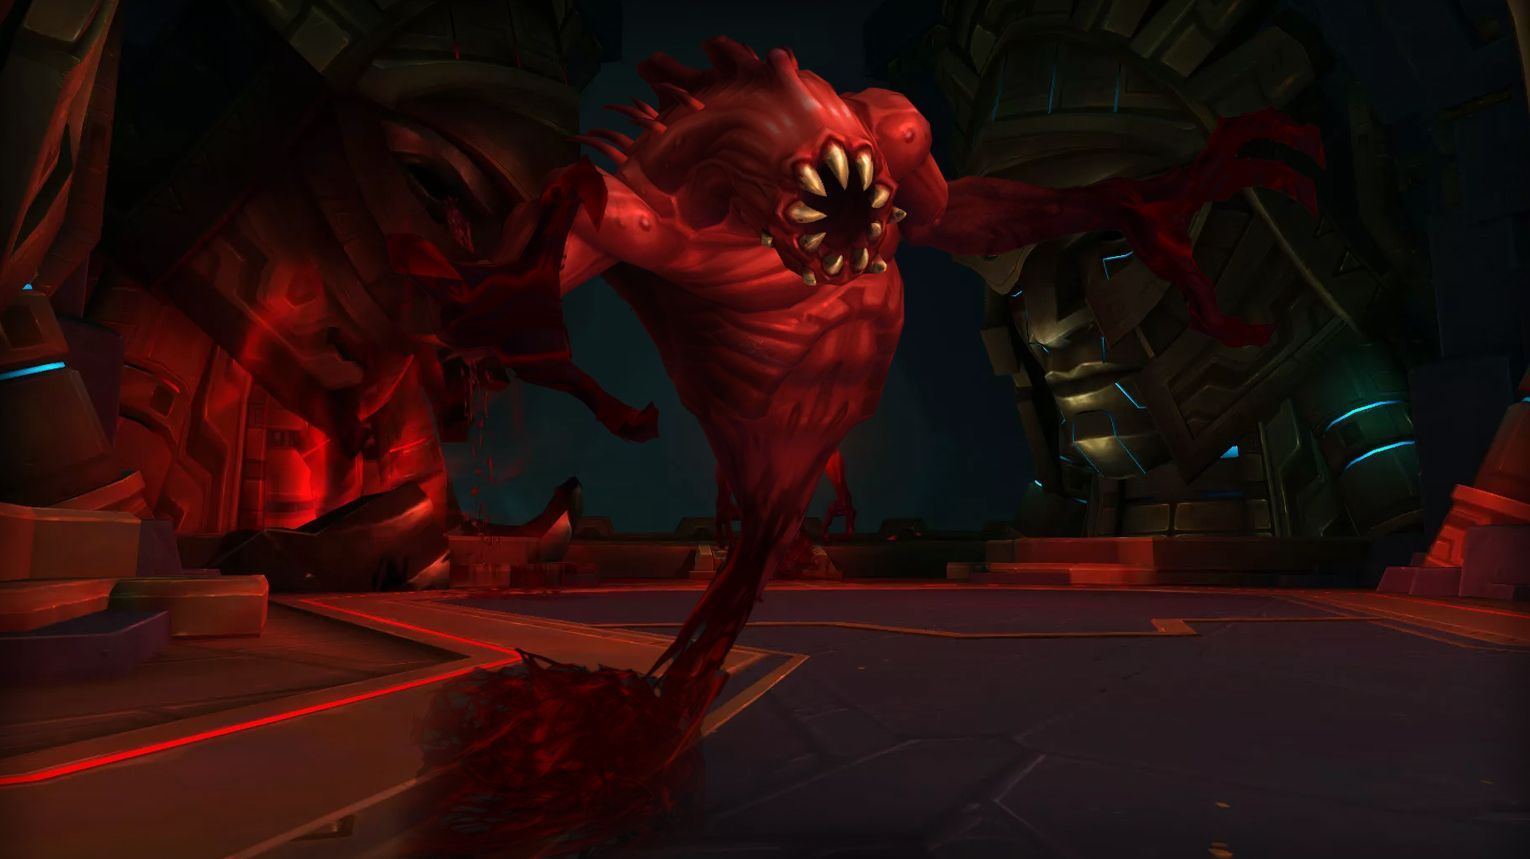
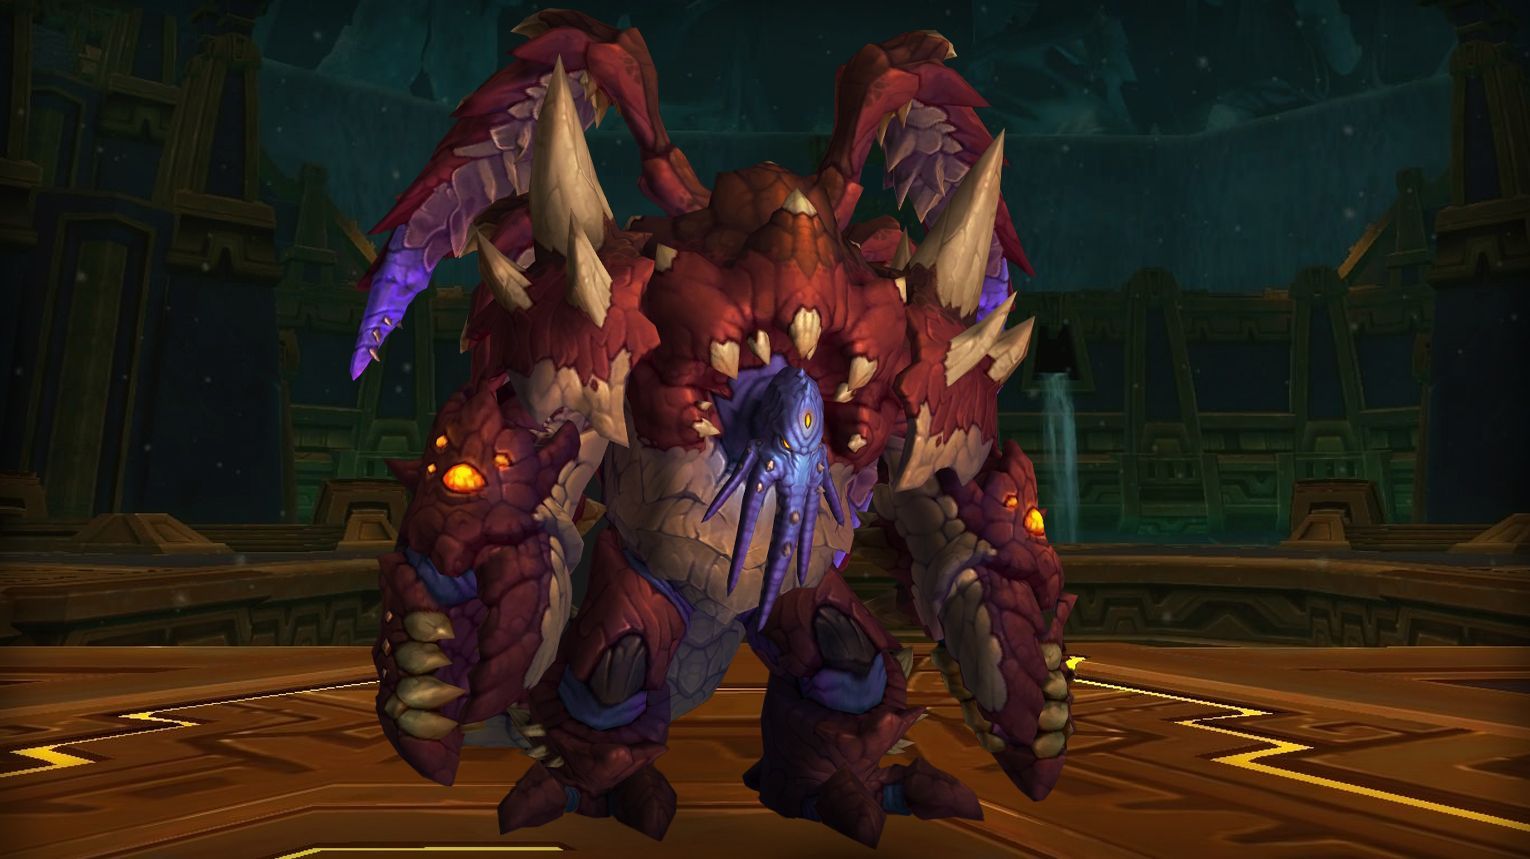
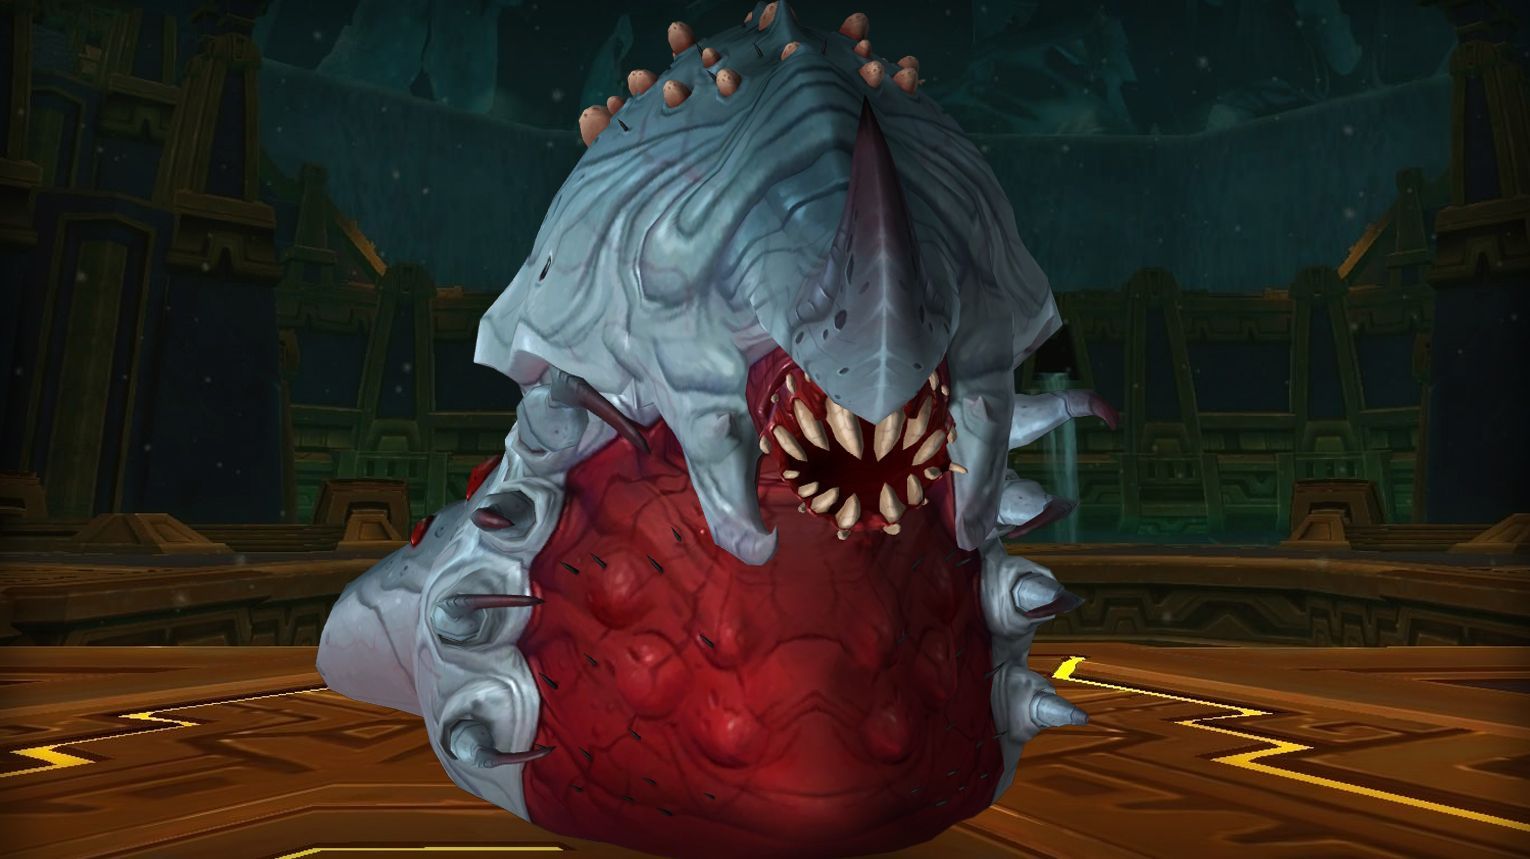
Fetid Devourer
Fetid Devourer is a single-phase DPS race in Uldir with a 6-minute enrage timer. Tanks must stack to handle Terrible Thrash, while healers focus on players with Malodorous Miasma and Putrid Paroxysm. DPS must quickly kill Corruption Corpuscles and sidestep Rotting Regurgitation. Use Bloodlust/Drums at 50% health (Fetid Frenzy) to maximize damage during the boss’s vulnerable phase.
- Tanks: Classes with strong active mitigation (e.g.,

- Healers: Classes with strong spot healing and cooldowns (e.g.,
- DPS: High burst damage and cleave capabilities (e.g.,
![]() Tips:
Tips:
- Tanks:
- Stand next to each other to ensure Terrible Thrash only hits tanks.
- Swap roles when the off-tank runs out of defensive cooldowns.
- Healers:
- Focus on players with Malodorous Miasma and prepare for heavy healing when it turns into Putrid Paroxysm.
- DPS:
- Kill Corruption Corpuscles within 20 seconds of spawning.
- Stand close to the boss to easily sidestep Rotting Regurgitation.
- Save cooldowns for when the boss reaches 50% health (Fetid Frenzy).
- Positioning:
- Tanks keep the boss in the center.
- DPS and healers stay close to the boss to avoid Rotting Regurgitation.
- Add Management:
- Assign DPS teams to focus on each Corruption Corpuscle.
- Tank the boss near one add to allow cleave damage.
- Cooldown Usage:
- Align offensive cooldowns with Fetid Frenzy (50% health).
- Use defensive cooldowns during high-damage phases (e.g., Putrid Paroxysm).
| Type of Armor | Item | Loot type |
| Cloth | Horrific Amalgam’s Hood | Head |
| Leather | Jerkin of the Aberrant Chimera | Chest |
| Fused Monstrosity Stompers | Feet | |
| Plate | Waste Disposal Crushers | Hands |
| Any | Fetid Horror’s Tanglecloak | Cloak |
| Biomelding Cleaver | 1H Axe | |
| Regurgitated Purifier’s Flamestaff | Staff | |
| Frenetic Corpuscle | Trinket |
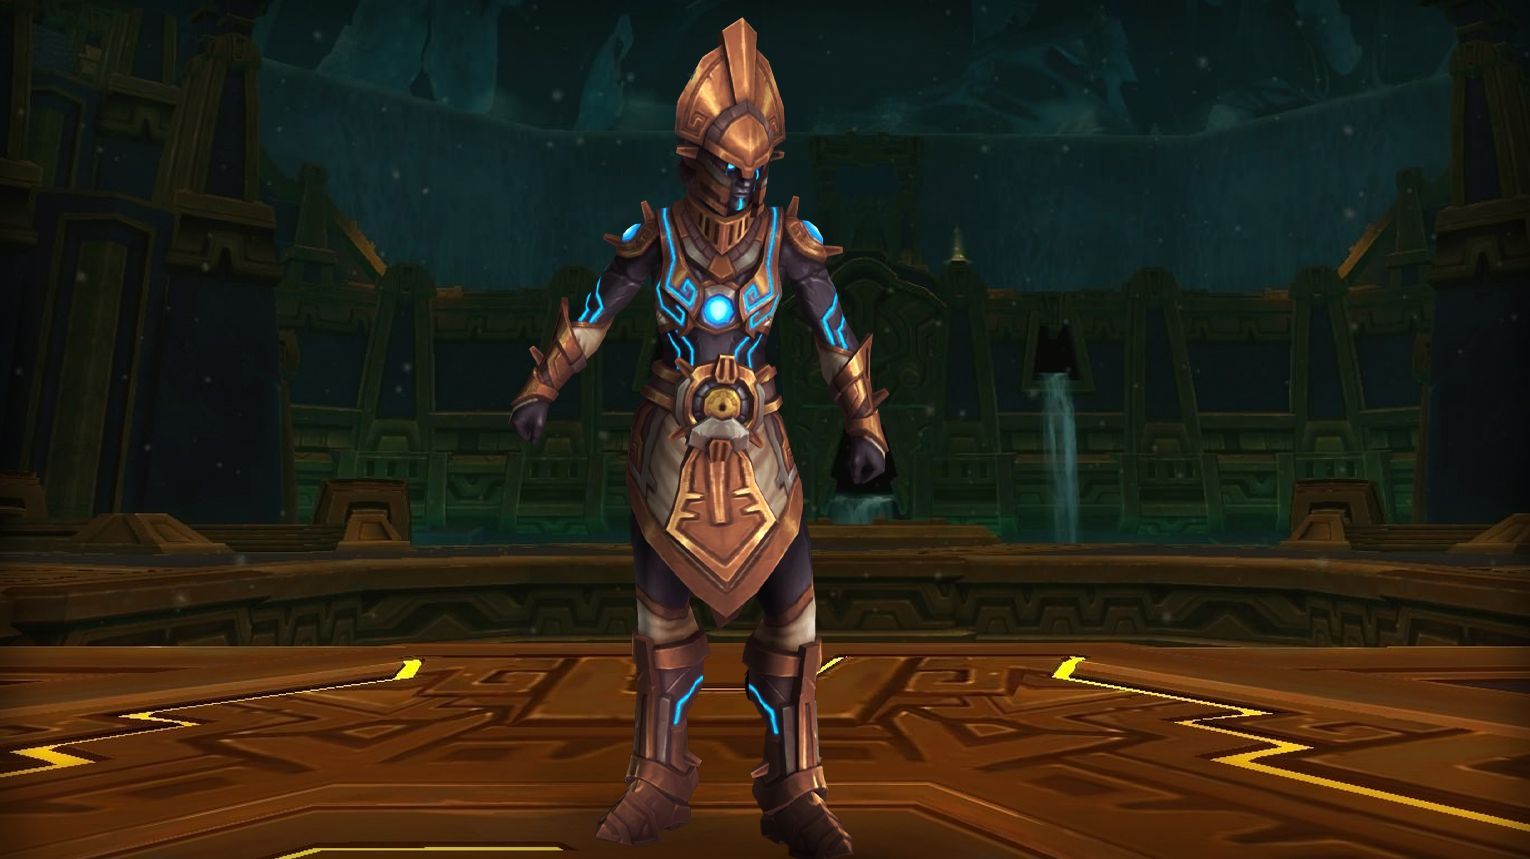
Zek’voz, Herald of N’Zoth

Zek’voz is a three-phase encounter in Uldir, the first raid in Battle for Azeroth. This boss challenges groups to manage multiple adds while avoiding dangerous area-of-effect abilities. Zek’voz is available on Normal and Heroic difficulties starting September 4th. After defeating Zek’voz, players can progress to the Zul encounter.
- Tanks: Classes with strong active mitigation and cooldowns (e.g.,
- Healers: Classes with strong raid-wide healing and damage reduction cooldowns (e.g.,
- DPS: Classes with strong cleave, interrupts, and crowd control (e.g.,
![]() Tips:
Tips:
- Phase 1:
- Dodge Eye Beam by moving away from allies when targeted.
- Stack behind the boss to funnel Silithid Warriors and cleave them down quickly.
- Use crowd control (stuns, slows) to manage adds.
- Phase 2:
- Place Ominous Clouds in low-traffic areas when Roiling Deceit expires.
- Avoid stepping into Ominous Clouds to prevent spawning Guardians of Yogg-Saron.
- Interrupt and prioritize killing Nerubian Voidweavers.
- Phase 3:
- Soak Orb of Corruption before it lands to prevent raid-wide damage.
- Damage the Will of the Corruptor mind-controlled player to break the effect.
- Use Bloodlust/Drums and damage cooldowns to burn the boss down quickly.
- Phase 1 (100% – 65%):
- Tanks: Position Zek’voz between the raid and Silithid Warriors to funnel adds.
- DPS: Focus on cleaving down Silithid Warriors while avoiding Eye Beam.
- Healers: Be prepared for burst damage from Eye Beam and Titan Spark.
- Phase 2 (65% – 30%):
- Tanks: Position Zek’voz near Nerubian Voidweavers for cleave damage.
- DPS: Interrupt Void Bolt casts and prioritize killing Nerubian Voidweavers.
- Healers: Watch for Roiling Deceit and Ominous Cloud damage.
- Phase 3 (30% – 0%):
- Tanks: Maintain boss positioning while managing Orb of Corruption.
- DPS: Soak Orb of Corruption and nuke the boss. Break Will of the Corruptor quickly.
- Healers: Focus on raid-wide healing as Titan Spark damage increases.
| Type of Armor | Item | Loot type |
| Cloth | Void-Lashed Wristband | Wrist |
| Mantle of Contained Corruption | Shoulder | |
| Leather | Quarantine Protocol Treads | Feet |
| Replicated Chitin Cord | Waist | |
| Chainvest of Assured Quality | Chest | |
| Titanspark Energy Girdle | Waist | |
| Plate | Warboots of Absolute Eradication | Feet |
| Greaves of Creeping Darkness | Legs | |
| Any | Zem’lan Dagger | Dagger |
| Warport Hex Focus | Off-hand | |
| Golden Fleet Mojo Charm | Off-hand | |
| Zem’lan Chopper | 1H Axe | |
| Containment Analysis Baton | 1H Mace | |
| Bleached Bone Club | 1H Mace | |
| Bleached Bone Cutlass | 1H Sword | |
| Void-Binder | Polearm | |
| Ring of the Infinite Void | Ring | |
| Bleached Bone Shield | Shield | |
| Zem’lan Pummeler | Staff | |
| Disc of Systematic Regression | Trinket | |
| Zocali Warglaive | Warglaive |
Vectis
Vectis is a boss encounter in the Uldir raid from the Battle for Azeroth expansion. The fight alternates between two phases on a set timer, requiring careful management of the Omega Vector debuff through precise player positioning. Vectis is the third, fourth, or fifth boss in Uldir. After defeating Vectis, players can progress towards the Zul encounter.
- Tanks: High-mobility tanks are preferred for soaking Plague Bombs in Phase 2.
- Healers: Strong single-target and raid healers are crucial due to high damage from Contagion and Lingering Infection stacks.
- DPS: Classes with strong cleave/AoE damage are ideal for dealing with Plague Amalgam adds and maintaining boss damage.
![]() Tips:
Tips:
General Tips
- Phase 1:
- Form three evenly sized groups to manage Omega Vector debuffs.
- Keep groups 10-15 yards apart to prevent debuffs from jumping between groups.
- Move 5 yards away from players affected by Gestate to avoid splash damage.
- Use personal defensive cooldowns if you have high Lingering Infection stacks before Contagion.
- Phase 2:
- Assign two players per group to handle Omega Vector bouncing.
- Dodge Blood Geyser lines and avoid standing in the Liquefy pool.
- Soak Plague Bomb zones individually to prevent adds from spawning.
Tank-Specific Tips
- Avoid getting Omega Vector to minimize Lingering Infection stacks.
- Taunt swap at 2/3 stacks of Evolving Affliction.
- Tank Plague Amalgam adds under the boss for cleave damage.
Healer-Specific Tips
- Focus on healing players with high Lingering Infection stacks before Contagion.
- Be prepared for burst damage on players soaking Plague Bombs in Phase 2.
Phase 1 (1 minute 30 seconds)
- Omega Vector:
- Three debuffs are placed on random non-tank players.
- Debuffs jump to the nearest player every 10 seconds, applying Lingering Infection stacks.
- Use three bounce groups to evenly distribute stacks.
- Evolving Affliction:
- Tanks must taunt swap at 2/3 stacks to manage damage.
- Gestate:
- Move away from affected players to avoid splash damage.
- Kill the resulting Plague Amalgam add quickly to minimize Immunosuppression casts.
- Contagion:
- Healers should focus on players with high Lingering Infection stacks.
Phase 2 (35 seconds)
- Liquefy:
- Avoid standing in the toxic blood pool to prevent rapid Lingering Infection stacks.
- Blood Geyser:
- Dodge the lines to avoid damage and debuffs.
- Plague Bombs:
- Assign one player per zone to soak the damage and prevent adds from spawning.
- Omega Vector:
- Two players per group should handle the debuff bouncing.
| Type of Armor | Item | Loot type |
| Cloth | Mutagenic Protofluid Handwraps | Hands |
| Cord of Animated Contagion | Waist | |
| Leather | Hood of Pestilent Ichor | Head |
| Wristwraps of Coursing Miasma | Wrist | |
| Blighted Anima Greaves | Legs | |
| Plate | Chestguard of Virulent Mutagens | Chest |
| Any | Bow of Virulent Infection | Bow |
| Plasma-Spattered Greatcloak | Cloak | |
| Vector Deflector | Shield | |
| Inoculating Extract | Trinket | |
| Syringe of Bloodborne Infirmity | Trinket |
Zul, Reborn
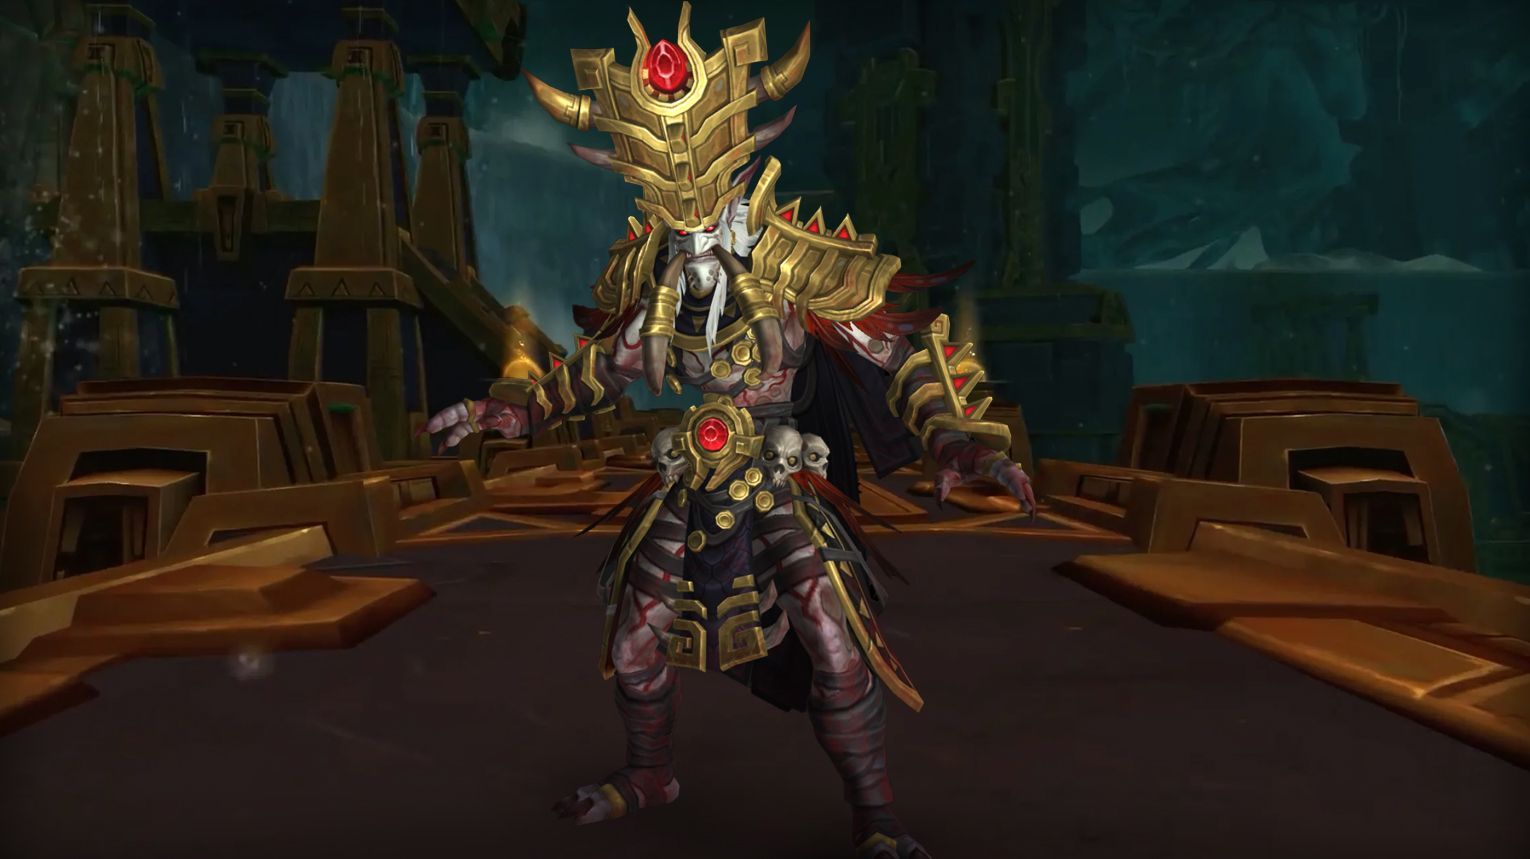
Zul, Reborn is a two-phase encounter in the Uldir raid. The first phase involves managing waves of dangerous adds while dealing with the boss’s abilities. The second phase is a race against time as the raid runs out of room due to increasing area denial. The longer Phase One lasts, the more challenging Phase Two becomes. Zul is the sixth boss in Uldir, and after defeating him, players progress to the Mythrax the Unraveler encounter.
- Tanks: Classes with strong active mitigation and mobility (e.g.,
- Healers: Classes with strong raid-wide healing and dispels (e.g.,
- DPS: Classes with strong AoE, cleave, and interrupt capabilities (e.g.,

![]() Tips:
Tips:
General Tips:
- Phase One:
- Prioritize killing adds over damaging Zul.
- Move away from allies when afflicted with Dark Revelation.
- Interrupt Bloodshard casts from Nazmani Bloodhexers.
- Kill Bloodthirsty Crawgs before they reach 100% energy and explode.
- Use AoE purges (e.g., Mass Dispel) to quickly deal with Minion of Zul adds.
- Phase Two:
- Never stand in front of Zul to avoid Rupturing Blood.
- Position Rupturing Blood pools at the edge of the room.
- Assign a ranged player to soak Pool of Darkness.
- Use Bloodlust/Drums in Phase Two to burn Zul quickly.
Tank-Specific Tips:
- Phase One:
- Tank adds near Zul for cleave damage, but move Nazmani Crushers away before they cast Thrumming Pulse.
- Face Nazmani Crushers away from the raid to avoid Bloody Cleave.
- Use defensive cooldowns when tanking Bloodthirsty Crawgs.
- Phase Two:
- Face Zul away from the raid and alternate taunting to manage Rupturing Blood stacks.
- Let Rupturing Blood debuffs expire at the edge of the room.
Healer-Specific Tips:
- Phase One:
- Be ready to heal through Dark Revelation explosions.
- Keep players healthy to prevent deaths from Bloodshard.
- Phase Two:
- Heal through ticking damage from Corrupted Blood.
- Disperse healing to the player soaking Pool of Darkness.
- Dispels Deathwish debuffs when players are near the edge.
DPS-Specific Tips:
- Phase One:
- Focus on killing adds (Nazmani Crushers, Bloodhexers, Crawgs) before damaging Zul.
- Use crowd control (slows, stuns) on Minion of Zul adds.
- Phase Two:
- Phase One (100%-40%):
- Positioning: Stand near the center of the room to handle Dark Revelation and adds.
- Add Management:
- Nazmani Crusher: Move away before Thrumming Pulse.
- Nazmani Bloodhexer: Interrupt Bloodshard and kill Animated Ichor before it reaches Zul.
- Bloodthirsty Crawgs: Kill before they explode with Engorged Burst.
- Dark Revelation: Afflicted players should move to the edge to minimize raid damage.
- Phase Two (40%-0%):
- Positioning: Form a semi-circle behind Zul to avoid Rupturing Blood and Deathwish paths.
- Rupturing Blood: Tanks should alternate taunts and place pools at the edge.
- Pool of Darkness: Assign a ranged player to soak and heal through the damage.
- Deathwish: Dispels debuffs when players are near the edge to minimize raid damage.
| Type of Armor | Item | Loot type |
| Cloth | Visage of the Ascended Prophet | Head |
| Leather | Usurper’s Bloodcaked Spaulders | Shoulder |
| Armbands of Sacrosanct Acts | Wrist | |
| Cincture of Profane Deeds | Waist | |
| Crest of the Undying Visionary | Head | |
| Plate | Chestplate of Apocalyptic Machinations | Chest |
| Imperious Vambraces | Wrist | |
| Any | Cloak of Rippling Whispers | Cloak |
| Tusk of the Reborn Prophet | Dagger | |
| Pursax, the Backborer | Dagger | |
| Rivermarsh Basher | 1H Mace | |
| Bleached Bone Cutlass | 1H Sword | |
| Zem’lan Buckler | Shield | |
| Loa-Blessed Warshield | Shield | |
| Zem’lan Pummeler | Staff |
Mythrax the Unraveler
Mythrax the Unraveler is the seventh boss in the Uldir raid, the first raid in Battle for Azeroth. The encounter consists of two phases: Phase One, where the raid engages Mythrax directly, and Phase Two, which triggers every 33% health lost, where the raid engages various adds while Mythrax is nearly immune to damage. After defeating Mythrax, players can progress to the G’huun encounter.
- Tanks: Classes with strong mobility and cooldowns for managing Essence Shear and Annihilation stacks (e.g.,
- Healers: Classes with strong raid-wide healing and mobility to handle Imminent Ruin and Oblivion Sphere damage (e.g.,
- DPS: Classes with strong cleave, interrupts, and mobility to handle adds and mechanics (e.g.,
![]() Tips:
Tips:
- General:
- Spread 5+ yards apart to avoid multiple players being charmed by Oblivion Spheres.
- Collect Existence Fragment orbs to reduce Annihilation stacks, but prioritize players with high stacks.
- Avoid standing in front of the boss to prevent Essence Shear from hitting the raid.
- Phase One:
- Tanks should face Mythrax away from the raid and taunt swap after each Essence Shear.
- Move out of Obliteration Blast and Imminent Ruin zones.
- Clear areas cluttered with Oblivion Spheres by moving the raid.
- Phase Two:
- Spread out at the start to avoid Oblivion Spheres spawning on the stack point.
- Focus on killing Vision of Madness adds and interrupting Void Volley from N’raqi Destroyers.
- Avoid Obliteration Beam and stay out of Oblivion Veil.
- Phase One:
- Tanks position Mythrax facing a wall and taunt swap after Essence Shear.
- DPS and healers spread out to minimize Oblivion Sphere charm effects.
- Use displacement abilities (e.g., Death Grip) to free charmed players quickly.
- Move as a group to clear areas with too many Oblivion Spheres.
- Phase Two:
- Stack in a pre-marked area after Oblivion Spheres spawn.
- Focus on killing Vision of Madness adds and interrupting Void Volley.
- Tanks keep N’raqi Destroyers 40+ yards apart to avoid Critical Mass.
- Avoid Obliteration Beam and stay out of Oblivion Veil.
- Use raid cooldowns for Xalzaix’s Awakening.
| Type of Armor | Item | Loot type |
| Cloth | Robes of the Unraveler | Chest |
| Leather | Cowl of Dark Portents | Head |
| C’thraxxi General’s Hauberk | Chest | |
| Oblivion Crushers | Hands | |
| Plate | Chitinspine Pauldrons | Shoulder |
| Any | Codex of Imminent Ruin | Off-hand |
| Luminous Edge of Virtue | 1H Sword | |
| Band of Certain Annihilation | Ring | |
| Twitching Tentacle of Xalzaix | Trinket | |
| Xalzaix’s Veiled Eye | Trinket | |
| Voror, Gleaming Blade of the Stalwart | 2H Sword |
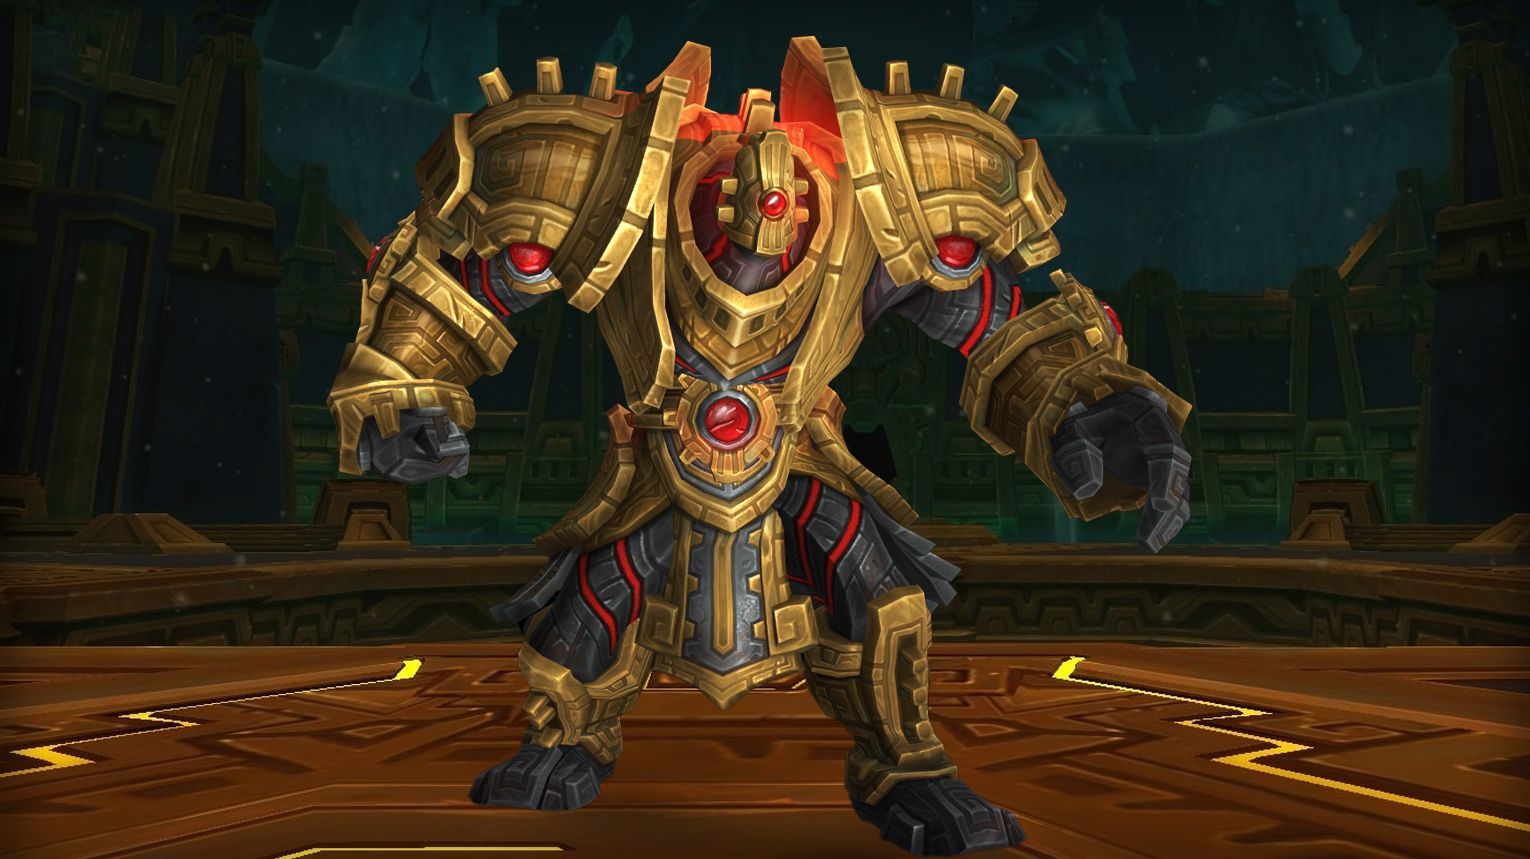
G’huun
G’huun is a three-phase boss in Uldir requiring strong coordination, especially for Power Matrix mechanics. In Phase One, focus on adds and trigger Reorigination Blast; in Phase Two, tank G’huun, manage Putrid Blood, and trigger a second blast; in Phase Three, burn G’huun while avoiding Collapse and Gaze of G’huun. Use Bloodlust during Phase Two after the second blast for maximum damage. Key mechanics include Explosive Corruption, Wave of Corruption, and Blood Feast.
- Power Matrix Runners: Classes with strong mobility and movement abilities are ideal for carrying the Power Matrix orbs. Recommended classes include:

- Healers: Any healer can work, but
- Tanks: Tanks with strong active mitigation and mobility are preferred to handle Dark Young and G’huun‘s mechanics.
![]() Tips:
Tips:
- Power Matrix Mechanics:
- Assign pairs of players to handle the Power Matrix orbs. Use movement abilities to traverse the Upper Platforms quickly.
- Damage Amorphous Cysts to reduce their Undulating Mass aura, which slows movement.
- Throw the Power Matrix to your partner before becoming rooted.
- After depositing the orb, jump down to the Arena Floor to rejoin the group quickly.
- Debuff Management:
- Players with Explosive Corruption should move to the edge of the room to avoid damaging the raid.
- Dodge Virulent Corruption orbs that radiate from Explosive Corruption.
- Stack on the player with Blood Feast to reset Putrid Blood stacks.
- Add Priority:
- Focus on killing Cyclopean Terrors first, as their Torment casts can overwhelm the raid.
- Interrupt Torment and use stuns/silences to lock them down.
- Tank Dark Young near Cyclopean Terrors to cleave damage and benefit from Dark Bargain.
- Reorigination Blast:
- Trigger Reorigination Blast in Phase One and Phase Two to deal massive damage to G’huun and stun adds.
- Stack the raid during the blast to help healers efficiently heal the group.
- Phase One:
- Focus on killing Cyclopean Terrors and Dark Young while sending pairs to deliver Power Matrix orbs.
- Avoid damaging G’huun, as his Blood Shield will heal all damage.
- Trigger the first Reorigination Blast to transition to Phase Two.
- Phase Two:
- Tank G’huun in the center of the room and taunt swap at 6-8 stacks of Growing Corruption.
- Stack for Wave of Corruption to help healers, but spread for Blood Feast.
- Kill Gibbering Horror adds quickly and interrupt their Mind-Numbing Chatter.
- Trigger the second Reorigination Blast to bring G’huun to 20% health and start Phase Three.
- Phase Three:
- Avoid Collapse zones by moving away from marked areas.
- Stack for Wave of Corruption and face away from G’huun during Gaze of G’huun to avoid being feared.
- Burn G’huun before Putrid Blood stacks overwhelm the raid.
| Type of Armor | Item | Loot type |
| Cloth | Amice of Corrupting Horror | Shoulder |
| Cord of Septic Envelopment | Waist | |
| Leather | Striders of the Putrescent Path | Feet |
| Tunic of the Sanguine Deity | Chest | |
| Spaulders of Coagulated Viscera | Shoulder | |
| Plate | Helm of the Defiled Laboratorium | Head |
| Hematocyst Stompers | Feet | |
| Any | Lancet of the Deft Hand | Fist Weapon |
| Re-Origination Pulse Rifle | Gun | |
| Barricade of Purifying Resolve | Shield | |
| Heptavium, Staff of Torturous Knowledge | Staff | |
| Vanquished Tendril of G’huun | Trinket |
Uldir Achievements List
| Achievement | Requirement |
| Crimson Descent | Defeat bosses in the depths of Uldir. |
| Halls of Containment | Kill bosses in the first section of Uldir. |
| Heart of Corruption | Slay bosses and extinguish the corruption in the lowest reaches of Uldir. |
| Uldir | Defeat all bosses of Uldir on Normal difficulty or higher. |
| Uldir Guild Run | Kill all bosses of Uldir on Normal difficulty or higher, while in a guild group. |
| Ahead of the Curve: G’huun | Slay G’huun in Uldir on Heroic difficulty or higher, before the beginning of the Battle of Dazar’alor. |
| Cutting Edge: G’huun | Defeat G’huun in Uldir on Mythic difficulty, before the beginning of the Battle of Dazar’alor. |
| Hall of Fame: G’huun (Alliance) | Among the first one hundred Alliance guilds worldwide to defeat G’huun on Mythic difficulty. |
| Hall of Fame: G’huun (Horde) | Among the first one hundred Horde guilds worldwide to defeat G’huun on Mythic difficulty. |
| Mythic: G’huun | Kill G’huun on Mythic difficulty. |
| Mythic: G’huun Guild Run | Slay G’huun on Mythic difficulty while in a guild group. |
| Mythic: Fetid Devourer | Defeat the Fetid Devourer on Mythic difficulty. |
| Mythic: MOTHER | Kill MOTHER on Mythic difficulty. |
| Mythic: Mythrax the Unraveler | Slay Mythrax the Unraveler on Mythic difficulty. |
| Mythic: Taloc | Defeat Taloc on Mythic difficulty. |
| Mythic: Vectis | Kill Vectis on Mythic difficulty. |
| Mythic: Zek’voz | Slay Zek’voz on Mythic difficulty. |
| Mythic: Zul | Defeat Zul on Mythic difficulty. |
| Glory of the Uldir Raider | Complete the Uldir raid achievements. |
| Double Dribble | Kill G’huun after having no player move while holding a Power Matrix on Normal difficulty or higher. |
| Edgelords | Slay Zul, Reborn without any player stepping onto the inner ring of the Oblivion Door on Normal difficulty or higher. |
| Elevator Music | Defeat Taloc after activating all Orbs of Harmony on Normal Difficulty or higher. |
| Existential Crisis | Kill Mythrax the Unraveler with no player touching an Existence Fragment spawned by another player on Normal difficulty or higher. |
| New Mog, G’huun This? | Collect an armor set from Uldir. |
| Now We Got Bad Blood | Slay Vectis after infecting Warmother Rakkali with Plague Bomb then defeating her on Normal difficulty or higher. |
| Parental Controls | Defeat MOTHER after entering her secret passcode on Normal difficulty or higher. |
| Thrash Mouth – All Stars | Kill the Fetid Devourer after having all players hit by Terrible Thrash at least once on Normal difficulty or higher. |
| What’s in the Box? | Slay Zek’voz after exposing the Puzzle Box of Yogg-Saron to the Projection of Yogg-Saron on Normal difficulty or higher. |


Comments: