

Roblox Shirt Overview
Before you start drawing, it is important to understand exactly what a “Shirt” is in the Roblox ecosystem and how the 3D wrapping works. Understanding the difference between 2D images and 3D mapping is the first hurdle for every new designer.


- The Torso: The large central rectangle is your canvas for the body. The red part is the front (128×128 pixels), the blue is the back, and the sides wrap around the ribs. It is critical to ensure that horizontal lines (like belts or stripes) on the “Front” panel line up perfectly with the “Side” panels, otherwise, the shirt will look broken when the character turns sideways.
- The Arms: The smaller squares represent the arms. You can draw long sleeves by filling all the squares (top, bottom, and sides of the arm), or short sleeves by filling only the top ones. The bottom-most squares on the arm section represent the hands; usually, you leave these transparent unless you are designing gloves.
- The Folding: Imagine folding a cardboard box. The edges of the “Front” square will touch the edges of the “Side” squares. Your lines must match perfectly here. This requires a keen eye for pixel placement. If a stripe is at pixel height 50 on the front, it must be at pixel height 50 on the side panel.

Required Tools

To make a professional-looking shirt, you need the right software. You do not need expensive tools, but you need something that supports “Layers” and “Transparency.” The ability to manipulate images on a pixel level is what separates MS Paint users from professional designers.

- Paint.NET (Free): This is the best choice for beginners on Windows. It is simple, fast, and supports community-made plugins for special effects. It offers a great balance between power and ease of use, allowing you to manage layers without the overwhelming interface of professional software.
- Photopea (Free & Web-based): If you do not want to install anything, use Photopea. It is a clone of Photoshop that runs in your browser. It supports advanced layer styles, drop shadows, and even vector shapes. This is highly recommended because it allows you to save your work as a PSD file, meaning you can come back and edit the text or colors later without losing quality.
- GIMP (Open Source): A very powerful tool, but it has a steep learning curve. Use this if you want advanced artistic brushes or need to do complex image manipulation. It is free forever and rivals paid software like Photoshop in terms of raw capability.
Making Shirts on Mobile
In 2026, many top Roblox designers work exclusively on mobile devices like iPads or Android tablets. The rise of powerful tablets and stylus pens has made mobile design just as precise as desktop design.
- Importing: Start by importing the Roblox template as your first layer. Ensure your canvas size is set to the exact dimensions of the template.
- Opacity Control: Lower the opacity of the template layer to 50% so you can see your drawing over it, but still see the guide boxes. Create a new layer *above* the template for your drawing, and a layer *below* the template for base colors. This layering technique prevents you from accidentally erasing the guide lines.
- Stabilizer: Turn on the “Stabilizer” tool in the top right corner. This makes your lines smooth, even if you are drawing with your finger. Set the stabilizer to level 5 or higher to draw perfectly smooth curves for necklines and sleeve edges.
Step-by-Step Instructions
Follow these detailed steps to create your design from scratch to the final product without errors. Rushing these steps often leads to low-quality uploads or wasted Robux.
1. Download the Official Template
Go to the Roblox Create page, navigate to “Avatar Items,” select “Classic Shirts,” and download the reference image. Do not use random templates from Google Images, as they might be outdated, resized incorrectly, or contain hidden watermarks that could ruin your design. The file must be the original specific dimensions provided by Roblox.
2. Set Up Your Workspace
3. Designing the Details
- The Neck Hole: This is the most common mistake for beginners. You must use the “Eraser” tool or the “Selection” tool to physically cut out a hole for the neck in your design layer. If you paint skin color over the neck area, it won’t match the player’s actual skin tone if they change their avatar color. It must be transparent so the avatar’s real head and neck show through.
- Short Sleeves: For a T-shirt look, color only the top 30% of the arm squares (the shoulders). Leave the rest transparent. Use the “Ruler” or “Line” tool to ensure the cut-off point is at the exact same pixel height on both the left and right arms, as well as the side of the torso, to create a continuous sleeve line.
- Belts and Shoes: Remember that the bottom of the “Torso” rectangle connects to the pants. If you are making a hoodie, add a darker band at the bottom. If you are making a dress or a long coat, the design needs to continue onto the “Pants” template (which is a separate file). Ensure the colors match perfectly between your shirt file and your pants file.
4. Exporting
How to Sell & Earn Robux
Uploading is just the first step. To make money, you need to list the item for sale and understand the economics of the platform.
- Sales Toggle: Switch the “On Sale” button to active. You will be prompted to set a price.
- Pricing Strategy: The minimum price is 5 Robux. Most designers sell casual shirts for 5-10 Robux to drive volume. Highly detailed “uniforms” or specialized cosplay gear can sell for 50-100 Robux. It is often better to sell 100 shirts at 5 Robux than 1 shirt at 500 Robux.
- Creator Fees: Remember the 70/30 split. If you sell a shirt for 10 Robux, you get 7. Roblox keeps 3. This math is automatic. You do not need to pay the fee upfront; it is deducted from the sale before the Robux reaches you.
Troubleshooting Common Errors
Here is how to fix the most annoying problems designers face, which can range from graphical glitches to account warnings.
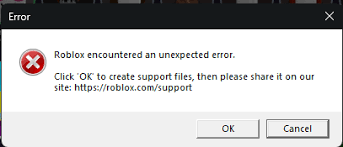
If your shirt is removed and replaced with a “content deleted” icon, do not re-upload it immediately. You might get banned or receive a strike. Check your design for:
- Small, unreadable text. Moderators often delete text that is too small to read because they suspect it might contain personal information or bad words.
- QR codes, discord links, or URLs. These are strictly forbidden on avatar items to protect child safety.
- Copyrighted brand logos (Nike, Adidas, Gucci). While some slip through, Roblox is strict about intellectual property. It is safer and more creative to make your own “parody” brands or unique logos.
This is called “bleeding” or “texture filtering artifacts.” If you see thin white lines on the shoulders or sides of the torso, it means you stayed too perfectly inside the guide lines. When the 3D engine wraps the image, it sometimes pulls a tiny bit of the pixel next to the edge. To fix this, you actually need to color slightly *outside* the template boxes (about 2 pixels) on the edges that fold. This “overspray” ensures that if the texture stretches, it grabs your color, not the transparent background.
Pro Tips for Success

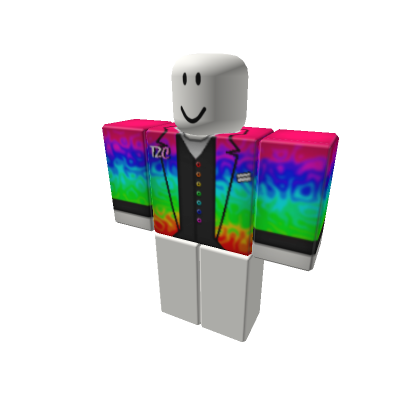
Flat colors look like plastic or MS Paint art. To achieve an S-Tier look, you must add wrinkles and shadows that simulate fabric.
- Technique: Create a layer named “Shading” above your color layer. Use a soft airbrush with black color. Draw curves where fabric would naturally bunch up—near the elbows, under the armpits, and at the waist.
- Placement: Add shadows under the armpits, along the bottom hem, and across the chest to define the shape of the body. Light usually comes from above, so shadows should be on the lower parts of folds.
- Blending: Lower the opacity of this layer to 15-25% and change the Layer Mode to “Overlay” or “Multiply.” This allows the underlying color to shine through the black, creating a realistic depth effect without making the shirt look dirty.

Do not just use the paint bucket tool to fill a square with solid blue. Search Google for “Denim texture seamless” or “Knitted wool texture.” Copy this image, paste it into your design, and resize it to fit the template. Set the layer mode to “Overlay” or “Soft Light.” This gives your shirt a realistic grainy feel that flat colors cannot achieve, distinguishing your work from 90% of the other designers on the platform.

You don’t have to spend 10 Robux to see if your design works. Use Roblox Studio to test for free.
1. Open Roblox Studio and open a “Baseplate” project.
2. Go to the “Avatar” tab and insert a “Rig” (Avatar Dummy).
3. In the Explorer window on the right, open the Dummy’s folder and find the “Shirt” object (or add one if it’s missing).
4. Click the “ShirtTemplate” property, and choose “Add Image.” Select your local PNG file.
This renders the shirt instantly on the dummy in 3D. You can rotate the camera to check for misaligned pixels or weird seams before you commit real money to the upload.

Shirts sell significantly better if there are matching pants available. Players love complete outfits. Create an “Outfit Set” by designing pants that line up perfectly with the bottom of your shirt. If your shirt has a belt, draw the top half on the shirt file and the bottom half on the pants file. Link the items in the description of both assets (e.g., “Matching pants here: [link]”) to cross-promote your items and double your potential sales.
Comments: