
In Diablo 4 Season 10, commanding the right Necromancer build is the key to dominating the battlefield, from the early leveling grind to the pinnacle of endgame content. Whether you’re starting fresh at level 1 or pushing deep into The Pit, this guide shows you exactly which setups are worth your time.

- Best leveling builds: Sever Affliction and Blood Surge – offering consistent AoE and single-target damage, highly effective Minions, and a supremely smooth journey from 1–60.
- Best endgame builds: Blood Wave, Archmage Minion, and Reap Warrior – S-Tier powerhouses engineered for ruthless efficiency, capable of annihilating hordes and decimating bosses with ease.

Best Necromancer Builds for Leveling (Diablo 4 Season 10 Tier List)
Ascending to power as a Necromancer in Diablo 4 is a thrilling journey of commanding the dead and unleashing devastating magic. However, a successful start requires a specific strategic approach. The core logic behind a superior leveling build revolves around achieving a self-sustaining engine of destruction that minimizes downtime and maximizes clear speed. Unlike specialized endgame setups, a leveling build must be versatile, resilient, and not reliant on specific legendary items.

A top-tier leveling build excels in three key areas, creating a powerful feedback loop:
- Sustained Area of Effect (AoE) Damage: The primary goal from levels 1-60 is to clear packs of monsters quickly. Builds like the S-Tier Blood Surge Necromancer excel here, as their core mechanic inherently damages all nearby enemies simultaneously, drastically reducing the time spent in each encounter.
- Robust Essence & Corpse Economy: Your resources are the lifeblood of your offense. A good build seamlessly generates and spends both Essence and Corpses. Skills that create Corpses (like Reap) or refund Essence are invaluable, ensuring you are never a passive spectator in a fight.
- Built-in Survivability and “Set-and-Forget” Minions: While you focus on positioning and casting, your army should provide a durable frontline. The Necromancer’s unique Book of the Dead mechanic allows you to customize your Skeletal Warriors and Mages to either tank damage or augment your chosen damage type. This passive pressure is crucial for a smooth leveling experience.
This is why builds like Sever Affliction and Blood Surge dominate the leveling meta—they naturally incorporate these pillars without complex itemization.

To ensure your path to Level 60 is as swift and potent as possible, focus on these critical aspects:
- Prioritize Your Core Resource: Intelligence
While all stats offer benefits, Intelligence is considered the primary attribute for Necromancer, as it provides a universal multiplier to all your skill damage. Prioritize gear with Intelligence to see the most significant damage increases early on. - Master Your Two Resources: Essence and Corpses
Understand that these are two sides of the same coin. Use a Basic Skill like Reap or Bone Splinters not just to finish off weak foes, but primarily to generate Essence for your powerful Core Skills and to create the first Corpse in a pack. That first Corpse can then be exploded with Corpse Explosion for more damage or used with Corpse Tendrils to group enemies for a devastating blow. - Strategize Your Army with the Book of the Dead
Your minions are not just damage-dealers; they are a key defensive system.- Skeletal Warriors: Early on, Defenders provide a much-needed health buffer, while Reapers can help generate extra Corpses.
- Skeletal Mages: Cold Mages are an excellent choice for their ability to Chill and Freeze, offering incredible crowd control.
- Remember Sacrifice: Don’t forget you can sacrifice a minion type for a powerful personal buff if you find your minions dying too often or if your build focuses on personal power.
- Optimize Your Gameplay Loop
- Difficulty: The recommended difficulty to level in is normal or hard. This will provide you with the smoothest and fastest leveling experience. The bonus experience in higher difficulties is often negated by the slower kill times.
- Progression Flow: Focus on the main campaign to unlock your mount and endgame activities. Save extensive exploration and Altar of Lilith hunting for after you have a mount, as it will dramatically increase your efficiency.
- Gearing Philosophy: While leveling, constantly upgrade to the item with the highest Item Power to boost your base damage and armor. Don’t worry about perfect stats until you start acquiring Sacred and Ancestral items in World Tier 3 and 4.
Sever Affliction Necromancer Leveling Build: S-Tier
This build is defined by its incredible visual and auditory feedback and its smooth power progression. It is exceptionally easy to start, leveraging Skeletal Minions for extra damage, corpse generation, and safety, making the early game a breeze. The build also offers a surprising amount of customization through its Legendary Aspects, allowing you to tailor its utility and AoE potential.
Who is this for? This build is optimal for players who enjoy a straightforward, minion-assisted playstyle with spectacular visual effects and a clear path to power. It’s a fantastic choice for a first-time Necromancer or anyone leveling a new character.
| Item Name | Item Type | Key Affixes | Unique / Legendary Power | Sockets |
| Cap of Hardened Bones | Helm | +Intelligence, +Maximum Life, +Decrepify, +Soulrift Duration | +[21.0 – 30.0]% Damage Reduction for Your Summons. You gain 30% increased Damage Reduction. | Flawless Sapphire, Flawless Emerald |
| Tunic of Occult Dominion | Chest | +Intelligence, +Maximum Life, +Resistance to All Elements, +Total Armor, +Soulrift Duration | Your maximum number of Skeletal Warriors and Skeletal Mages is increased by 2. | Flawless Emerald, Flawless Emerald |
| Bloodless Scream | Two-Handed Scythe | +Non-Physical Damage, Lucky Hit: Resource Restore, +Intelligence, +Darkness Skills, Lucky Hit: Shadow Damage | Your Darkness Skills Chill enemies for up to 100% and deal [100 – 200]%[x] increased damage to Frozen enemies and bosses. Every 800 times you damage enemies with Darkness Skills, all Nearby enemies are Feared for 0.25 seconds before Freezing for 3 more seconds. | Flawless Emerald, Flawless Emerald |
| Gloves of the Damned | Gloves | +Intelligence, +Critical Strike Chance, +Maximum Life, +Sever Size | You deal 55%[x] increased Shadow damage to enemies afflicted by any Curse. | N/A |
| Torturous Pants | Pants | +Armor, +Intelligence, +Maximum Life, +Total Armor, +Sever Size | Iron Maiden is now also a Darkness Skill and deals Shadow damage. Enemies have a 30% chance to be Stunned for 1 second when they take damage from Iron Maiden. | Flawless Sapphire, Flawless Sapphire |
| Aphotic Boots | Boots | +Max Evade Charges, +Armor, +Intelligence, +Movement Speed, +Soulrift Duration | Skeletal Priests empower your Skeletal Warriors’ attacks to deal Shadow damage and have a 25.0% chance to Stun enemies for 1.5 seconds. | N/A |
| Ring of Reanimation | Ring | +Lightning & All Resist, +Attack Speed, +Intelligence, +Critical Strike Chance, +Ultimate Cooldown Reduction | Your Minions gain increased damage while alive, up to 60%[x] after 10 seconds. | Flawless Skull |
| Ring of Frenzied Dead | Ring | +Fire & All Resist, +Intelligence, +Critical Strike Chance, +Critical Strike Damage | Each time one of your Minions damages an enemy, they gain 18.0%[+] Attack Speed for 3 seconds, up to 54.0%[+]. | Flawless Diamond |
| Reaping Lotus’ Amulet | Amulet | +Resistance to All Elements, +Critical Strike Chance, +Intelligence%, +Fueled by Death, +Soulrift Duration | Sever no longer returns and instead splits into 3 specters that expand out from its apex. Sever deals 240% of normal damage. | Flawless Diamond |

The core gameplay loop is simple but effective. You use Corpse Tendrils as your opener to group enemies and make them Vulnerable, then cast Sever into the pack to decimate them.
- Essence Management: Your resource is managed through a combination of Reap (for quick Essence and Corpses), Grim Harvest (passive Essence from consuming Corpses), and Iron Maiden.
- Ultimate Skill – Soulrift: This skill is a powerhouse, providing massive Essence generation, automatically applying Vulnerable, and granting a stacking damage multiplier.
- Key Passive – Affliction: This passive synergizes perfectly, adding a free, powerful damage instance whenever you cast a curse on a Vulnerable, Crowd Controlled, or Damage-over-Time (DoT) affected enemy.

While leveling, always use your highest Damage-Per-Second (DPS) weapon. For other gear, prioritize the following stats and Legendary Aspects.
Stat Priorities (Marked List):
- Weapons & Jewelry:
- Intelligence
- Vulnerable Damage
- Critical Strike Chance
- Attack Speed
- Armor:
- Maximum Life
- Intelligence
- Damage Reduction
- Total Armor
- Cooldown Reduction
Must-Have Legendary Aspects (Codex of Power):
- Damned (Amulet): Increases your Shadow damage output significantly.
- Grasping Veins (Gloves): Greatly boosts your damage after using Corpse Tendrils.
- Voracious Rage (Ring): Enhances your resource management.
Best-in-Slot Unique Items:
- Greaves of the Empty Tomb (Boots): The premier item for this build, it doubles your Sever damage and increases its area of effect.
- Ring of the Sacrilegious Soul: Automatically consumes corpses for you, providing incredible passive utility.
- Lidless Wall (Shield): Allows for a powerful transition to an end-game variation using Bone Storm.
This build excels at leveling due to its minion army providing a safe and powerful buffer.
- Early Game: Focus on raising your Skeletal Warriors and Mages. Use Reap and Sever as your primary skills. Corpse Tendrils is your most important utility skill.
- Mid Game: Unlock your Golem for an even sturdier tank. Your Ultimate Skill, Soulrift, will come online, solving your Essence issues and supercharging your damage.
- Flexibility: If you find minions cumbersome, you can replace them with Corpse Explosion for more passive damage or switch to a Bone Golem for better AoE and Vulnerable application.
As you approach level 60 and unlock Torment difficulty, your focus shifts to optimization.
- Paragon Boards & Glyphs: This is where the bulk of your late-game power will come from. Start working on your Paragon boards and leveling up your Glyphs in Nightmare Dungeons.
- Stat Perfection: You must now overcap your Armor and Resistances to counter the penalties from higher World Tiers. Aim for 1000+ Armor and 75%+ Resistances.
- Gear Overhaul: This is the time to hunt for the build’s defining Uniques, like the Greaves of the Empty Tomb, and perfect your gear with optimal stats and upgraded Legendary Aspects.
Blood Surge Necromancer Leveling Build: S-Tier
The defining characteristic of the Blood Surge Necromancer is its incredible area-of-effect (AoE) damage. Its core mechanic revolves around the Overpower stat, which allows your Blood Surge to periodically deal devastating, guaranteed bonus damage based on your Life and Fortify. The gameplay is straightforward and potent, supported by a dependable army of Skeletal Minions that assist with damage and Essence generation. A key advantage is its minimal dependency on specific Legendary drops to function effectively during leveling, making it a reliable and consistent choice from the start.
Who is this for? This build is optimal for players who enjoy a tanky, spell-caster playstyle and love seeing large groups of enemies vanish with a single, powerful spell. It’s perfect for those who want a smooth leveling journey with a clear path to power.
| Item Name | Item Type | Key Affixes | Unique / Legendary Power | Sockets |
| Cap of the Embalmer | Helm | +Armor, +Intelligence, +Maximum Life, +Soulrift Duration | Consuming a Corpse has a 35% chance to spawn a Blood Orb. | Cir, Ceh |
| Tunic of Disobedience | Chest | +Armor, +Intelligence, +Essence per Second, +Soulrift Duration | You gain 0.8%[+] increased Armor for 4 seconds when you deal any form of damage, stacking up to 46.0%[+]. | Cem, Lum |
| Blood-bathed Focus | Off-hand | +Lucky Hit Chance, +Intelligence, +Critical Strike Chance, +Maximum Life, +Blood Surge Double Damage Chance | Blood Surge‘s nova echoes again after a short delay, dealing 10%[x] less damage. | Flawless Ruby |
| Axe of Rathma’s Chosen | One-Handed Axe | +Intelligence, +Maximum Life, +Overpower Damage, +Damage Over Time, +Blood Surge Double Damage Chance | Whenever your Blood Skills Overpower you gain 55%[+] Attack Speed for 4 seconds. | Flawless Ruby |
| Cruor’s Embrace | Gloves | +Maximum Life%, +Tides of Blood, +Blood Surge Drains from Elites, +Blood Surge Ranks | Casting Blood Surge consumes nearby Corpses to cause mini novas, dealing [60 – 120] damage. This damage is increased by 10%[x] for each enemy drained by your initial cast, up to 50%[x], as well as by 20%[x] for each Corpse consumed. | N/A |
| Pants of Hardened Bones | Pants | +Armor, +Intelligence, +Maximum Life | You gain 30% increased Damage Reduction. | Flawless Topaz, Flawless Topaz |
| Blood Getter’s Boots | Boots | +Max Evade Charges, +Movement Speed, +Essence per Second | Your Skeletal Priests now also empower you at 75% effectiveness. | N/A |
| Starlight Ring | Ring | +Fire & All Resist, +Intelligence, +Critical Strike Chance, +Maximum Life, +Resource Cost Reduction | Gain 45.0 of your Primary Resource for every 20% of your Life that you Heal or every 120% Life that you Overheal while at Maximum Life, up to 300 Resource per second. | Flawless Diamond |
| Ring of Voracious Rage | Ring | +Fire & All Resist, +Attack Speed, +Intelligence, +Maximum Life, +Resource Cost Reduction | Killing an enemy with a Core Skill refunds 35.0% of its base cost. Can only happen once per Skill cast. | Flawless Diamond |
| Deathspeaker’s Pendant | Amulet | +Resistance to All Elements, +Coalesced Blood, +Attack Speed, +Blood Surge Ranks, +Essence per Enemy Drained | Blood Surge casts a mini nova on your Minions, dealing [41 – 85] damage. Damage is increased by 10% per target drained by the initial cast, up to 50%. | Flawless Diamond |
The core loop is intuitive. You use Corpse Tendrils to group up enemies and make them Vulnerable, then unleash Blood Surge to wipe them out. Every fifth cast of Blood Surge while you are “Healthy” will be an Overpowered attack, dealing massive damage.
- Essence Management: Early on, you’ll use Reap and Iron Maiden to generate Essence. Your Skeletal Mages also passively generate Essence with their attacks.
- Ultimate Skill – Soulrift: This skill is a game-changer, providing a massive boost to Essence generation, automatically applying Vulnerable to enemies, and granting a stacking damage multiplier.
- Key Passive: You start with Affliction for extra damage but can later transition to Rathma’s Vigor, which guarantees an Overpower every 12 seconds, perfectly syncing with your Blood Surge rhythm.
While leveling, always equip the highest DPS weapon available. For other gear, focus on the following stats and Legendary Aspects.
Stat Priorities (Marked List):
- Weapons & Jewelry:
- Overpower Damage
- Maximum Life (directly increases Overpower damage)
- Vulnerable Damage
- Critical Strike Chance
- Armor:
- Maximum Life
- Damage Reduction
- Total Armor
- Cooldown Reduction
Must-Have Legendary Aspects (Codex of Power):
- Blood-bathed (Gloves): Causes your Blood Surge to echo a second time, drastically increasing its damage.
- Voracious Rage (Ring): Significantly improves your Essence management, allowing you to cast more often.
Best-in-Slot Unique Items:
- Cruor’s Embrace (Chest): The premier end-game Unique, it automates corpse consumption and allows multiple Blood Surge waves to hit the same target, solving its single-target damage weakness.
- Ring of the Sacrilegious Soul: Automatically consumes corpses for you, providing incredible passive utility.
- Blood Moon Breeches (Pants): Greatly enhances your survivability and damage output.
This build excels at leveling due to its massive AoE and minion support.
- Early Game: Focus on raising your Skeletal Warriors and Mages. They will tank for you and help generate Essence. Use Reap and Blood Surge as your primary skills.
- Mid Game: Unlock Corpse Tendrils and Soulrift. This combination will allow you to group enemies and unleash devastating, resource-fueled barrages of Blood Surge.
- Minion Strategy: Your skeletons are invaluable companions for most of the leveling process. Once you have sufficient gear and Essence sustain in the late game, you can sacrifice them via the Book of the Dead for powerful passive bonuses like Critical Strike Chance or Overpower Damage.
As you approach level 60 and unlock Torment difficulty, your focus shifts to optimization and overcoming the build’s weaknesses.
- Paragon Boards & Glyphs: This is where you will gain a massive power boost. Start leveling your Glyphs in Nightmare Dungeons to enhance your Overpower damage and survivability.
- Stat Perfection: You must now overcap your Armor and Resistances to counter the penalties from higher World Tiers. Aim for 1000+ Armor and 75%+ Resistances.
- Gear Overhaul: Hunt for the build’s defining Uniques, like Cruor’s Embrace, to transform its functionality. This is also the time to perfect your gear with optimal stats and upgraded Legendary Aspects to push into the highest tiers of content.
Blight Necromancer Leveling Build: A-Tier
The defining feature of this build is its superb defensive control. The core skill, Blight, not only deals shadow damage over time but also slows enemies caught within it. This creates a safe zone where you can damage foes while they are hindered. The build naturally synergizes with all Darkness-related passives, unlocking significant power without heavy reliance on specific Legendary drops. It’s a “set it and forget it” style where you control the battlefield, letting your damage-over-time effects and minions whittle down enemies.
Who is this for? This build is optimal for players who prefer a tactical, strategic playstyle over a frantic one. It’s perfect for those who enjoy controlling the pace of combat, kiting enemies, and watching them succumb to persistent shadow damage. It’s also an excellent choice for Hardcore mode due to its inherent safety.
| Item Name | Item Type | Key Affixes | Unique / Legendary Power | Sockets |
| Undying Cap | Helm | +Armor, +Intelligence, +Maximum Life, +Soulrift Duration | When you cast a Skill, you heal for 2.5% Life. Double this bonus while below 50% Life. | Cir, Ceh |
| Tunic of Disobedience | Chest | +Armor, +Essence per Second, +Soulrift Duration | You gain 0.8%[+] increased Armor for 4 seconds when you deal any form of damage, stacking up to 46.0%[+]. | Flawless Topaz, Flawless Topaz |
| Two-Handed Axe of the Damned | Two-Handed Axe | +Intelligence, +Maximum Life, +Blight Double Cast Chance, +Damage Over Time | You deal 55%[x] increased Shadow damage to enemies afflicted by any Curse. | Cem, Lum |
| Gloves of Reanimation | Gloves | +Attack Speed, +Damage Over Time, +Blight Ranks, +Shadow Damage Over Time | Your Minions gain increased damage while alive, up to 60%[x] after 10 seconds. | N/A |
| Pants of Hardened Bones | Pants | +Armor, +Intelligence, +Maximum Life, +Soulrift Duration | You gain 30% increased Damage Reduction. | Flawless Topaz, Flawless Topaz |
| Boots of the Void | Boots | +Max Evade Charges, +Movement Speed, +Essence per Second | Blight‘s defiled area Pulls In enemies and has a 55% chance to Stun them for 3 seconds when it appears. | N/A |
| Ring of the Umbral | Ring | +Fire & All Resist, +Attack Speed, +Intelligence, +Damage Over Time, +Resource Cost Reduction | Restore 8.0 of your Primary Resource when you Crowd Control an enemy. | Flawless Diamond |
| Ring of Voracious Rage | Ring | +Fire & All Resist, +Attack Speed, +Intelligence, +Resource Cost Reduction | Killing an enemy with a Core Skill refunds 35.0% of its base cost. Can only happen once per Skill cast. | Flawless Diamond |
| Ebonpiercer | Amulet | +Resistance to All Elements, +Blight Ranks, +Gloom Ranks, +Reaper’s Pursuit Ranks, +Blight Double Cast Chance | Blight also shoots 4 smaller projectiles that pierce enemies and deal [300 – 1,500] Corrupting damage over 3 seconds. | Flawless Diamond |
The gameplay loop is methodical and effective. You open fights with Corpse Tendrils to group enemies and make them Vulnerable, then drop Blight on the cluster. The Blight puddle slows enemies and increases all damage they take while inside.
- Essence Management: Your resources are sustained through Reap, Iron Maiden, and the Grim Harvest passive, which generates Essence whenever you consume a corpse.
- Ultimate Skill – Soulrift: This skill is a powerhouse for progression, providing massive Essence generation, automatically applying Vulnerable, and granting a stacking damage multiplier.
- Key Passive – Affliction: This synergizes perfectly, allowing you to cast your curse for a free, powerful damage instance whenever an enemy is Vulnerable, Crowd Controlled, or affected by a DoT—conditions you maintain constantly.
While leveling, always use your highest DPS weapon. For other gear, focus on the following stats and Legendary Aspects.
Stat Priorities (Marked List):
- Weapons & Jewelry:
- Damage Over Time
- Intelligence
- Vulnerable Damage
- Attack Speed
- Armor:
- Maximum Life
- Damage Reduction
- Total Armor
- Cooldown Reduction
Must-Have Legendary Aspects (Codex of Power):
- Damned (Amulet): Significantly increases your Shadow damage output.
- Voracious Rage (Ring): Drastically improves your Essence management.
- Umbral (Ring): A fantastic drop-only Aspect that restores Essence whenever you Crowd Control an enemy, which you do frequently.
Best-in-Slot Unique Items:
- Ebonpiercer (Amulet): This is a transformative item. It changes Blight to fire homing projectiles that deal such immense damage that the original puddle becomes secondary. It is the build’s ultimate damage upgrade.
- Ring of the Sacrilegious Soul: Automatically consumes corpses for you, providing incredible passive utility for Corpse Explosion and Tendrils.
- Bloodless Scream (Two-Handed Sword): Grants a massive damage multiplier and helps solve Resource management.
This build excels at leveling due to its safety and control.
- Early Game: Focus on raising your Skeletal Warriors and Mages. They will tank for you and help generate Essence. Use Reap and Blight as your primary skills.
- Mid Game: Unlock Corpse Tendrils and Soulrift. This combination allows you to group enemies and unleash devastating, resource-fueled barrages of Blight while they are Vulnerable and slowed.
- Minion Strategy: Your skeletons are invaluable companions for most of the leveling process, providing a frontline and extra damage. You can choose to keep them or later sacrifice them for raw statistical bonuses if you find you no longer need their support.
As you approach level 60 and unlock Torment difficulty, your focus shifts to optimization and addressing the build’s need for higher single-target damage.
- Paragon Boards & Glyphs: This is where you will gain a massive power boost. Start leveling your Glyphs in Nightmare Dungeons to enhance your Damage Over Time and survivability.
- Stat Perfection: You must now overcap your Armor and Resistances to counter the penalties from higher World Tiers. Aim for 1000+ Armor and 75%+ Resistances.
- Gear Overhaul: The end-game transition is defined by acquiring Ebonpiercer. This Unique fundamentally changes and supercharges the build, solving its damage scaling issues. This is the time to hunt for it and perfect your gear with optimal stats.
Best Endgame Necromancer Builds (Diablo 4 Season 10)
Reaching Level 60 with your Necromancer is merely the prelude to your true ascension. The endgame—comprising The Pit, Nightmare Dungeons, and other pinnacle activities—demands a complete evolution in your build’s philosophy. Where leveling builds prioritize versatility and sustainability, endgame builds are engineered for hyper-specialization, immense burst damage, and unyielding survivability against apocalyptic threats.
The shift in focus is dramatic and necessary. The best builds, like the dominant Blood Wave Necromancer, are no longer just “good all-rounders”; they are masterpieces of synergistic power that excel in three critical domains:
- Devastating AoE Cleave with Elite/Boss Nuking Power: The endgame separates builds that can clear trash mobs from those that can delete everything. The most challenging endgame content requires the ability to… down Bosses and Elites quickly and effectively. S-Tier builds achieve this without compromise. A build like Shattered Spirit Necromancer specializes in delivering lethal, focused damage, while Blood Wave variants offer massive, screen-clearing AoE that also annihilates single targets.
- Advanced Layered Defense: Surviving a single hit is no longer enough. Endgame mechanics and boss abilities will one-shot all but the most fortified characters. Top-tier builds incorporate multiple, overlapping defensive layers. This includes not just high armor and life, but damage reduction effects, constant healing (like that found in Blood builds), immunity frames from skills like Blood Mist, and powerful crowd control. The best endgame Necromancer builds provide that in strength, allowing you to “soak powerful single hits” and stay in the fight.
- Synergy with the Paragon Board and Legendary Aspects: A leveling build uses aspects; an endgame build is defined by them. The true power of builds like the Shadowblight Necromancer or Archmage Minion Necromancer is unlocked through specific legendary powers and, most importantly, the massive stat boosts and multiplicative damage nodes on the Paragon board. These systems transform a functional skillset into an unstoppable force of nature.

Transitioning smoothly into the endgame requires a deliberate and focused approach. Here are the key activities to master:
- Complete Your Renown
Before diving deep, ensure you have completed all Renown in every zone. The final rewards provide you with crucial extra Skill Points and Paragon Points, which are non-negotiable for maximizing your build’s potential. - Master the Endgame Activity Loop
Your endgame journey will revolve around a cycle of key activities:- Nightmare Dungeons & The Pit: The Pit is a progression challenge unlocked at level 60 and is arguably the ultimate test of your build’s capabilities. Alongside Nightmare Dungeons, these are your primary source for leveling Glyphs, which provide massive power spikes on your Paragon board.
- Helltides: Participate in these frequently. They are the only place where you can reliably obtain Forgotten Souls, a material essential for Enchanting your best Sacred and Ancestral gear at the Occultist.
- Tree of Whispers & World Bosses: These provide consistent rewards, experience, and a source of Nightmare Sigils to fuel your dungeon runs.
- Refine Your Gear with Precision
The “highest Item Power” rule is over. Now, you must hunt for Ancestral items with the correct four affixes for your build. For most Necromancers, this means prioritizing:- Intelligence (for global damage)
- Vulnerable Damage
- Critical Strike Chance/Damage
- Core Skill Damage
- Cooldown Reduction is also incredibly valuable for Ultimate-centric builds.
- Commit to a Single Build
The S-Tier and A-Tier builds can easily complete both instanced and open-world content, but they require full investment. Now is the time to choose your specialization—be it the high-mobility Archmage Minion Necromancer for speed farming or the devastating Blood Wave Necromancer for pushing high-tier content—and dedicate all your resources (Aspects, Paragon points, gear) to perfecting it.
Archmage Minion Endgame Necromancer Build: S-Tier
The defining feature of this build is The Hand of Naz, a Unique glove that revolutionizes the minion playstyle. It replaces your Skeletal Warriors and Golem with additional Skeletal Mages. When a Skeletal Mage attacks 25 times without dying, it upgrades to a Skeletal Arch-Mage, gaining a massive damage multiplier and the ability to teleport to your location to unleash devastating AoE attacks. The build focuses entirely on maximizing minion damage through numerous passive and active multipliers, creating a screen-clearing army that operates with terrifying efficiency.
Who is this for? This build is optimal for players who love the “pet” archetype and want their minions to be the primary source of devastation. It’s for end-game players who enjoy complex, synergistic gear and Paragon setups and want to push high-tier content with a powerful, autonomous army.
| Item Name | Item Type | Key Affixes | Unique / Legendary Power | Sockets |
| Heir of Perdition | Two-Handed Sword? | +Damage to Angels/Demons, +Critical Strike Chance, +Lucky Hit Chance, +Movement Speed, +Core Skills | Succumb to hatred and earn Mother’s Favor, increasing your damage dealt by 60%[x]. Slaughter enemies to briefly steal Mother’s Favor from surrounding allies. | Igni, Thul |
| Shroud of False Death | Chest | +All Passives, +All Stats, +Damage After Stealth, +Maximum Life, +Resource Generation | If you haven’t dealt damage in the last 2 seconds, gain Stealth and 40%[+] Movement Speed. | Grand Topaz, Grand Topaz |
| Two-Handed Scythe of Service and Sacrifice | Two-Handed Scythe | +Intelligence, +Maximum Life, +Skeleton Mage Damage, +Summon Damage, +Titan’s Fall | Skeleton Warriors explode on death, dealing 450 Physical damage. They lose 25% Life per second in combat. Skeleton Mages take 90% less damage and deal 100%[x] increased damage. | Nagu, Qax |
| The Hand of Naz | Focus | +Skeleton Mage Damage, +Attack Speed, +Maximum Life, +Skeletal Mage Mastery | Sacrificing both Warriors and Golems grants an additional Mage for each Minion sacrificed. After 25 attacks, Mages upgrade to Arch-Mages, which teleport to safety and have splashing attacks. | N/A |
| Blood Moon Breeches | Pants | +Critical Strike Chance, +Hellbent Commander, +Golem Mastery, +Curse Skills | Your Summons have a [3.0 – 7.0]% chance to randomly inflict Decrepify or Iron Maiden. You deal [20 – 50]%[x] increased Critical Strike Damage to Cursed enemies. | Grand Topaz, Grand Topaz |
| Boots of Occult Dominion | Boots | +Max Evade Charges, +Armor, +Intelligence, +Maximum Life, +Movement Speed, +Corpse Tendrils Size | Your maximum number of Skeletal Warriors and Skeletal Mages is increased by 2. | N/A |
| Ring of Mendeln | Ring | +All/Shadow Resist, +Summon Attack Speed, +Mastery Skills, +Damage, +Intelligence | Every 6th attack from each Minion is empowered, exploding for [780 – 1,350] Physical damage. | Grand Skull |
| Ring of Reanimation | Ring | +Fire/All Resist, +Attack Speed, +Intelligence, +Maximum Life, +Ultimate Cooldown, +Skeleton Mage Damage | Your Minions gain increased damage while alive, up to 60%[x] after 10 seconds. | Grand Skull |
| Unyielding Commander’s Amulet | Amulet | +All Resist, +Ultimate Cooldown, +Skeleton Mage Damage, +Intelligence%, +Coalesced Blood, +Hellbent Commander | While Army of the Dead is active, your Minions take 90% reduced damage and you deal 110%[x] increased Summon Damage. | Grand Skull |
The gameplay is strategic, focusing on setting up your minions for success. The rotation involves grouping enemies and applying buffs.
- Core Rotation: Initiate with Army of the Dead to stun enemies and activate key damage buffs. Follow up with Corpse Tendrils to group enemies and Bone Prison to make them Vulnerable. Cast Blight to create a damage-amplifying puddle and use Raise Skeleton on a corpse to summon a Skeletal Priest that buffs your mages.
- Key Passive – Kalan’s Edict: This passive increases the Attack Speed and damage of your Skeletal Mages for each active minion, synergizing perfectly with having 12-14 mages.
- Resource Generation: Decompose is your Essence generator and also creates corpses to fuel your other skills.
This build is highly dependent on specific end-game items to function as intended.
Stat Priorities (Marked List):
- Weapons & Jewelry:
- Intelligence (Increases minion damage and your resistances)
- Attack Speed
- Critical Strike Chance
- Skeletal Mage Damage
- Armor:
- Maximum Life
- Ranks to Key Passives (Hellbent Commander, Skeletal Mage Mastery)
- Cooldown Reduction
- Damage Reduction
Must-Have Legendary Aspects & Uniques:
- The Hand of Naz (Gloves): The build’s cornerstone. Replaces warriors and golems with mages and enables the Arch-Mage upgrade.
- Blood Moon Breeches (Pants): Causes your Skeletal Mages to automatically spread the Decrepify curse, providing crowd control and enabling other damage multipliers.
- Ring of Mendeln (Ring): Provides a powerful proc that makes your minions’ attacks deal massive bonus damage based on your stats.
- Unyielding Commander’s Aspect (Amulet): While Army of the Dead is active, your minions take 90% reduced damage and deal a massive 110%[x] increased damage.
The transition to this build is a significant gear and skill overhaul that should only be attempted once you have the key items.
- Paragon Boards & Glyphs: The Cult Leader board is mandatory, providing huge damage multipliers for your minions. Glyphs like Amplify and Gravekeeper further scale your damage based on curses and corpses.
- Mythic Items: End-game goals include Heir of Perdition (Helm) and Shroud of False Death (Chest), which provide massive stat boosts and powerful effects.
- Chaos Perks (Season 10): The Alter the Balance Unique Perk is transformative, turning Army of the Dead into a spammable Core Skill. This allows you to maintain the Unyielding Commander’s damage buff permanently.
Blood Wave Endgame Necromancer Build: S-Tier
The core of this build’s identity is the Alter the Balance Unique Chaos Perk, which fundamentally changes how Blood Wave functions. It removes the cooldown from Blood Wave, turning it into a spammable Core Skill that consumes Essence instead. This allows you to cast tidal waves repeatedly, creating a relentless onslaught. The build synergizes this with the Overpower mechanic, which guarantees massive bonus damage based on your Life and Fortify, making each wave hit with catastrophic force.
Who is this for? This build is optimal for players who enjoy a tanky, spell-casting playstyle and love impactful, high-visibility abilities. It’s perfect for those who want to feel unstoppable, trading frantic mobility for raw, overwhelming power and survivability.
| Item Name | Item Type | Key Affixes | Unique / Legendary Power | Sockets |
| Heir of Perdition | Two-Handed Sword? | +Damage to Angels/Demons, +Critical Strike Chance, +Lucky Hit Chance, +Movement Speed, +Core Skills | Succumb to hatred and earn Mother’s Favor, increasing your damage dealt by 60%[x]. Slaughter enemies to briefly steal Mother’s Favor from surrounding allies. | Grand Topaz, Grand Topaz |
| Shroud of False Death | Chest | +All Passives, +All Stats, +Damage on Next Attack After Stealth, +Maximum Life, +Resource Generation | If you haven’t dealt damage in the last 2 seconds, gain Stealth and 40%[+] Movement Speed. | Ahu, Qax |
| Two-Handed Mace of the Damned | Two-Handed Mace | +Overpower Damage, +Intelligence, +Maximum Life, +Damage while Fortified, +Blood Wave Double Damage Chance | You deal 55%[x] increased Shadow damage to enemies afflicted by any Curse. | Royal Diamond, Royal Diamond |
| Vehement Brawler’s Gloves | Gloves | +Intelligence, +Critical Strike Chance, +Maximum Life, +Damage while Fortified, +Blight Size | Casting an Ultimate Skill increases your damage by 30%[x] for 8 seconds. Gain 2 additional Ultimate Skill Ranks. | N/A |
| Kessime’s Legacy | Pants | +Fortify on Blood Wave, +Ultimate Damage, +Damage Reduction while Fortified, +Blood Wave Cooldown Reduction, +Blood Wave Double Damage Chance | Blood Wave now forms a wave on each side of you. Both waves converge at your feet, Pulling In all surrounding enemies and exploding for [300 – 450] damage. | Zan, Xal |
| Banished Lord’s Talisman | Amulet | +Resistance to All Elements, +Maximum Life%, +Overpower Damage, +Attack Speed, +Core Skills | After you spend 275 of your Primary Resource, your next Core Skill is guaranteed to Overpower. Your Critical Strikes that Overpower deal 72%[x] increased damage. | N/A |
| Ring of Ultimate Shadow | Ring | +Cold/All Resist, +Attack Speed, +Intelligence, +Maximum Life, +Damage while Fortified | Bone Storm and Blood Wave are also Darkness Skills, deal Shadow damage, and gain additional effects: Enemies damaged by Bone Storm take 420 Corrupting damage over 2 seconds. Blood Wave creates Desecrated Ground as it travels, dealing 6,720 Corrupting damage over 4 seconds. | Flawless Skull |
| Blood Boiling Ring | Ring | +Fire/All Resist, +Intelligence, +Maximum Life, +Overpower Damage, +Blood Overpower Damage | When your Core Skills Overpower any number of enemies, you spawn 3 Volatile Blood Drops. Collecting one causes it to explode, dealing 938 Physical damage. Every 20 seconds, your next Skill is guaranteed to Overpower. | Flawless Skull |
| Amulet of Apogeic Furor | Amulet | +Resistance to All Elements, +Maximum Life, +Blood Overpower Damage, +Intelligence%, +Tides of Blood, +Essence from Blood Orbs | Casting an Ultimate Skill increases your Ultimate damage by 10.0%[x], up to 100%[x]. At 10 stacks, your Cooldowns and this bonus are reset. | Flawless Skull |
The gameplay is methodical and powerful. You engage by casting Decrepify and Blight to apply curses and a damage-amplifying area. You then unleash Blood Wave as your primary damage source. The key is to position yourself to gather the Blood Orbs created by the wave, as they heal you, grant Fortify, and provide Essence to fuel your next cast.
- Core Mechanic – Overpower: Your damage is driven by Rathma’s Vigor, which guarantees an Overpower every 12 seconds, and the Banished Lord’s Talisman, which provides another guaranteed Overpower after spending 300 Essence.
- Support Skills: Corpse Tendrils is used to group enemies and make them Vulnerable, while Corpse Explosion helps trigger damage passives.
- Key Passive – Rathma’s Vigor: This is non-negotiable, providing a guaranteed Overpower and reducing cooldowns, which is crucial before you acquire the Alter the Balance perk.
This is a true end-game build that requires specific items to function at its peak.
Stat Priorities (Marked List):
- Weapons & Jewelry:
- Overpower Damage
- Maximum Life (directly increases Overpower damage)
- Ultimate Damage
- Intelligence
- Armor:
- Maximum Life
- Damage Reduction
- Damage While Fortified
- Cooldown Reduction (until you get Alter the Balance)
Must-Have Legendary Aspects & Uniques:
- Kessime’s Legacy (Pants): The cornerstone of the build. It allows Blood Wave to cast a second time, doubling its damage and area coverage.
- Alter the Balance (Chaos Perk): The build’s engine. It removes Blood Wave‘s cooldown, allowing you to spam it as long as you have Essence.
- Tidal Aspect (Weapon): Causes Blood Wave to summon three waves instead of one, dramatically increasing its coverage and damage potential.
- Aspect of Ultimate Shadow (Ring): Converts your Blood Wave damage to Shadow, allowing it to benefit from all your Darkness skill passives and multipliers.
The transition to this build is a complete overhaul that should only be attempted once you have the key components.
- Paragon Boards: The Blood Begets Blood and Bloodbath boards are essential, providing massive bonuses to Overpower damage, Life, and Blood skill effectiveness.
- Gear Overhaul: You will need to re-temper your gear, shifting priority from Cooldown Reduction to Essence Generation and Maximum Life to sustain the spammable Blood Wave playstyle.
- Mythic Items: End-game goals include Heir of Perdition (Helm) and Shroud of False Death (Chest) for their immense stat boosts and powerful unique effects.
DoT Blood Wave Endgame Necromancer Build: S-Tier
This build’s unique identity comes from combining two powerful mechanics. First, the Alter the Balance Unique Chaos Perk removes the cooldown from Blood Wave, allowing you to spam it as long as you have Essence. Second, the Aspect of Ultimate Shadow converts the Blood Wave‘s damage to Shadow, causing it to leave behind “Desecrated Ground” that deals heavy damage over time. Unlike the Overpower-focused variant, this build specializes in stacking numerous Damage-over-Time multipliers and Shadow damage bonuses, creating a massive, persistent area of denial that shreds everything caught within it.
Who is this for? This build is optimal for players who enjoy a strategic, area-control playstyle. It’s perfect for those who like to set up deadly zones and watch enemies perish over time, rather than relying on burst damage. It offers tremendous survivability and is excellent for clearing dense packs and controlling boss arenas.
| Item Name | Item Type | Key Affixes | Unique / Legendary Power | Sockets |
| Heir of Perdition | Two-Handed Sword | +200% Damage to Angels/Demons, +20% Crit Chance, +20% Lucky Hit, +20% Movement Speed, +2 Core Skills | Succumb to hatred and earn Mother’s Favor, increasing your damage dealt by 60%[x]. Slaughter enemies to briefly steal Mother’s Favor from surrounding allies. | Ahu, Qax |
| Shroud of False Death | Chest Armor | +1 All Passives, +160 All Stats, +333% Damage after Stealth, +800 Life, +11.1% Resource Generation | If you haven’t dealt damage in the last 2 seconds, gain Stealth and 40%[+] Movement Speed. | Grand Topaz, Grand Topaz |
| Two-Handed Axe of Ultimate Shadow | Two-Handed Axe | +Intelligence, +Damage Over Time, +Max Life, +Desecrated Ground Damage, +Titan’s Fall | Bone Storm and Blood Wave are also Darkness Skills, deal Shadow damage: Bone Storm deals Corrupting DoT; Blood Wave creates Desecrated Ground. | Grand Amethyst, Grand Amethyst |
| Vehement Brawler’s Gloves | Gloves | +Intelligence, +Damage Over Time, +Max Life, +Crowd Control Duration, +Desecrated Ground Damage | Casting an Ultimate Skill increases your damage by 30%[x] for 8 seconds. Gain 2 additional Ultimate Skill Ranks. | N/A |
| Kessime’s Legacy | Pants | +Fortify on Blood Wave, +Ultimate Damage, +Damage Reduction while Fortified, +Blood Wave Cooldown Reduction, +Blood Wave Double Damage | Blood Wave now forms a wave on each side of you. Both waves converge, Pulling In enemies and exploding for [300 – 450] damage. | Igni, Wat |
| Bloodless Scream | Two-Handed Scythe | +Non-Physical Damage, +Lucky Hit: Resource Restore, +Intelligence, +Darkness Skills, +Lucky Hit: Shadow Damage | Your Darkness Skills Chill and deal 240%[x] increased damage to Frozen enemies/bosses. Every 800 hits with Darkness Skills Freezes nearby enemies. | N/A |
| Ring of Creeping Death | Ring | +Shadow/All Resist, +Intelligence, +Damage Over Time, +Max Life, +Desecrated Ground Damage | You deal 20%[x] increased DoT per Crowd Control effect on the enemy. Unstoppable/Staggered enemies take 40%[x] increased DoT. | Grand Emerald |
| Ring of Apogeic Furor | Ring | +Fire/All Resist, +Intelligence, +Damage Over Time, +Max Life, +Desecrated Ground Damage | Casting an Ultimate Skill increases your Ultimate damage by 10%[x], up to 100%[x]. At 10 stacks, your Cooldowns and this bonus are reset. | Royal Ruby |
| Amulet of the Damned | Amulet | +All Resist, +Desecrated Ground Damage, +Resource Cost Reduction, +Intelligence%, +Coalesced Blood, +Gloom | You deal 55%[x] increased Shadow damage to enemies afflicted by any Curse. | Grand Amethyst |
The gameplay is about carpeting the battlefield with corrosive shadows. You open with Blight to create an initial damage-amplifying puddle and apply Iron Maiden for Essence and healing. You then unleash Blood Wave repeatedly, covering the area in waves that also create persistent Desecrated Ground.
- Core Mechanic – Spammable Waves: With the Alter the Balance perk, Blood Wave becomes your primary spammable damage skill, consuming Essence instead of having a cooldown.
- Damage Amplification: Corpse Tendrils groups enemies and makes them Vulnerable, while Corpse Explosion helps trigger the Flesh-eater passive for a significant damage boost.
- Key Passive – Affliction: This passive is chosen over Rathma’s Vigor, as it provides a powerful, free damage instance whenever you cast a curse on a Vulnerable, Crowd Controlled, or DoT-affected enemy—conditions you maintain constantly.
This is a dedicated end-game build that requires specific key items to function.
Stat Priorities (Marked List):
- Weapons & Jewelry:
- Damage Over Time
- Shadow Damage
- Intelligence
- Lucky Hit Chance
- Armor:
- Maximum Life
- Damage Reduction
- Desecrated Ground Damage
- Ultimate Damage
Must-Have Legendary Aspects & Uniques:
- Kessime’s Legacy (Pants): The build’s cornerstone. It causes Blood Wave to cast a second time, effectively doubling the area covered by Desecrated Ground.
- Alter the Balance (Chaos Perk): The engine of the build. It enables the spam-casting of Blood Wave.
- Aspect of Ultimate Shadow (Weapon): Converts Blood Wave to Shadow damage and makes it leave behind Desecrated Ground, enabling the entire DoT playstyle.
- Aspect of Creeping Death (Ring): Greatly increases the damage of your Shadow Damage-over-Time effects, providing a massive multiplier to your primary damage source.
The transition is a complete overhaul that should only be done once you have the key components.
- Paragon Boards: The Wither and Flesh-eater boards are essential, providing huge bonuses to Shadow Damage, Damage-over-Time, and a powerful damage multiplier after consuming corpses.
- Gear Overhaul: You must re-temper your gear, focusing on Essence Generation to sustain the spam-casting of Blood Wave, and prioritizing Damage Over Time and Desecrated Ground Damage above all else.
- Mythic Items: End-game goals include Heir of Perdition (Helm) and Shroud of False Death (Chest) for their immense stat boosts and powerful effects that synergize with the build’s skill-spamming nature.
Reap Warrior Endgame Necromancer Build: S-Tier
The core of this build’s uniqueness lies in the powerful synergy between two key Chaos Perks. Grim Reapers gives your Skeletal Warriors a 25% chance to cast Reap instead of their normal attack. This is then supercharged by Unstable Power, which makes all Basic Skills (including the Warriors’ Reap) guaranteed to Critically Strike and Overpower for 100% increased damage. The result is an army of skeletons that unleash devastating, screen-shaking Reaps, making them your primary source of damage while you support them from the sidelines.
Who is this for? This build is optimal for players who love the minion fantasy but want a more active and explosive twist. It’s perfect for those who enjoy creative build-crafting and want to leverage seasonal mechanics to create a truly unique playstyle where your undead army does the heavy lifting in the most spectacular way possible.
| Item Name | Item Type | Key Affixes | Unique / Legendary Power | Sockets |
| Blood Getter’s Cap | Helm | +Intelligence, +Max Resource, +Corpse Tendrils Size, +Skeletal Warrior Mastery, +Minion Fortify Chance | Your Skeletal Priests now also empower you at 75% effectiveness. | Neo, Wat |
| Lidless Wall | Shield | +Block Chance, +Main Hand Damage, +Armor, +Bone Storm Duration, +Bone Storm Double Damage, +Bone Skills, +Cooldown Reduction | Lucky Hit: While you have an active Bone Storm, hitting an enemy has up to a 54% chance to spawn a new one. Each active Bone Storm grants 20%[x] Critical Strike Damage, up to 100%[x]. | Nagu, Ceh |
| Focus of Grasping Veins | Focus | +Lucky Hit Chance, +Intelligence, +Max Life, +Max Resource, +Overpower Damage, +Reap Double Hit Chance | Gain 25%[+] Critical Strike Chance for 6s after casting Corpse Tendrils. You deal 50%[x] bonus Critical Strike Damage to enemies damaged by Corpse Tendrils. | Grand Ruby |
| Shard of Verathiel | One-Handed Sword? | +Damage, +All Stats, +Basic Skills, +Basic Attack Speed, +Max Resource | Basic Skills deal [50 – 150]%[x] increased damage but additionally cost 25 Primary Resource. | Grand Ruby |
| Bloodless Scream | Two-Handed Scythe | +Non-Physical Damage, +Lucky Hit: Resource Restore, +Intelligence, +Darkness Skills, +Lucky Hit: Shadow Damage | Your Darkness Skills Chill and deal 240%[x] increased damage to Frozen enemies/bosses. Every 800 hits with Darkness Skills Freezes nearby enemies. | N/A |
| Paingorger’s Gauntlets | Gloves | +Attack Speed, +Basic Skills, +Cooldown Reduction, +Lucky Hit: Stun Chance | Damaging with a Non-Basic Skill marks enemies. Your next Basic Skill’s damage is echoed to all marked enemies for 150%[x] increased damage. | Grand Topaz, Grand Topaz |
| Boots of Occult Dominion | Boots | +Max Evade Charges, +Max Life, +Movement Speed, +Corpse Tendrils Size, +Skeletal Warrior Mastery | Your maximum number of Skeletal Warriors and Skeletal Mages is increased by 2. | N/A |
| Ring of Reanimation | Ring | +Lightning/All Resist, +Attack Speed, +Intelligence, +Max Life, +Resource from Macabre Skills, +Overpower Damage | Your Minions gain increased damage while alive, up to 60%[x] after 10 seconds. | Grand Skull |
| Ring of the Moonrise | Ring | +Poison/All Resist, +Attack Speed, +Intelligence, +Max Life, +Resource from Macabre Skills, +Overpower Damage | Basic Skills grant Attack Speed stacks. At max stacks, enter a Vampiric Bloodrage for 60%[x] Basic Skill damage and 15% Movement Speed. | Grand Skull |
| Amulet of Adaptability | Amulet | +All Resist, +Intelligence%, +Gloom, +Hellbent Commander, +Resource from Macabre Skills, +Overpower Damage | Basic Skills generate +5 Resource and deal increased damage based on your current Primary Resource (up to 500). | Grand Skull |
Your role is that of a battlefield commander and support caster. You are not the main damage source; you exist to enable your minions.
- Core Mechanic – Minion-Led Reap: Your Skeletal Warriors are the stars. Your job is to group enemies with Corpse Tendrils and then let your warriors shred them with their guaranteed Critical/Overpower Reaps.
- Buff and Control: You maintain Bone Storm for its buffs and survivability, use Bone Prison to trap enemies for your warriors, and cast Blight to apply a damage multiplier to enemies standing in it.
- Panic Button: Blood Mist is your essential “oh-shoot” button to escape deadly situations or to reposition.
This build requires specific Uniques to reach its full potential, but it functions well even during the acquisition process.
Stat Priorities (Marked List):
- Weapons & Jewelry:
- Attack Speed (Increases how often your warriors attack and proc Reap)
- Intelligence
- Critical Strike Damage
- Overpower Damage
- Armor:
- Maximum Life
- + Ranks to Skeletal Warrior Mastery
- + Ranks to Hellbent Commander
- Damage Reduction
Must-Have Legendary Aspects & Uniques:
- Shard of Verathiel (Weapon): A massive damage multiplier for your Basic Skills, which directly scales the damage of your warriors’ Reap.
- Paingorger’s Gauntlets (Gloves): Marks enemies with your Non-Basic Skills (like Blight), causing the first Reap that hits them to echo its damage to all marked enemies, solving area-of-effect clear.
- Blood Moon Breeches (Pants): Causes your minions to automatically apply curses, enabling other damage multipliers like Aspect of the Damned.
- Aspect of Occult Dominion (Boots): Increases your maximum number of Skeletal Warriors and Mages, allowing for a larger, more powerful army.
The transition is about optimizing the build’s performance by acquiring its key Uniques and perfecting your Paragon board.
- Paragon Boards: The Cult Leader board is essential for any minion build, providing huge damage multipliers for your summons.
- Gear Acquisition: The hunt for Shard of Verathiel and Paingorger’s Gauntlets is your top priority, as they are the final pieces that elevate the build from functional to exceptional.
- Book of the Dead: You will sacrifice your Skeletal Mages and Golem for raw statistical bonuses (Overpower Damage and Critical Strike Damage), as your Warriors are your only needed minions.
Shadowblight Endgame Necromancer Build: S-Tier
This build’s identity is defined by its ruthless efficiency and incredible mobility. By sacrificing all minions, you gain significant raw damage bonuses and free up skill slots to focus entirely on shadow spells. The build is engineered to stack an immense number of damage multipliers from curses, shadow damage, and key passives. A standout feature is the use of Ebonpiercer, which can be Masterworked to grant up to +12 ranks in Reaper’s Pursuit. Combined with four darkness skills on your bar, this can push your movement speed to the 200% cap, making you unnaturally fast and agile.
Who is this for? This build is optimal for players who enjoy a fast-paced, high-skill “spell-slinger” playstyle. It’s perfect for those who prefer dealing damage directly rather than through minions and appreciate a build with high mobility and complex, synergistic mechanics.
| Item Name | Item Type | Key Affixes | Unique / Legendary Power | Sockets |
| Heir of Perdition | Two-Handed Sword | +200% Damage to Angels/Demons, +20% Crit Chance, +20% Lucky Hit, +20% Movement Speed, +2 Core Skills | Succumb to hatred and earn Mother’s Favor, increasing your damage dealt by 60%[x]. Slaughter enemies to briefly steal Mother’s Favor from surrounding allies. | Cir, Ohm |
| Shroud of False Death | Chest Armor | +1 All Passives, +160 All Stats, +333% Damage after Stealth, +800 Life, +11.1% Resource Generation | If you haven’t dealt damage in the last 2 seconds, gain Stealth and 40%[+] Movement Speed. | Grand Topaz, Grand Topaz |
| Blighted Two-Handed Sword | Two-Handed Sword | +Crit Damage, +Intelligence, +Max Life, +Shadow Damage, +Finality | Consecutive hits with the Shadowblight Key Passive deal 35.0%[x] increased damage for each hit, resetting after 6 seconds of the first. | Zan, Qax |
| Ebonpiercer | Amulet | +All Resist, +Blight, +Gloom, +Reaper’s Pursuit, +Blight Double Cast Chance | Blight also shoots 4 smaller projectiles that pierce enemies and deal 1,800 Corrupting damage over 3 seconds. | N/A |
| Fists of Fate | Gloves | +Lucky Hit Chance, +Crit Chance, +Attack Speed, +Chance to Make Vulnerable | Your attacks randomly deal 1% to 360% of their normal damage. | Grand Topaz, Grand Topaz |
| Boots of the Cursed Aura | Boots | +Max Evade Charges, +Armor, +Intelligence, +Max Life, +Movement Speed, +Corpse Tendrils Size | A dark aura surrounds you, inflicting Decrepify and Iron Maiden on enemies who touch it. Curses spread and last 4 seconds outside the aura. | N/A |
| Sacrificial Ring | Ring | +Poison/All Resist, +Attack Speed, +Intelligence, +Max Life, +Shadow Damage | Your Sacrifice bonuses are increased by 55%. | Grand Skull |
| Ring of the Damned | Ring | +Lightning/All Resist, +Attack Speed, +Intelligence, +Crit Damage, +Shadow Damage | You deal 55%[x] increased Shadow damage to enemies afflicted by any Curse. | Grand Skull |
| Amulet of Decay | Amulet | +All Resist, +Lucky Hit: Resource Restore, +Corpse Tendrils Size, +Intelligence%, +Coalesced Blood, +Terror | Each time Shadowblight deals damage, it increases the next Shadowblight‘s damage by 50%[x], stacking up to 5 times. | Grand Skull |
The gameplay is a dynamic dance of applying debuffs and damage-over-time effects. You engage by spamming Blight to lay down corrosive areas, then use Soulrift to make enemies Vulnerable and regenerate your Essence.
- Core Mechanic – Shadowblight: Every 8th instance of shadow damage you deal triggers Shadowblight, dealing a massive 200% shadow damage burst. With multiple DoT effects ticking, this procs very frequently.
- Essence & Corpse Management: Decompose channels to generate Essence and corpses, while Corpse Explosion and Corpse Tendrils consume them for extra damage and crowd control.
- Automated Curses: The Aspect of the Cursed Aura automatically applies Decrepify and Iron Maiden to enemies near you, enabling other damage multipliers without spending skill casts.
This is a high-investment end-game build that requires specific Mythic and Unique items to reach its full potential.
Stat Priorities (Marked List):
- Weapons & Jewelry:
- Intelligence (Increases damage and resistances)
- Attack Speed
- Critical Strike Chance
- Shadow Damage / Damage Over Time
- Armor:
- Maximum Life
- Damage Reduction
- Cooldown Reduction
- Lucky Hit Chance
Must-Have Legendary Aspects & Uniques:
- Ebonpiercer (Gloves): A core item that transforms Blight into homing projectiles and provides massive ranks to Reaper’s Pursuit, fueling your incredible movement speed.
- Shroud of False Death (Chest): A Mythic item that provides +1 to all Passives and valuable All Stats, significantly boosting your power.
- Aspect of the Cursed Aura (Boots): Automates your curse application, which is crucial for activating other damage multipliers like Aspect of the Damned.
- Aspect of Decay (Amulet): Causes Shadowblight‘s damage to increase by 50% each time it hits an enemy, stacking up to 5 times for a massive 250% damage multiplier.
The transition is a complete overhaul that should only be attempted once you have the core items.
- Paragon Boards: The Wither and Blood Begets Blood boards are essential, providing huge bonuses to Shadow Damage, Damage-over-Time, and a powerful damage multiplier when you collect Blood Orbs.
- Book of the Dead: You will sacrifice all your minions—Warriors, Mages, and Golem—for raw statistical bonuses: increased Shadow Damage, Damage to Vulnerable enemies, and Critical Strike Damage.
- Chaos Perks (Season 10): The Alter the Balance Unique Perk is transformative, turning Soulrift into a spammable Core Skill, allowing you to maintain key buffs like the one from the Finality passive permanently.
Shattered Spirit Endgame Necromancer Build: S-Tier
The core mechanic that defines this build is the Shattered Spirit‘s Aspect. When Bone Spirit damages an enemy, it automatically casts Bone Splinters at them. This is then supercharged by the Gospel of the Devotee Unique, which gives Bone Splinters a piercing effect, allowing each projectile to shred through multiple enemies. The build further enhances this with the Unstable Power Chaos Perk, guaranteeing that every one of these auto-cast Bone Splinters is a Critical Hit and Overpower. The result is a spectacular, machine-gun-like volley of super-powered bone shards that decimate everything in their path.
Who is this for? This build is optimal for players who enjoy complex, synergistic mechanics and high-burst damage windows. It’s perfect for those who appreciate a tactical playstyle that involves setting up for massive damage bursts and want a build that feels unique and powerful in both clearing dense packs and nuking elite enemies.
| Item Name | Item Type | Key Affixes | Unique / Legendary Power | Sockets |
| Lidless Wall | Shield | +Block Chance, +Main Hand Damage, +Armor, +Bone Storm Duration, +Bone Storm Double Damage, +Bone Skills, +Cooldown Reduction | Lucky Hit: While you have an active Bone Storm, hitting an enemy has up to a 54% chance to spawn a new one. Each active Bone Storm grants 20%[x] Critical Strike Damage, up to 100%[x]. | Yul, Wat |
| Shroud of False Death | Chest Armor | +1 All Passives, +160 All Stats, +333% Damage after Stealth, +800 Life, +11.1% Resource Generation | If you haven’t dealt damage in the last 2 seconds, gain Stealth and 40%[+] Movement Speed. | Ahu, Qax |
| Focus of the Moonrise | Focus | +Lucky Hit Chance, +Cooldown Reduction, +Intelligence, +Max Life, +Bone Splinters Double Cast Chance, +Overpower Damage | Damaging an enemy with a Basic Skill grants Attack Speed stacks. At max stacks, enter a Vampiric Bloodrage for 60%[x] Basic Skill damage and 15% Movement Speed. | Grand Ruby |
| Shard of Verathiel | One-Handed Sword? | +Damage, +All Stats, +Basic Skills, +Basic Attack Speed, +Max Resource | Basic Skills deal [50 – 150]%[x] increased damage but additionally cost 25 Primary Resource. | Grand Ruby |
| Crown of Lucion | Helm | +Max Life, +Cooldown Reduction, +Lucky Hit Chance, +Shadow Resistance | Each time you use a Skill with a Resource Cost, gain 18%[x] increased damage and 30%[+] increased Resource Cost for 4 seconds, stacking up to 5 times. | N/A |
| Paingorger’s Gauntlets | Gloves | +Attack Speed, +Basic Skills, +Cooldown Reduction, +Lucky Hit: Stun Chance | Damaging with a Non-Basic Skill marks enemies. Your next Basic Skill’s damage is echoed to all marked enemies for 150%[x] increased damage. | Grand Topaz, Grand Topaz |
| Gospel of the Devotee | Pants | +Basic Attack Speed, +Intelligence, +Max Life, +Basic Skill Double Damage Chance | Your Basic Skills are empowered: Reap is faster, Decompose spawns Corpses, Hemorrhage has an extra burst, Bone Splinters pierce. | N/A |
| Ring of Decaying Humerus | Ring | +Poison/All Resist, +Attack Speed, +Intelligence, +Max Life, +Rapid Ossification, +Overpower Damage | Your Bone Skills now deal Shadow damage instead of Physical. Enemies take 25%[x] increased Shadow damage after being hit with a Bone Skill. | Grand Skull |
| Ring of Adaptability | Ring | +Lightning/All Resist, +Attack Speed, +Intelligence, +Max Life, +Resource from Macabre Skills, +Overpower Damage | Basic Skills generate +5 Resource and deal increased damage based on your current Primary Resource (up to 500). | Grand Skull |
| Shattered Spirit’s Amulet | Amulet | +All Resist, +Corpse Tendrils Size, +Intelligence%, +Coalesced Blood, +Evulsion, +Bone Spirit Cooldown Reduction | Casting Bone Spirit also launches 18 Bone Splinters in all directions, dealing 600%[x] increased damage and generating 6 Essence per enemy hit. | Grand Skull |
The gameplay is a rhythmic cycle of setup and execution. You begin by casting Bone Storm for its defensive and offensive buffs. You then use Corpse Tendrils to group enemies together, making them vulnerable. Finally, you spam Bone Spirit, which in turn automatically fires volleys of piercing, overpowering Bone Splinters into the clustered pack, wiping them out almost instantly.
- Core Mechanic – Automated Splinters: Your primary damage comes from the Bone Splinters cast by the Shattered Spirit‘s Aspect, not from Bone Spirit itself.
- Cooldown Management: A key goal is to reduce Bone Spirit‘s cooldown to around 5 seconds through gear and the Rapid Ossification passive. This allows you to spam it constantly, fueling your main damage source.
- Buffs and Control: Blight is used to amplify damage against enemies, while Bone Storm provides critical survivability and stat boosts.
This is a high-investment end-game build that requires specific items to function smoothly.
Stat Priorities (Marked List):
- Weapons & Jewelry:
- Cooldown Reduction (Essential for spamming Bone Spirit)
- Attack Speed
- Intelligence
- Critical Strike Chance / Damage
- Armor:
- Maximum Life
- Damage Reduction
- Ranks to Key Passives (Rapid Ossification)
Must-Have Legendary Aspects & Uniques:
- Shattered Spirit‘s Aspect (Amulet): The build’s engine. It causes Bone Spirit to automatically cast Bone Splinters at your target.
- Gospel of the Devotee (Boots): A game-changer that gives Bone Splinters a piercing effect, transforming it from a single-target skill into a devastating area-of-effect attack.
- Shard of Verathiel (Weapon): Provides a massive damage multiplier to your Basic Skills, which directly scales the damage of your auto-cast Bone Splinters.
- Lidless Wall (Helm/Chaos Armor): Creates additional Bone Storms, providing immense survivability, cooldown reduction, and a stacking Critical Strike Damage bonus.
The transition involves a complete skill and gear overhaul focused on achieving the perfect cooldown loop.
- Paragon Boards: The Bone Graft and Wither boards are essential, providing bonuses to Bone skill damage, Maximum Essence, and Shadow damage (via the Aspect of Decaying Humerus).
- Cooldown Optimization: The end-game goal is to stack enough Cooldown Reduction so that Bone Spirit‘s cooldown is instantly reset by the Rapid Ossification passive whenever you consume a corpse, creating a seamless spam cycle.
- Book of the Dead: You will sacrifice all your minions for raw statistical bonuses: Shadow Damage, Overpower Damage, and Critical Strike Damage, all of which perfectly synergize with the build’s mechanics.
Bone Spirit Endgame Necromancer Build: A-Tier
The core of this build’s identity is its nuke-style gameplay without long cooldowns. Unlike other Ultimate-like skills, Bone Spirit can be spammed continuously with proper gear and skill setup. Its damage scales directly with your Maximum Essence, making resource management a primary damage mechanic. The build is further defined by its reliance on Bone Prison, which not only traps enemies but also significantly boosts your Maximum Essence via the Path of Trag’Oul Unique boots, creating a powerful synergy where you are strongest when enemies are imprisoned.
Who is this for? This build is optimal for players who enjoy a tactical, precision-based playstyle and get satisfaction from seeing massive, screen-shaking damage numbers. It’s perfect for those who like setting up elaborate traps and unleashing overwhelming burst damage, rewarding good positioning and timing.
| Item Name | Item Type | Key Affixes | Unique / Legendary Power | Sockets |
| Heir of Perdition | Two-Handed Sword | +200% Damage to Angels/Demons, +20% Crit Chance, +20% Lucky Hit, +20% Movement Speed, +2 Core Skills | Succumb to hatred and earn Mother’s Favor, increasing your damage dealt by 60%[x]. Slaughter enemies to briefly steal Mother’s Favor from surrounding allies. | Yul, Wat |
| Shroud of False Death | Chest Armor | +1 All Passives, +160 All Stats, +333% Damage after Stealth, +800 Life, +11.1% Resource Generation | If you haven’t dealt damage in the last 2 seconds, gain Stealth and 40%[+] Movement Speed. | Grand Topaz, Grand Topaz |
| Focus of Apogeic Furor | Focus | +Lucky Hit Chance, +Intelligence, +Max Life, +Max Resource, +Bone Crit Damage, +Bone Spirit Double Damage | Casting an Ultimate Skill increases your Ultimate damage by 10.0%[x], up to 100%[x]. At 10 stacks, your Cooldowns and this bonus are reset. | Grand Emerald |
| Imprisoned Spirit’s Sword | One-Handed Sword | +Crit Damage, +Intelligence, +Max Life, +Bone Crit Damage, +Bone Spirit Double Damage | When Bone Spirit explodes inside a Bone Prison, it explodes an additional time, dealing 80% damage. Bone Spirit now prioritizes enemies inside a Bone Prison. | Grand Emerald |
| Lidless Wall | Shield | +Block Chance, +Main Hand Damage, +Armor, +Bone Storm Duration, +Bone Storm Double Damage, +Bone Skills, +Cooldown Reduction | Lucky Hit: While you have an active Bone Storm, hitting an enemy has up to a 54% chance to spawn a new one. Each active Bone Storm grants 20%[x] Critical Strike Damage, up to 100%[x]. | N/A |
| Crown of Lucion | Helm | +Max Life, +Cooldown Reduction, +Lucky Hit Chance, +Shadow Resistance | Each time you use a Skill with a Resource Cost, gain 18%[x] increased damage and 30%[+] increased Resource Cost for 4 seconds, stacking up to 5 times. | Zan, Ner |
| Path of Trag’Oul | Boots | +Max Evade Charges, +Movement Speed, +Bone Skills, +Armor, +Bone Prison Cooldown Reduction | Bone Prison traps a larger area and fires [10 – 30] Bone Splinters at enemies trapped within. Gain 2 Max Essence for 10s per hit. | N/A |
| Ring of Decaying Humerus | Ring | +Lightning/All Resist, +Attack Speed, +Intelligence, +Max Life, +Bone Crit Damage, +Bone Spirit Cooldown Reduction | Your Bone Skills now deal Shadow damage instead of Physical. Enemies take 25%[x] increased Shadow damage after being hit with a Bone Skill. | Grand Diamond |
| Sacrificial Ring | Ring | +Poison/All Resist, +Attack Speed, +Intelligence, +Max Life, +Bone Crit Damage, +Resource from Macabre Skills | Your Sacrifice bonuses are increased by 55%. | Grand Diamond |
| Amulet of the Damned | Amulet | +All Resist, +Corpse Tendrils Size, +Intelligence%, +Coalesced Blood, +Evulsion, +Resource from Macabre Skills | You deal 55%[x] increased Shadow damage to enemies afflicted by any Curse. | Grand Skull |
The gameplay is a precise sequence of setup and execution. You begin by casting Bone Storm for its offensive and defensive buffs. Next, you use Corpse Tendrils to group enemies into a tight cluster. The crucial step is casting Bone Prison on the group, which makes them Vulnerable and, with Path of Trag’Oul, dramatically increases your Maximum Essence. Finally, you unleash Bone Spirit, which now deals massively increased damage due to your inflated Essence pool, homing in and obliterating everything trapped within the prison.
- Core Mechanic – Essence Scaling: Your Bone Spirit damage is directly multiplied by your current Maximum Essence. Building and maintaining a huge Essence pool is your top priority.
- Cooldown Management: Through the Rapid Ossification passive and gear with Cooldown Reduction, you reduce Bone Spirit‘s cooldown to near zero, allowing you to cast it repeatedly.
- Key Passive – Ossified Essence: This provides a consistent damage multiplier while your Essence is high, which is almost always the case.
This is a gear-dependent end-game build that requires specific stats and Uniques to function smoothly.
Stat Priorities (Marked List):
- Weapons & Jewelry:
- Maximum Essence (Your primary damage stat)
- Critical Strike Chance
- Intelligence
- Cooldown Reduction
- Armor:
- Maximum Life
- Damage Reduction
- Ranks to Bone Skills
Must-Have Legendary Aspects & Uniques:
- Path of Trag’Oul (Boots): The build’s engine. Hitting an enemy with Bone Splinters from Bone Prison grants a massive amount of Maximum Essence, directly fueling your damage.
- Imprisoned Spirit’s Aspect (Weapon): Causes Bone Spirit to cast a second, weaker spirit when it detonates inside a Bone Prison, effectively doubling your damage output against trapped enemies.
- Lidless Wall (Gloves/Chaos Armor): Creates additional Bone Storms, providing incredible survivability, cooldown reduction, and a stacking Critical Strike Damage bonus.
- Aspect of Decaying Humerus (Ring): Converts your Bone skill damage to Shadow, allowing you to benefit from Sacrifice bonuses and Paragon nodes that increase Shadow damage.
The transition involves a complete skill and gear overhaul focused on maximizing your Essence pool and minimizing Bone Spirit‘s cooldown.
- Paragon Boards: The Bone Graft and Wither boards are essential, providing massive bonuses to Maximum Essence, Bone skill damage, and Shadow damage.
- Book of the Dead: You will sacrifice all your minions for raw statistical bonuses: Shadow Damage, Damage to Vulnerable Enemies, and Critical Strike Damage.
- Chaos Perks (Season 10): The Alter the Balance Unique Perk is transformative, making Bone Spirit fire three spirits per cast with a 100% damage bonus and enhanced Essence scaling, in exchange for a longer cooldown that you must then overcome with gear.
Golem Endgame Necromancer Build: B-Tier
This build’s identity is defined by its focus on a single, powerful minion rather than a sprawling horde. The key to its power is the Hulking Monstrosity Paragon node and the Sacrificial Aspect, which together convert the bonuses from sacrificing your Skeletal Warriors and Mages into a massive damage increase for your Golem. This transforms your Golem from a mere tank into a devastating damage dealer. Furthermore, the Golem‘s active ability provides a reliable source of Unstoppable, a rare and valuable defensive tool for the Necromancer.
Who is this for? This build is optimal for players who love the minion fantasy but prefer a more targeted approach. It’s perfect for those frustrated with skeleton AI, as you can directly command your Golem to leap onto elites and bosses, ensuring your damage is focused where it matters most.
| Item Name | Item Type | Key Affixes | Unique / Legendary Power | Sockets |
| Fists of Fate | Gloves | +Lucky Hit Chance, +Crit Chance, +Attack Speed, +Chance to Make Vulnerable | Your attacks randomly deal 1% to 360% of their normal damage. | Igni, Wat |
| Shroud of False Death | Chest Armor | +1 All Passives, +160 All Stats, +333% Damage after Stealth, +800 Life, +11.1% Resource Generation | If you haven’t dealt damage in the last 2 seconds, gain Stealth and 40%[+] Movement Speed. | Grand Topaz, Grand Topaz |
| Sacrificial Two-Handed Scythe | Two-Handed Scythe | +Intelligence, +Crit Damage, +Max Life, +Golem Damage, +Summon Damage, +Titan’s Fall | Your Sacrifice bonuses are increased by 55%. | Ahu, Qax |
| Lidless Wall | Shield | +Block Chance, +Main Hand Damage, +Armor, +Bone Storm Duration, +Bone Storm Double Damage, +Bone Skills, +Cooldown Reduction | Lucky Hit: While you have an active Bone Storm, hitting an enemy has up to a 54% chance to spawn a new one. Each active Bone Storm grants 20%[x] Critical Strike Damage, up to 100%[x]. | N/A |
| Blood Moon Breeches | Pants | +Crit Chance, +Hellbent Commander, +Golem Mastery, +Curse Skills | Your Summons have a [3.0 – 7.0]% chance to randomly inflict Decrepify or Iron Maiden. You deal [20 – 50]%[x] increased Critical Strike Damage to Cursed enemies. | Grand Topaz, Grand Topaz |
| Ring of Mendeln | Ring | +All/Shadow Resist, +Summon Attack Speed, +Mastery Skills, +Damage, +Intelligence | Every 6th attack from each Minion is empowered, exploding for 1,620 Physical damage. | N/A |
| Ring of Grasping Veins | Ring | +Lightning/All Resist, +Attack Speed, +Intelligence, +Max Life, +Golem Cooldown, +Golem Damage | Gain 25%[+] Critical Strike Chance for 6s after Corpse Tendrils. Deal 50%[x] bonus Crit Damage to enemies damaged by Corpse Tendrils. | Grand Diamond |
| Ring of Reanimation | Ring | +Poison/All Resist, +Attack Speed, +Intelligence, +Max Life, +Golem Cooldown, +Golem Damage | Your Minions gain increased damage while alive, up to 60%[x] after 10 seconds. | Grand Diamond |
| Amulet of Fel Gluttony | Amulet | +All Resist, +Golem Cooldown, +Golem Damage, +Intelligence%, +Fueled by Death, +Amplify Damage | Your Golem Active causes it to erupt for 600 damage. Your Golem consumes Corpses to reduce its cooldown by 1 second. | Grand Skull |
Your role is that of a battlefield commander and support for your Golem. You are not the main damage source; you exist to enable your colossal companion.
- Core Mechanic – Golem Command: You will constantly use the Golem‘s active ability to make it leap onto high-priority targets. This not deals damage and draws aggro but also makes you Unstoppable.
- Buff and Control: You maintain Bone Storm for its powerful buffs to Attack Speed, Critical Strike Chance, and Damage Reduction. Corpse Tendrils and Bone Prison are used to group enemies and make them Vulnerable, setting up your Golem for devastating strikes.
- Damage Scaling: Your personal damage is secondary. Your skills like Reap and Decompose are used primarily to trigger passives like Reaper’s Pursuit for movement speed and damage, and to generate corpses for utility.
This build is relatively straightforward to gear but relies on specific stats to feel smooth.
Stat Priorities (Marked List):
- Weapons & Jewelry:
- Armor:
- Maximum Life
- Golem Mastery
- Damage Reduction
- Cooldown Reduction
Must-Have Legendary Aspects & Uniques:
- Ring of Mendeln (Boots/Chaos Armor): The premier minion damage Unique. It causes your Golem‘s attacks to periodically unleash a massive burst of damage that scales with your stats.
- Blood Moon Breeches (Pants): Causes your Golem to automatically spread curses to enemies, enabling other damage multipliers and providing crowd control.
- Sacrificial Aspect (Weapon): Drastically increases the bonus you get from sacrificing your skeletons, which is then funneled into your Golem via Hulking Monstrosity.
- Aspect of Fel Gluttony (Amulet): Provides essential Cooldown Reduction for your Golem‘s active ability whenever a corpse is consumed, which happens frequently.
The transition involves respeccing your skills and Paragon board to focus entirely on empowering your Golem.
- Paragon Boards: The Hulking Monstrosity board is the build’s cornerstone, converting skeleton sacrifices into Golem power. The Cult Leader board is also essential for scaling your minion’s damage with your Attack Speed.
- Book of the Dead: You will sacrifice your Skeletal Warriors and Mages for Critical Strike Chance and Damage to Vulnerable enemies, respectively. These bonuses are then massively amplified for your Golem.
- Golem Choice: The Blood Golem is recommended for its high innate damage multiplier and healing capability, but the Iron Golem can be used for its lower cooldown in easier content.
Conclusion
The path of the Necromancer in Diablo 4 is one of unparalleled power and strategic depth. From the relentless, fast-paced leveling with Sever Affliction to the endgame dominance of the mighty Blood Wave Necromancer, this class offers a playstyle for every aspiring master of death. You are now equipped with the knowledge to not only reach the endgame efficiently but to conquer it.
This tier list ranks the best Necromancer builds for leveling and endgame content in Season 10, providing a proven roadmap to success. The S-Tier and A-Tier builds can easily complete both instanced and open-world content, giving you the tools to tackle any challenge Sanctuary throws your way. Now, go forth, Ascendant. The minions of Hell await your command, and the highest levels of The Pit tremble at your approach. Your legacy as a paragon of the undead arts begins now.

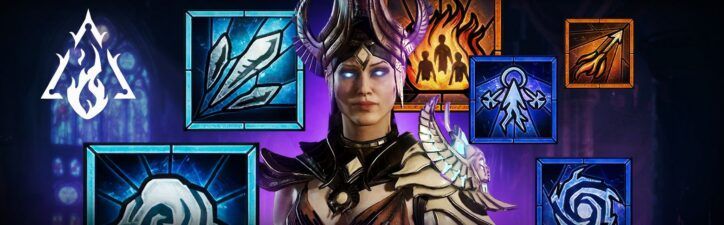


Comments: